How long does a water purifier filter last? Surely it depends on the usage and the water. But you have to consider filter replacement once in a while. There are seven stages in water purifier filter replacement which we have explained fully in the article below. Water Filter Cartridge Replacement Guide The following is a textual preview of stages 1 through 7 that will be followed by a picture-by-picture tutorial that will walk you through the process of changing the filter one step at a time with simple instructions for each shot. During this activity, I strongly advise you to use safety eyewear since water may spray in your direction, and the water may include particles that were collected from the silt in the previous filter. 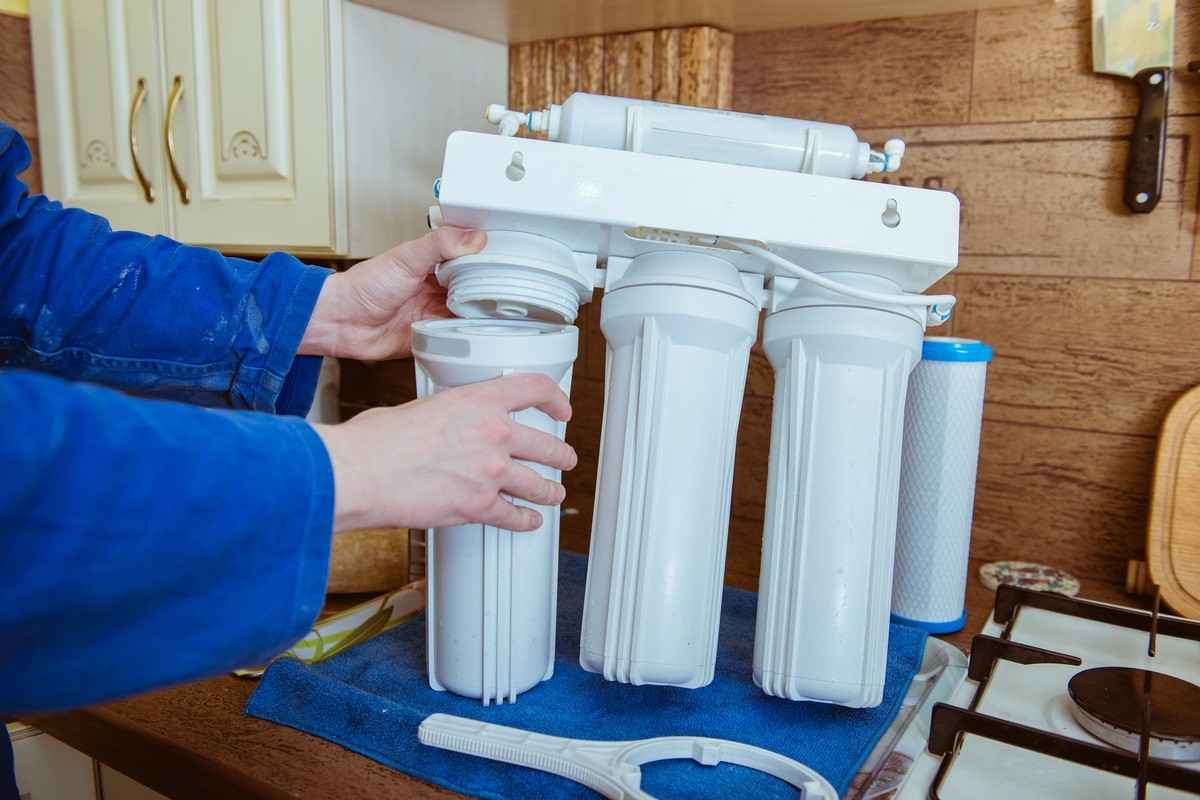 To collect any water that may run out of the housing while you are working on the project, you will need to position a bucket directly under the water-filtration assembly. A Glance at the First Seven Steps of the Project The water supply should be turned off. To release some of the pressure, hit the red button. Turn the handle until it is in the BYPASS or OFF position. Housing should be unscrewed. Take out the huge O-ring, clean it up, and put it to the side. Take off the used filter cartridge and throw it away. Clean the housing by using dish detergent and warm water. Finish by thoroughly rinsing. Fill the first third with water. Scrub the area after adding approximately a tablespoon of bleach and using it to disinfect it. Perform a thorough washing. Insert the O-ring into the groove after lubricating it with clean silicone grease and then replacing it. It is essential to check that the O-ring is positioned perfectly horizontally within the groove. If this is the case, the housing could not have an adequate seal. In the housing's bottom, replace the old filter cartridge with a new one using the standpipe as a guide. Hand-tighten the housing after screwing it onto the cap. BE CAREFUL NOT TO OVERTIGHTEN. Check that the cap of the standpipe fits into the cartridge. Activate the water supply system. For valve-in-head systems, turn the handle slowly until it is in the ON position. To release the pressure, use the button below (if present). Before you finish the installation, make sure there are no leaks. Important Information Regarding the Recent Replacement of Your Filter After you've finished placing the sediment-filtration cartridge for the entire home, turn on the water!
  After you have replaced the filter and ensured that the housing is correctly sealed, you will need to let the water in your home flow for approximately five minutes before using any of it. Before consuming the water or using it for any other consumer purpose, it is important to let the water from the faucet that is used for drinking and bathing run for approximately thirty seconds. The sediments in the water will be able to be detected as soon as they enter the tap system since the water that first comes out of your taps will most likely have an unpleasant color to it. Turn Off the Supply of Water First Step: Turning Off the Water Supply and Releasing Pressure Stop the flow of water into the filter by turning off the main water feed or the valve at the head of the valve. When you want to relieve any pressure that has built up, hit the red button. However, you need to be careful since a spray of water will come flying out when you activate the release button. NOTE: If the target of your prank is unaware of the thrust of water that shoots from the housing pressure-relief valve, the red button may be used as an excellent instrument for playing a practical joke on that person. Just check that everybody is wearing their safety goggles! Take Away the Housing The second step is to take off the housing and clean the O-ring. Turn the screw on the housing unit counterclockwise to remove it, then remove the big O-ring. The O-ring may be found inside the housing and has the appearance of a thin, black rubber band with a big diameter. You will need to clean it by wiping it down with a gentle cloth and then set it aside until it is ready to reinstall in the housing. Check to see whether it is still in excellent condition; if it is not, place an order for a new one.
 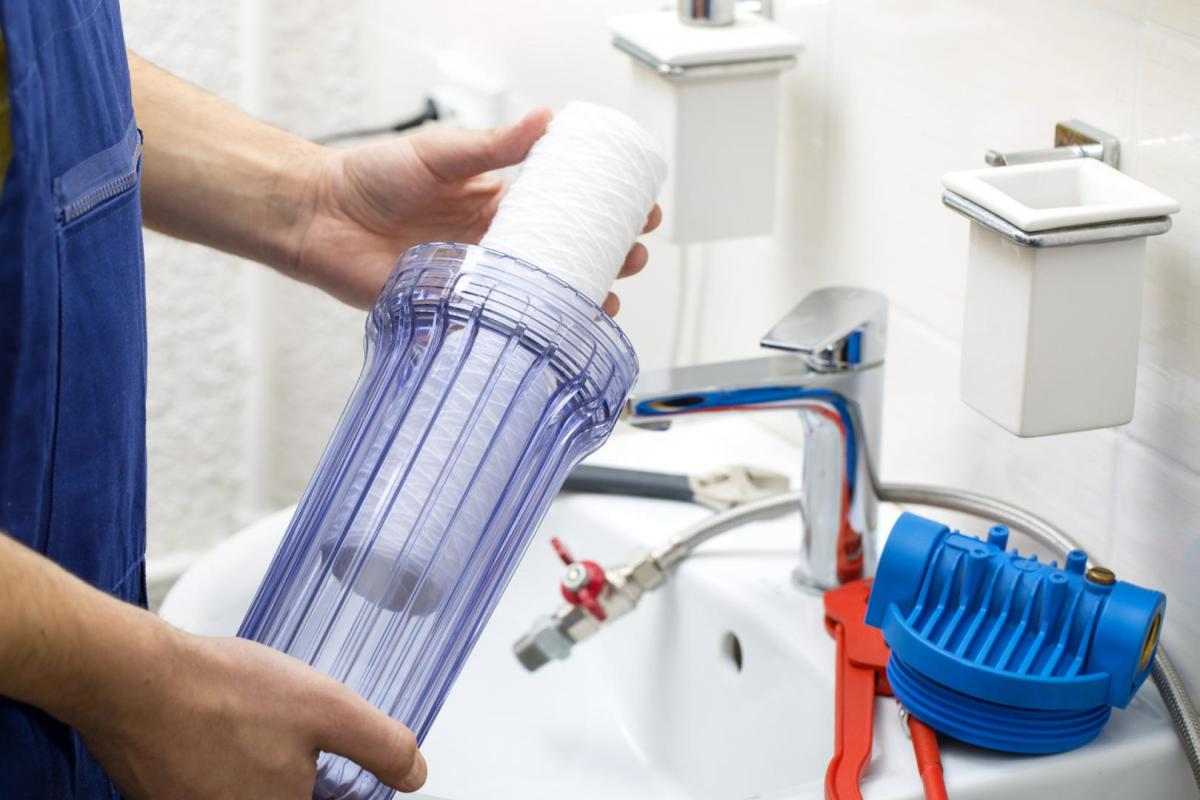 Lubricate O-Ring The next step is to get rid of the old filter and clean the housing. Take off the unclean old filter, and dispose of it in the trash. To properly clean the housing, you will need to begin by removing the majority of the dirt using water. The housing should then be washed with dish soap and warm water using a low-abrasive sponge or cloth, and then it should be thoroughly rinsed thereafter. To sterilize the interior of the housing, first, fill it up to about a third of its capacity with water, then pour in about a tablespoon's worth of bleach and scrub the surface gently. Perform a series of thorough and multiple items of washing. Lubricate the O-ring as the fourth step Lubricate the O-ring entirely with clean silicone grease, making sure to cover both the inner and the outer surface of the O-ring. Do this while taking care not to leave any gaps in the coverage. (It is extremely crucial to use a grease that is based on silicone for this application because the silicone will not cause the rubber to expand or soften in the same way as grease that is based on hydrocarbon will.) Put the O-ring back into its groove after replacing it. If you don't correctly seat the o-ring, the housing's seal will fail, the water pressure will drop, and your water supply will become susceptible to germs. Take extra precautions to ensure that the O-ring is properly seated. Replace the Old Water-Filter Cartridge with a New One Install a New Water-Filter Cartridge as the Fifth Step Now you should change the filter. If you look inside the housing, there is a standpipe installed in the middle of the bottom of the housing.
  It is a molded component with a circular form and a short pipe that gives the impression of being made of plastic emerging from it (See photo #5). Because this is the water access port and all of your water will be coming from it to be filtered before it is distributed throughout your home, the filter must be appropriately installed over it. Make an effort to align the filter so that it is centered on the standpipe. Turn the Cap to the Housing Screws. Step 6: Screw the Cap onto the Housing To change the filter cartridge, unscrew the cap from the housing and replace it with the new filter cartridge. Be sure to position the filter so that it is centered over the standpipe on the cap. You won't necessarily be able to visibly position it, but you'll be able to tell when the standpipe has successfully inserted itself into the cartridge hole since it will feel smooth and effortless. Take care not to overtighten the housing since it is extremely prone to cracking if you do. Step 7: Activate the Water Supply and Perform a Pressure Test Turn the water supply back on by turning the intake handle counterclockwise slowly. Caution is advised since the water may rush in too rapidly, which may cause the housing to be blown off and the unit to be rendered useless. Therefore, carefully turn the input valve while feeling the pressure as it enters so that you can maintain control while the housing is being filled. We removed the filter and replaced it with a valve-in-head unit; nevertheless, the same degree of care must be taken with any water supply input that is utilized. If you click the red release button, the pressure will be released, and water will rooster-tail out of the device; thus, you should be prepared to get sprayed (or place a towel over the unit while conducting this step). Before you leave the unit, check to see that the housing and the cap have formed a good seal at the point where they meet.
💰 Tenfold your income 💎