For Laying tiles, mixing mortar is essential. However, doing with highest quality is a different story. A mixture of water, cement, sand, and additives are combined to create mortar, a powerful but gooey adhesive. It is used for holding brick, stone, and even tile together in various types of masonry. When working with tiles, thinset mortar, which frequently comes in powdered form, is used. Although powered mortar is convenient to mix and consistently good, you can manufacture your own mortar out of cement to cut expenditures. Use a bucket of mortar that has been made into a thick yet spreadable paste to lay tiles across a wall or floor. 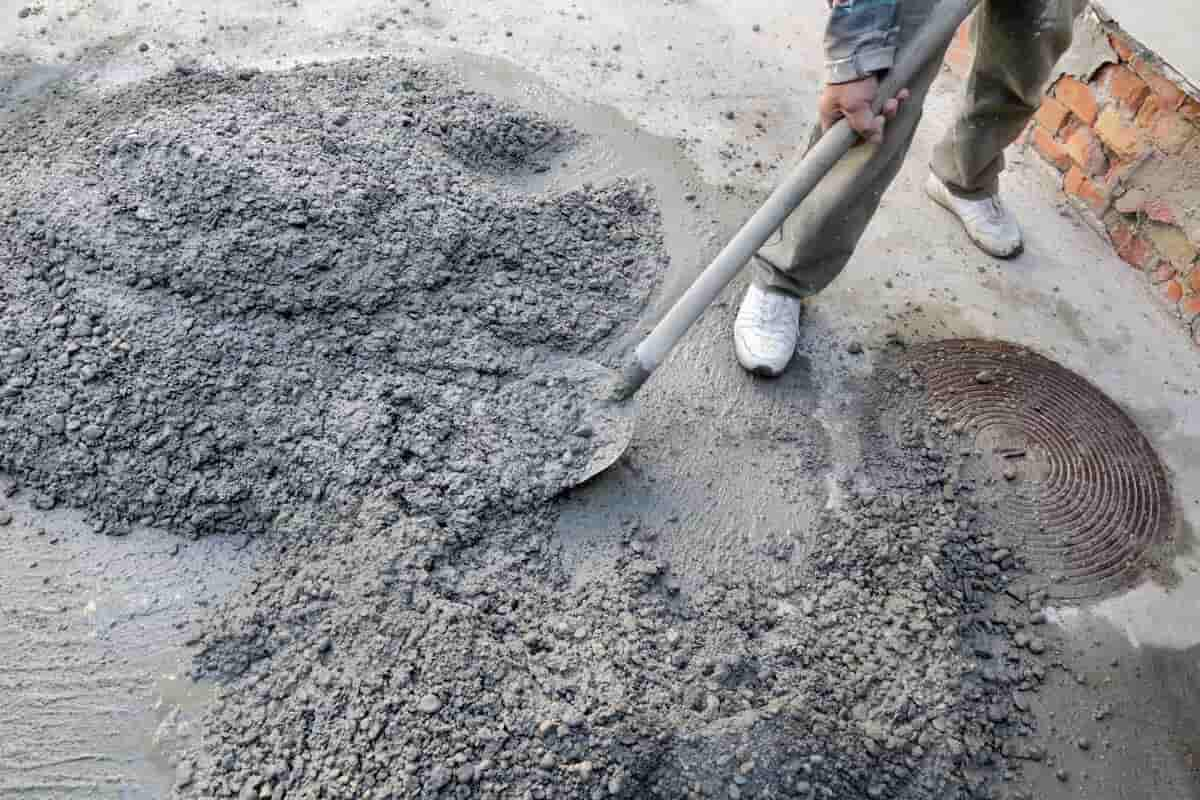 Mortar and Powder: To create a mortar that is more uniform, pick a thinset powder. Tile is designed to be adhered to surfaces like cement and concrete using thinset mortar. The majority of it is available as powder, which you combine with water to make an adhesive when finished. When you purchase a powdered mortar, you can be sure that you are obtaining a high-quality item that works well as an adhesive. Keep in mind that thinset mortar is also known as thinset cement, dryset mortar, and thinset drybond mortar. Grout mortar, masonry cement, and thinset mortar are not interchangeable terms. Most mortar strengthens when it is used more frequently. The best option for tile is thinset mortar because it is strongest when applied in thin layers. A pre-mixed thinset mortar in a plastic tub is another option. The only thing needed to activate it is water. Although it is more expensive, it is more consistent and easier to use than mortar made of powder. Fill the 5 US gal (19 L) plastic mixing bucket with the required amount of water. A 50 lb (23 kg) bag of mortar typically requires 1.5 US gal (5.7 L) of water. Depending on how much mortar you intend to use, adjust the amount. To lessen the quantity of dust the mortar will create when it is added, put the water to the bucket first. Before you start, look at the mixing directions on the bag of mortar. The manufacturer might suggest a different mixing ratio because not all mortar products are created equal. Gradually pour the mortar into the bucket. Put on a respirator mask before mixing mortar because it becomes a little dirty. Also, use safety glasses and latex gloves for additional protection. Using a trowel or paddle mixer, mix the mortar and water together after adding the mortar. You don't need to rush and put it all in at once; instead, add additional mortar as needed to achieve the right consistency at this point.
 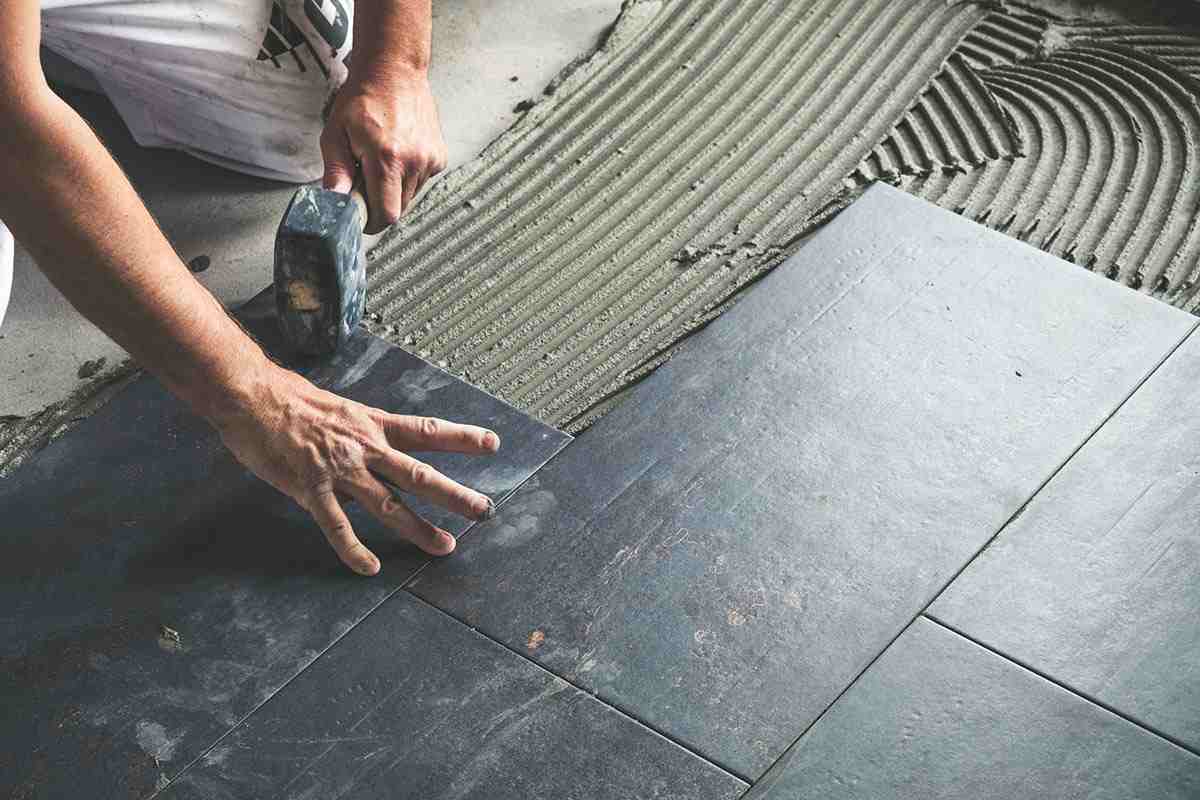 Add the lengths of the room's longest and shortest walls together to get an idea of how much mortar you'll need. To determine how many 50 lb (23 kg) bags of mortar to purchase, divide the quantity by 95. For instance, to cover the floor in a room of 12 feet by 12 feet (3.7 meters by 3.7 meters), you will need around two bags of mortar. When you pour some of the powder into the bucket, it creates an annoying cloud of dust. Pour the mortar in as gradually as you can to reduce the amount of dust. Avoid adding the powder to an empty bucket and make sure you always use a respirator mask. The mortar should be blended for about 3 minutes to reach a thick consistency. The mortar should be stirred until it resembles thick peanut butter or toothpaste. Pull your mixer out of the mortar and create a swirl to check the consistency. The mortar is ready if the swirl remains upright and does not vanish, much like a swirl on a meringue pie. Add more water or powder to adjust the consistency if it isn't what you're looking for. For instance, add extra powder to the mortar to make it thicker. To thin it, use water. To ensure that the materials are combined as completely as possible, always mix the mortar a little more thoroughly than you believe is necessary. The precise mixing period can change. If necessary, mix the mortar for 5 to 10 minutes to ensure that it reaches the proper consistency. For proper activation, give the mortar 10 minutes to rest. Slaking is the name of this step in the procedure. Rest the mixture to help the powder moisten evenly and turn into mortar. Additionally, it stimulates the bonding-related additives. The mortar stiffens and doesn't properly cure if you don't give it time to rest. The result is loose tiles that are not affixed to the mortar. To finish, give the mortar one more minute of stirring. Give the mortar one last stir to evenly distribute the additions after it has been activated. Once it has the final consistency you require for your project, keep stirring it.
 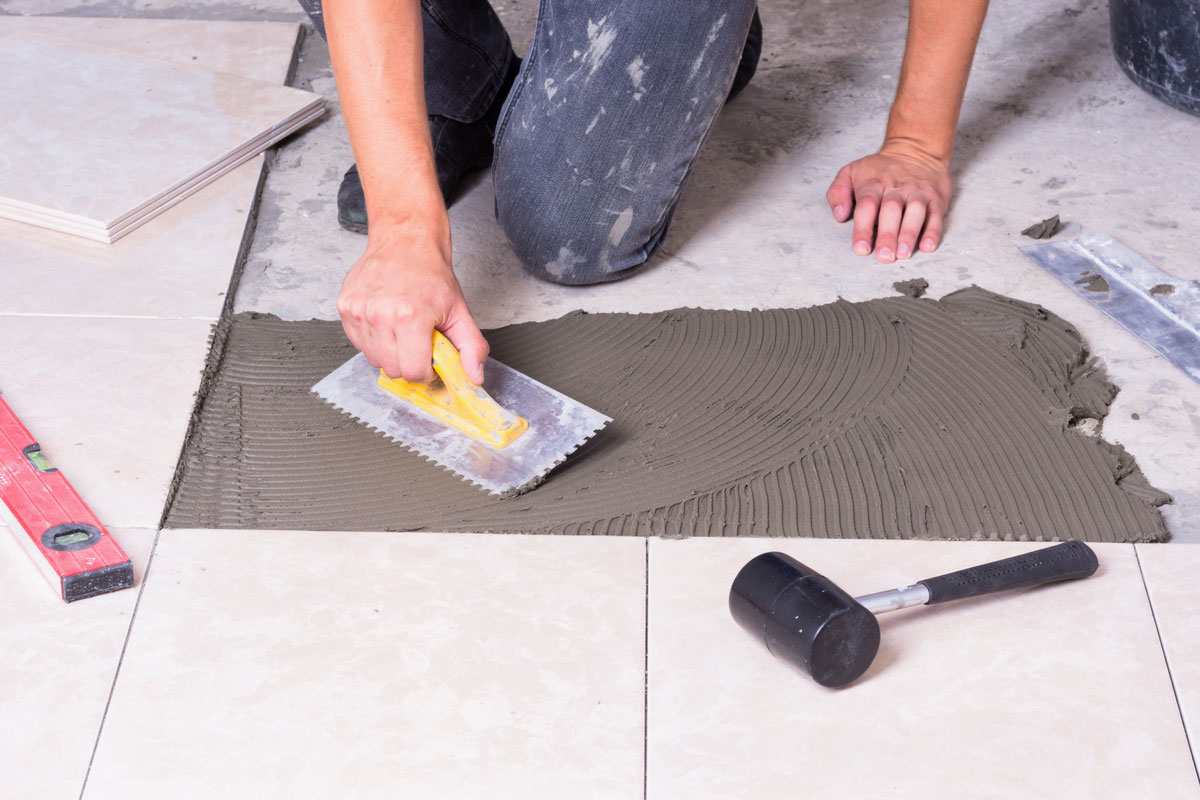 When you use your trowel to create ridges in the mortar, it will stand up when it is the appropriate consistency. At this point, don't add any water or powder! A weaker adhesive is produced when additional ingredients are added to the mixture. Creating Mortar from Nothing To save money, make your own mortar with cement and sand. The foundational ingredient in any mortar mixture is portland cement. Additionally, you require an equal volume of fine sand that is free of clay and stones as well as a liquid latex component to fortify the mixture. Compared to powdered or pre-mixed thinset mortar, all of these ingredients are less expensive on their own, but they are more difficult to combine to the right consistency. The major problem with mixing many batches of bespoke mortar is that it might be difficult to get them all to the same consistency without experience. If you’re new to dealing with mortar, start with a powder to guarantee you acquire the proper consistency you need for your project. When you're ready to experiment with different cement and sand mixtures, create your own mortar. Sift sand using a wire screen with a mesh size of 0.64 inches. You will probably have to remove any small stones from any sand you obtain. Get a piece of wire fencing with tiny openings and use it for this. Set the fencing on top of a bucket or a plastic tarp, then pour the sand on top of it. Let the sand fall through the screen, leaving the stones on top of it. The stones cause the mortar to be rougher than typical. With thicker forms of concrete, this is not a concern, but it weakens thinset mortar. Fill a container or mixing bucket with Portland cement. Cut open the cement bags you plan on using for the project. If you’re confused about how much you need, start with a tiny bit initially.
  Since thinset mortar for tiles doesn't require a thick layer, start by using roughly 12.5 lb (5.7 kg). You can always make a second batch of mortar or keep adding more as you go. Measure the length of either the room's longest or shortest wall to determine how much cement you'll need. To determine how many 50 lb (23 kg) bags of cement to use, multiply the lengths collectively and divide the result by 95. Try to just make as much mortar as you can utilize in a short period of time. After that, mortar dries out and is no longer useful. Using a trowel, mix equal parts of cement and sand. Sand thickens mortar, so use caution when adding it first. For a small batch, aim to use around 25 lb (11 kg) more sand than concrete. Tilt the bucket at a 45-degree angle after adding the sand, then start stirring the mixture with a trowel until it is thoroughly blended. Sand and cement should be scraped off the bucket's sides as you work to ensure proper mixing. To protect yourself from dust and other irritants, put on a respirator mask, safety glasses, and gloves. In the absence of a trowel, you might also use a mixing stick or paint mixer. One US gal (3.8 L) of cold water should be added to a different mixing bucket. All the water you intend to use for the mortar mix should be put in the bucket. Start with a small amount to prevent the mortar from becoming too runny. Additionally, this gives the bucket plenty of room for the additional components you require. Keep in mind that you may easily add extra water to thin the mortar as necessary afterwards. What you contribute to the mixture cannot be taken away. You might try mixing mortar in larger batches with more of each component once you get the hang of it. However, smaller batches are easier to mix to a satisfactory quality at initially.
 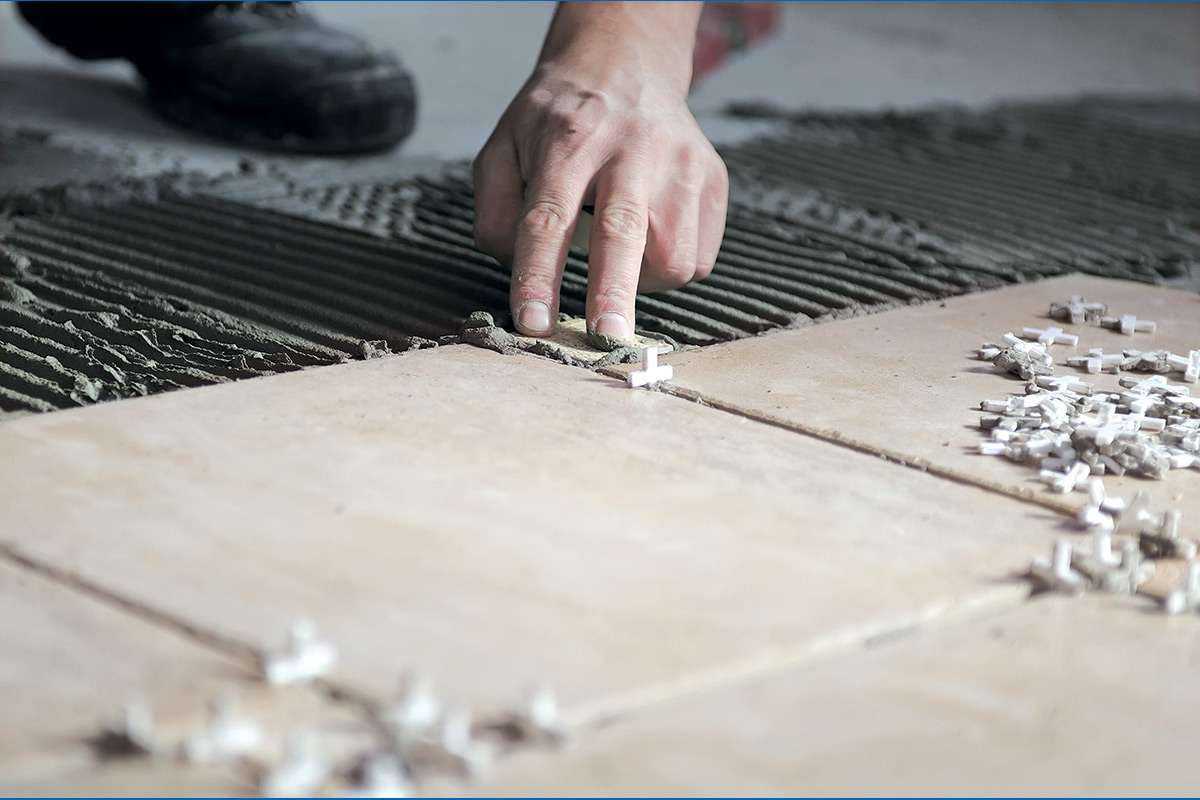 Using a paddle, incorporate the sand and cement into the water. To make mixing easier, purchase a paddle mixer or a paddle that can be plugged into the end of an electric drill. Pour the cement mixture into the water when you're ready to get started to lessen the amount of dust that rises. After that, combine the ingredients until the bucket appears to have an even distribution of them. In order to prevent mortar from sputtering everywhere, start with the paddle at a low setting of around 300 rpm. To make sure everything is combined, stir the mixture for at least 3 minutes. You can use this as an opportunity to check the mortar's consistency as well. A trowel could be used to mix the mortar, but this requires more time. You should budget at least 5 to 10 minutes to stir it by hand. The consistency of the mortar can be altered by adding more cement, sand, and water. Getting custom mortar to the right consistency is the most difficult step. The viscosity of thinset mortar should be thick and spreadable, like thick batter, peanut butter, or toothpaste. Gradually add the extra ingredients, stirring the mortar after each addition to check the consistency. To thin the mixture, add more water. To make it thicker, add additional sand and concrete. Allow the mortar mixture to sit in a dim room for ten minutes. To keep the bucket from drying out before you can use it, move it into a shaded spot. Mortar dries relatively rapidly, but if you don't give it time to rest, it will become weaker. So that the mixture can transform into a potent bonding adhesive, set it aside. Set the bucket, for instance, away from any neighboring windows and next to a wall. You might even put it under a shade tree or stick it in a closet.
 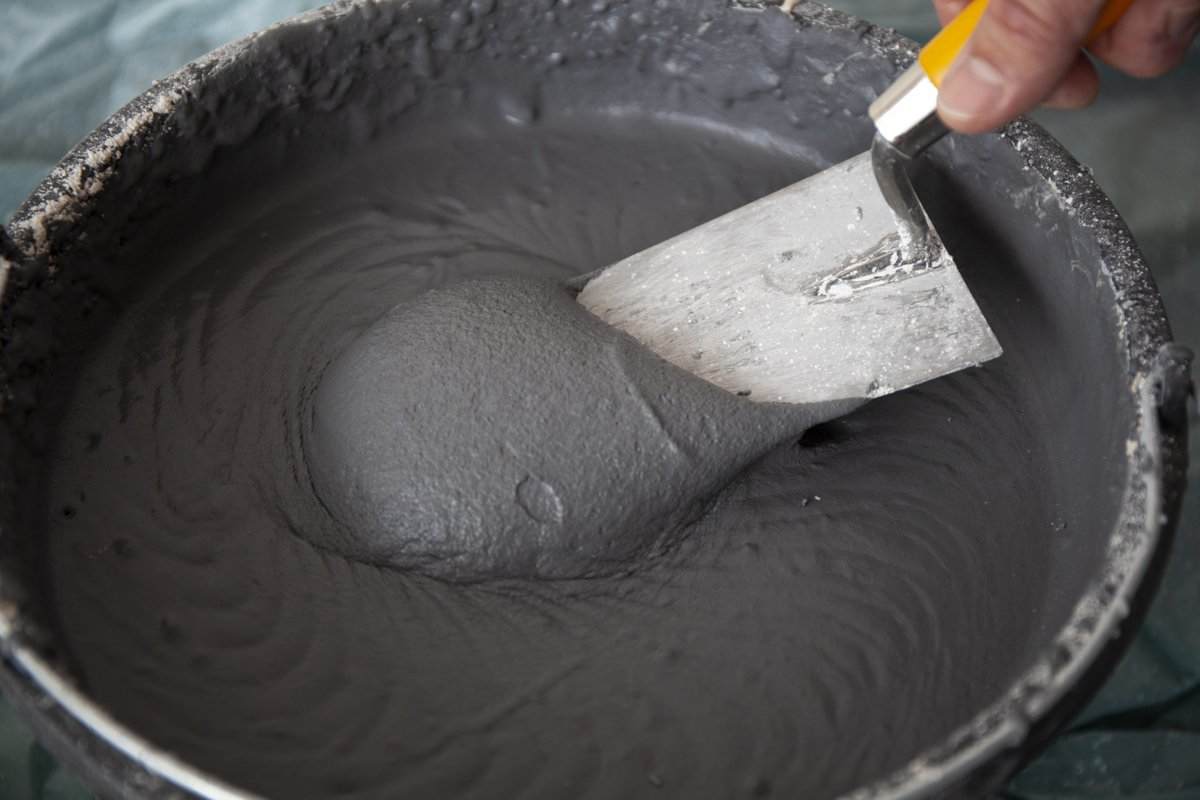 For added strength, mix some liquid latex additive into the mortar. The mortar's strength is secretly provided by the liquid latex. Without it, the mixture is stiff and doesn't adhere to the tile. Use a paddle mixer to incorporate roughly 0.125 US gal (0.47 L) of the additive into a batch of mortar weighing 12.5 lb (5.7 kg). To ensure that the additive is dispersed evenly throughout the mortar, thoroughly mix it. For every 12.5 lb (5.7 kg) of concrete you use, add 0.125 US gal (0.47 L) more to the mixture. If the mortar is still a little too thick, you might add more to thin it out. After allowing the mixture to sit for a further five minutes, test it. As the ingredient absorbs water, give it some time to activate. Next, take a trowel and some of the mortar. Start laying tile if the mortar appears stiff and hangs off the trowel's end without falling. If it isn't done yet, mix in more of the addition, let it rest once more, and then finish. There is a reliable, professional team behind this website which is ready to share its tiles knowledge with you and cooperate with wholesalers and importers around the world.
💰 Tenfold your income 💎