This gluten-free and grain-free apple cake made with almond flour is the ideal choice as a healthy breakfast, snack, or dessert for those who are on a diet. Your loved ones are going to adore it. You could also prepare it as a sweet treat for a particular occasion or bring it with you to a potluck. This delicious apple cake is so simple to make that anyone, even someone who has never baked before, will be able to make it successfully. This cake is made with very basic ingredients, all of which are good for you. This apple cake is made without flour or gluten and uses almond flour instead; it tastes fantastic! Even worse, it does not contain any oil at all! There are not many things in this world that can provide as much solace as a still-warm slice of cinnamon-rich apple cake that is packed with chunks of apples that are just tender enough to bite into. It does not require a dollop of whipped cream or a scoop of vanilla ice cream in order to be delightful, which is especially true if your friends and family are fortunate enough to be served a slice on the same day that it was baked, while the entire house is still fragrant with the baking of the cake. This apple cake is much easier to make than a French apple cake, and while the proportions of the ingredients are comparable, the cake is baked directly in a standard cake pan rather than in a springform pan. This recipe produces a cake that, despite having a lovely, buttery, browned crust, has the interior consistency of custard. Somehow, though, it manages to do this. To begin, use a traditional vegetable peeler to peel the apples without first removing the cores. On a cutting board, cut each apple in half lengthwise with a large, sharp knife, and then cut each half in half once more to create four quarters. Remove the center of each quarter by placing it on one of the cut sides, then slicing diagonally across it to remove the core. After coring, peeling, and quartering the apples, cut each one lengthwise into three or four pieces, and then cut those pieces into chunks. Cinnamon, nutmeg, and lemon juice should be tossed with the apples before serving. Nutmeg is optional. You actually only need to toss the apple chunks with the lemon juice after completing the preparations for the apple chunks as described earlier. They should be spread out on a baking sheet before being placed in the freezer on the baking sheet. After they have been frozen, place them in a bag with a zip-top closure and put them back in the freezer. You won't even need to thaw them before using them to make this gluten-free apple cake! The cake can be baked in a round cast aluminum baking pan measuring 9 inches in diameter. The pan should be well greased to prevent the sides of the cake from sticking to the pan while it bakes. However, the cake tastes even better to me when it is prepared in the same manner but baked in a round pan that is 8 inches in diameter. It takes about 10 minutes longer to bake all the way through when it is taller rather than longer, but each slice displays all those apples much better when it is prepared in this manner.
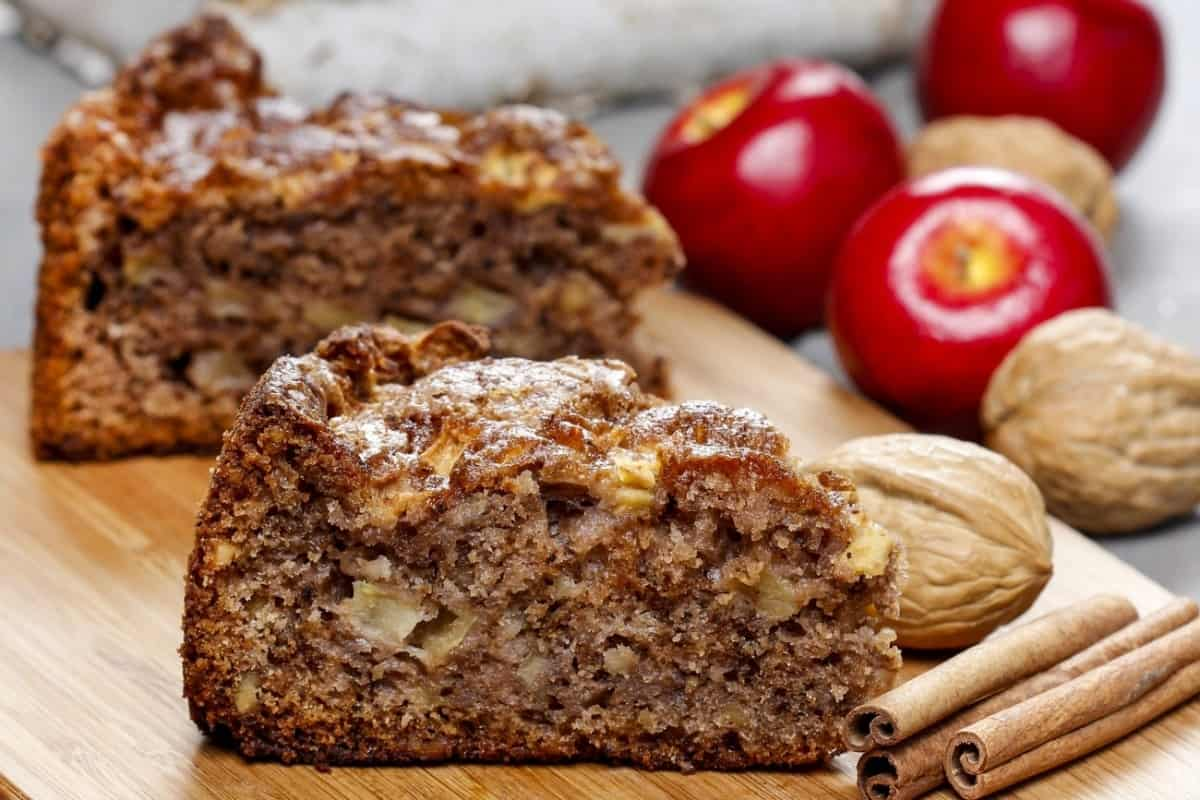 You are going to combine approximately two-thirds of the butter and egg mixture with the chopped apples, and the resulting batter is going to be almost impossible to smooth out. Be sure to cover all of the apples in as much batter as you can manage but fight the urge to use all of the batters. This will ensure that the apples are evenly coated. You should definitely use the remaining one-third of the wet mixture to coat the bottom of the baking pan that you have previously prepared. Set the temperature in your oven to 350 degrees. Prepare a round cake pan measuring 8 or 9 inches in diameter with butter or shortening and set it aside. Place the apple cubes in a large bowl and toss them with the ground cinnamon, nutmeg (if using it), and lemon juice. Put the bowl in its place. Flour, xanthan gum, baking powder, and salt should each be placed in their own separate bowls of approximately medium size, and then whisked together until thoroughly combined. Put the bowl in its place. Place the butter in a third, distinct, and large bowl, and use a hand mixer or the bowl of a stand mixer that is fitted with the paddle attachment to beat the butter until it is light and fluffy (about 2 minutes). First add the sugar, then the eggs, and finally the vanilla extract, making sure to thoroughly combine the ingredients after each addition.
 After adding the dry ingredients, continue beating until they are completely incorporated. The batter will be dense while still being silky smooth and airy. In the large bowl containing the apple mixture, transfer approximately two-thirds of the cake batter using a scraper. To ensure that each apple is covered in batter, mix the ingredients together. The consistency of the mixture will be quite chunky. The remaining one-third of the cake batter should be transferred to the cake pan that has been prepared. Spread into an even layer in the bottom of the prepared pan using a small offset spatula that has been dipped in water. After spreading the base layer of batter into an even layer with an offset spatula, scrape the chunky apple-packed cake batter into the pan on top of the layer of batter already present in the pan. If you used a pan that is 8 inches in diameter, it will be nearly full. Wrap the dish completely in aluminum foil, and position it in the middle of the oven after it has been preheated. Bake for 20 minutes. Take the pan out of the oven and then remove the foil cover that was on top of the pan. Place the pan back into the oven and continue baking until a toothpick inserted into the center of the cake comes out with no more than a few moist crumbs attached to it (about another 40 minutes, or about 50 minutes for an 8-inch pan).
 After removing the pan from the oven, allow the cake to cool for 15 to 20 minutes while it is still in the pan. There will be a gradual pulling away of the cake from the sides of the pan as it cools. Before carefully transferring the cake to a wire rack, check that the sides of the pan are not sticking to the pan by running a thin spatula along the edge of the pan. Please wait for the cake to cool for approximately 15 more minutes. Cut the cake with a knife that is extremely sharp and serve it as soon as possible, preferably while it is still warm. The only dairy product that is called for in this recipe is butter, and you should be able to successfully substitute vegan butter in its place. Melt and Miyoko's Kitchen are two of my most preferred brands. It's possible that Earth's Balance Buttery Sticks would work here, but because they're so salty and have so much more moisture, you should cut back on the salt and prepare for the possibility that the batter will leak out of the pan. During the baking process, make sure to line it with a baking sheet that has a rim.
💰 Tenfold your income 💎