white wall tiles purchase price+Specifications, Cheap wholesale
The price of wall tiles per square meter depends on a number of factors such as the size which can be 500 x 200 or smaller, the color, which can be white, grey or any other colors and the raw materials
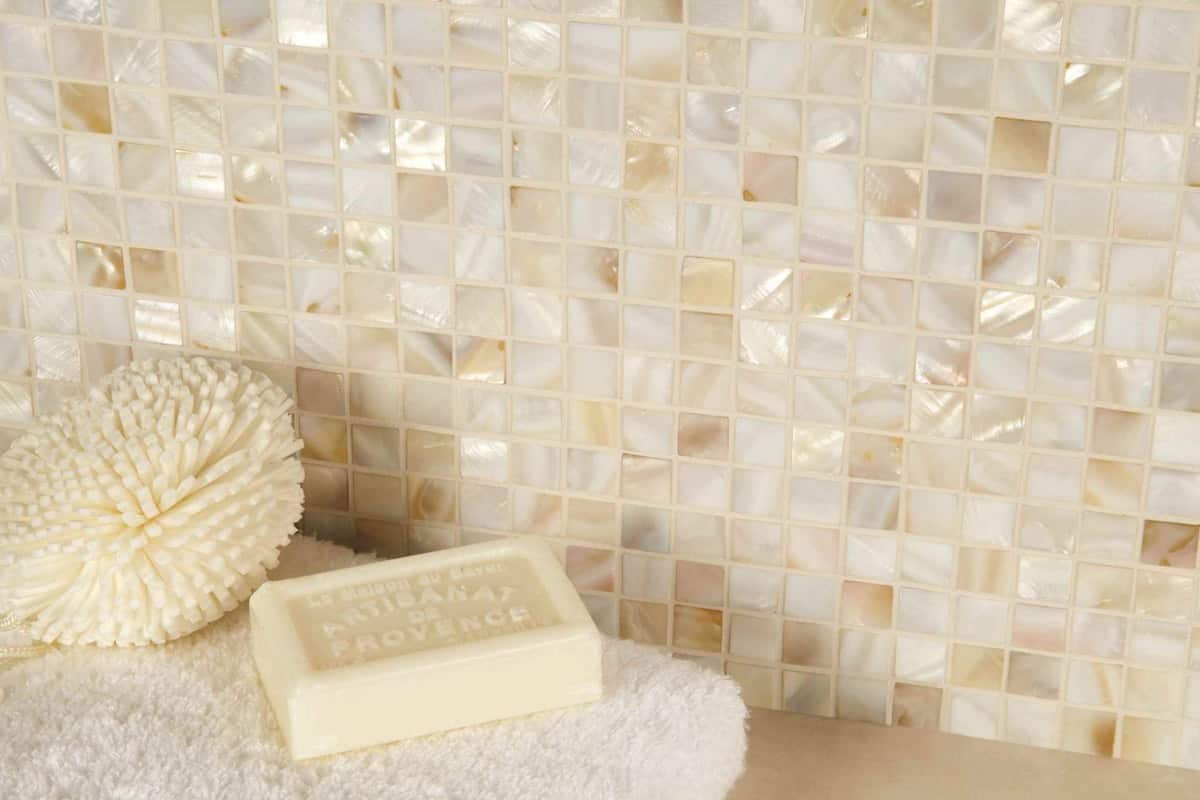
white wall tiles for kitchen
The idea of tiling your walls may seem frightening, but with the appropriate planning and the right equipment, it's far more straightforward than you may imagine
You shouldn't be intimidated by wall tiling if we've developed this helpful tutorial that covers all you need to know about it! You may scroll down to read everything or use the links below to go to the section you're interested in
Prior to installing your tiles
Make sure the surfaces you'll be working on are clean, dry, and level before you begin
When tiling over wallpaper, remove it down to the plaster and patch any gaps or cracks
Before you begin, make sure the new plaster is dry, keeping in mind that it might take at least two months for it to cure correctly
As with any DIY project, safety first and good planning are priorities
The supplies, safety equipment, and tiling tools you'll need are listed below to complete the project properly and safely:
Preparation for Wall Tiling
How many tiles are necessary?
Calculating the number of wall tiles you need requires first determining the size of the area you'll be covering
The space's height and breadth should be measured, then the results multiplied
Make careful to remove from the total the space occupied by any doors, windows, or cabinets
Sometimes it helps to draw out a quick sketch with all the measurements noted to avoid misunderstanding
You may purchase your tiles after you are confident with the calculations
The majority of ceramic tile packs are one square meter in size; however, we suggest keeping around 5 to 10% extra just in case
Getting Going
It's usually a good idea to begin tiling your grid near the wall's center since it makes it simpler to ensure that your design is symmetrical
Additionally, it implies that any half-tiles you may want can be placed at the end of each row and will be the same size
While it may be tempting to start in the corner, doing so might result in crooked rows and a disorganized end
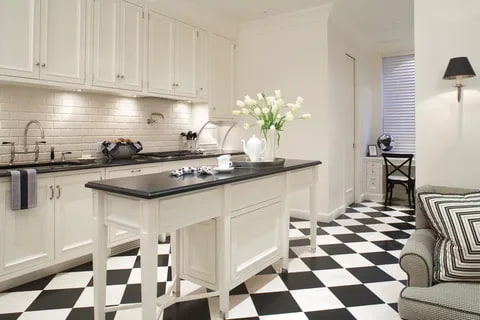
white wall tiles design
As we previously indicated, start your vertical rows in the center of your area
To discover this, you must measure the height and breadth and mark the center with a pencil
Use a gauge rod to determine the size of your row and end tiles
Depending on the size of your wall, we advise using a piece of wood that is 50mm by 25mm in dimension; however, any size would suit
The batten edge should be aligned with the first tile after you have laid up a line of tiles with some space in between them
With a pencil, number each tile and any gaps on the rod
It is simple to see how many you need in each row in this manner
Step 1
Mark the tile places across the wall with the gauge rod while holding it parallel to the center of the wall
Step 2
When you get to a corner, determine if the final tile needs to be trimmed to fit
As bigger tiles look much nicer when done, we advise altering your beginning location if less than half a tile would be required:
Measuring from Wall Corner to Outer Tiling for Wall
Step 3
Position the rod at the original mark and create a new one halfway between two tile markers if you do need to change your starting position
This should result in your end tiles needing to be cut being wider than half a tile and your center line and the center tile now aligning:
changed the center line for tiling on walls
Step 4
Draw a line from side to side while holding the gauge rod against your new mark and using a spirit level to check sure it's straight:
Use a gauge rod and a spirit level for creating horizontal rows in wall tiling
The horizontal rows should be constructed after the vertical ones
To minimize slipping while the glue is curing, we suggest using wooden battens fastened to the wall as a guide
white wall tiles bunnings
Align your gauge rod with the vertical line, skirting, and floor, then pencil mark next to the top tile mark on the rod
Follow the vertical line all the way up the wall to where the rod reaches the ceiling
Ideally, the wall and rod lines will coincide, saving you the trouble of cutting any tiles for the top and bottom rows
If not, just reduce the distance by half and, as with the vertical rows, make sure it is wider than half a tile
Use the mark on the rod that is immediately below them if they are narrower than half a tile:
Gauge Rod Alignment for Horizontal Rows of Wall Tiling: When
Step 2
Measure the space midway between the two wall markers and add another:
Step 3
Align one of the gauge rod's markings with the mark you just created while holding the gauge rod away from the floor or skirting
Make a second mark that is level with the rod's foot
This will be the beginning of your horizontal row
Draw a line across the wall starting at the mark using a long straight edge and a spirit level:
Step 4
Nail your 50mm x 25mm batten after checking the wall for any wires or pipes
Its top edge must be straight and should line up with the horizontal pencil line
Next, use a different batten to create the vertical line
The nail heads on the batten should be left slightly protruding as this will make them simpler to remove later:
Wall Part-Tiling
We believe it's truly worth taking the time to do it correctly since a top horizontal row consisting of entire tiles creates a significantly cleaner finish when merely part-tiling a wall
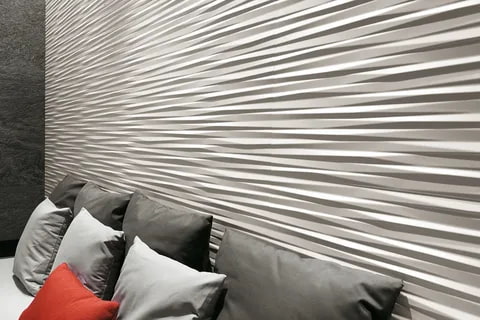
white wall tiles texture
Step 1
Mark the top row's location on the wall after determining the location of the lowest horizontal row using a gauge rod:
Step 2
Insert cut tiles into the space between your bottom row and the floor or skirting
Remember that you don't want them to be too little, so if they are less than half a tile, change your top row:
Step 3
If you'd want to avoid cutting tiles, determine if the skirting is level
To locate the lowest point, use a long, straight batten that has been leveled using a spirit level
Instead, you may use it to align your tiles if it is straight
If not, start cutting those tiles right now!
Whole tiles being fixed to a wall
Start putting your field tiles with the faces level before anything else
Remove any that are uneven and adjust the glue as necessary to make them all sit flush
You typically won't require corner trim if you choose beveled or rounded glazed edge tiles before tiling the return wall, tile the first wall all the way to the edge of your area, allowing the corners to overlap
Remember to provide space for grouting as well
Step 1
Use your notched trowel to scoop up some glue and spread it on the wall beginning at the corner of your two battens
After that, using a notched trowel and holding the blade at a 45° angle, work away from the vertical batten
Here, nice ridges are what we're searching for since they indicate an equal quantity of glue beneath the tiles and a higher likelihood that they will be straight
To prevent the glue from drying out, just work on around one square metre at a time:
white wall tiles b&q
Step 2
Press the first tile firmly to the wall with its center at the corner where your battens meet
Make careful to leave space between the tiles when you add the ones above and below it:
Step 3
Fill in these spaces with tile spacers and adjust the tiles as needed
To ensure an equal grout and simpler joins afterwards, firmly press your spacers into place:
Step 4
After putting tiles until the glue is completely coated, continue with the other portions of the wall
With a moist sponge, remove any extra glue off the tiles as you go
Once it has dried, it is tough to remove
Step 5
Take out the vertical batten and scrape off any extra glue that could have gotten between the tiles
Then, use the cut tiles required for the gaps to complete the wall
A wide variety of wall tiles are available, including porcelain, ceramic, glass, and stone
Because it is a vertical surface, there are no worries about foot traffic and slide resistance
This means that you have roughly limitless options in terms of the surface's material, size, form, and texture
white wall tiles 300 x 600
Therefore, there is no objective "best" wall tile
A lot of people think ceramic is the most significant material for wall tiles
It is resistant to water, stains, heat, and scratching, and it can easily endure the demands of the bathroom, as well as the shower, the backsplash in the kitchen, or the backsplash in the bathroom
Ceramic tile has the lowest total cost, is the easiest to cut, and can be purchased in a wide variety of eye-catching colors, patterns, and textures
Porcelain is an ideal option since it is impervious to water and has a very high level of durability
This makes it a good material for walls in locations that see a lot of foot traffic or in settings that are exposed to the elements
Because stone provides the greatest potential for appreciation in resale value, luxurious natural stone is the material that will yield the highest return on investment
However, you will need protective sealants and cleaners specially developed for natural stone to maintain it
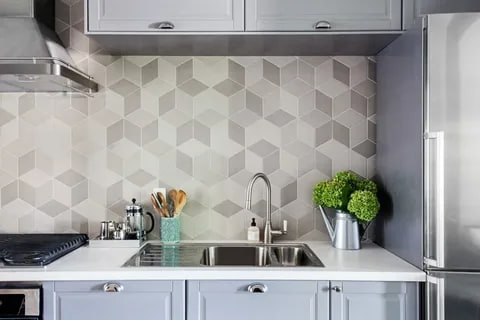
Tiles for the Backsplash wall
The backsplash is used in both the kitchen and the bathroom to make a fashion statement and serve as a wall protector
An infinite number of stunning mosaic backsplash designs are available when you use ceramic, porcelain, or natural stone wall tiles
Several slab alternatives are available for creating a modern, seamless backsplash, including natural stone, quartz, and extra-large-sized porcelain
Mosaics made of glass and metal are both stylish and captivating
It takes less than a day to install glass, ceramic, or porcelain, and all three materials are simple to clean
Natural stone mosaics are more expensive and need more maintenance than other materials; nevertheless, a natural stone backsplash may last a lifetime if properly sealed and maintained with just a little bit of additional work
Natural stone is mined; thus, each piece is absolutely one of a kind despite the fact that all premium materials give design
Natural stone backsplashes are becoming more popular, which may be attributed to the material's ability to raise the resale value
Tile for the shower wall
Due to the fact that the shower is always wet, the designs for the shower wall have to get some additional consideration
Shower wall tile, since it is a vertical surface, is not affected by standing water or foot activity; yet, it should be able to survive daily wetness and routine cleaning
Tile is an excellent option for the wall of the shower for these and a great many other reasons as well
Because they are the most water-resistant, robust, and simple to clean, ceramic and porcelain are the materials that we suggest using for the shower wall
The use of natural stone in showers is becoming more popular and is an elegant option
Nevertheless, it must be sealed before use, resealed once a year, and cleaned using products that are made specifically for natural stone
Suitable moisture barriers or backer board are required to guarantee that the installation of shower wall tile is waterproof and does not leak
Please refer to our installation guide if you would need additional information about the installation of shower tiles
How useful is this article to you?
Average Score
5
/
Number of votes:
1