A grout float is an easy, inexpensive, and durable piece of equipment. The ability to utilize a rubber float with grout effectively is the difference between a clean wall tile installation that lasts for decades and one that finally fractures and falls apart. Everyone who has successfully tiled a floor or wall is acquainted with the satisfaction of a job well done. It is extremely near to being a type of magic to be able to use wet mortar to secure a stack of completed ceramic sheets. After gaining adequate tiling experience, you will want to tile every surface in your house. The grouting procedure is the final phase in the process of tiling, and it puts everything together. The only tool necessary to complete the grouting procedure is a grout float. If you do not know how to do this, your tiling project will not be neat. Grouting is an integral component of any tiling process. Create a continuous surface by filling the spaces between tiles, also known as grout joints, with grout. At first glance, it may appear that the easiest way to apply grout would be to spray it into the seams, similar to how you would caulk other areas of your home, but this is not the greatest option. 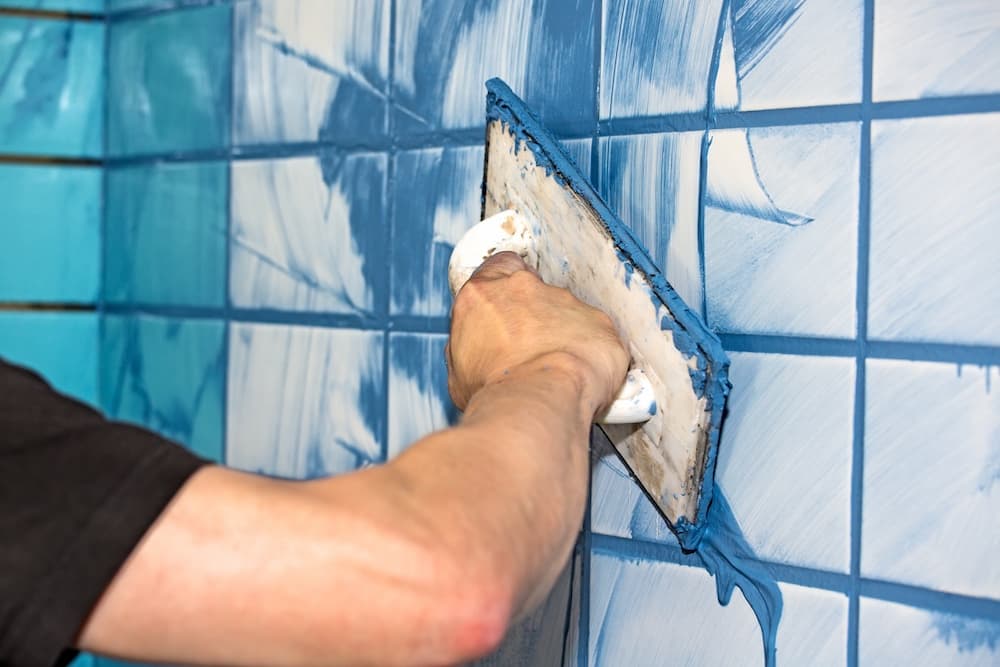 Rather than employing a laser-targeted application approach, grout is equally distributed across the surface using a broadcasting method. Large mounds of wet grout are scooped into the seams and tile surfaces throughout the whole tire surface. Following this, the tile is cleaned to remove excess grout. The grout is applied to the joints between the tiles, but not to the tiles' surfaces. The grout float collects the surplus and puts it in a separate location on the tile. The only method to ensure that grout is placed properly is by utilizing a rubber grout float, which is comprised of a rectangular non-stick gum rubber or soft nylon pad. This pad is not only durable but also flexible, and it prevents substances from penetrating its surface. For controlling the float, the user grabs a C-shaped handle. The initial stage in grouting tiles using a float is to fill the joints with newly mixed grout, followed by scraping the tiles clear of excess grout. For many years, tile setters have depended on this easy yet sophisticated process, which is still extensively adopted in the industry. A tile sponge, a bucket, grout that has been mixed, and a grout float are required to use a grout float effectively. On the surface of one of the tiles, grout should be put. Start with a quantity sufficient for a ball with a diameter between three and four inches.
 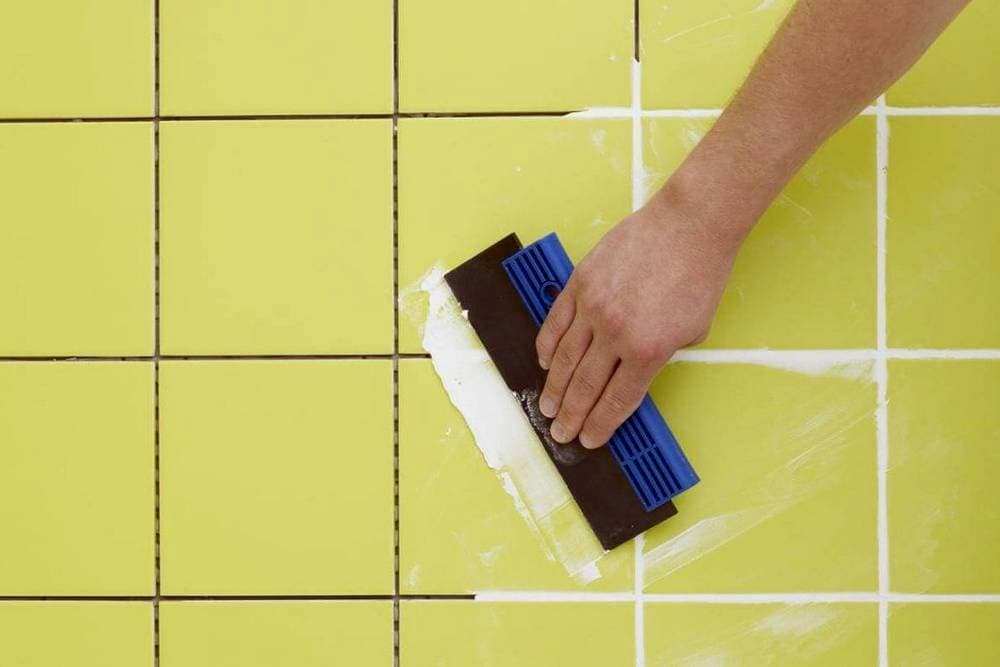 Sweep the grout across the tiles while holding the grout float at a 45-degree angle and placing one edge on the tile face. Work in approximately three-foot-wide and three-foot-deep sections. Importantly, the float should travel over the tile's seams at a 45-degree angle while sweeping diagonally across the tiles. If this care is not taken, the edge of the float will rip grout from the seams. While holding the grout float at a nearly 90-degree angle to the tile, scrape it across the surface. This will help you remove the maximum amount of grout. It's probable that you will need to perform this action multiple times. This time, sweep diagonally in the direction of the tile joints. Return the grout to the bucket for use in the subsequent tile installation. After removing as much grout as possible with the float, switch to the tile sponge. After dipping the sponge in clean water and squeezing it, it should be lightly wiped around the tile's surface. As you work, be careful not to rip grout from the seams. There are two distinct types of rubber grout floats floor floats and wall floats. The most significant difference is that floor floats often feature more stiff rubber pads than wall floats.
 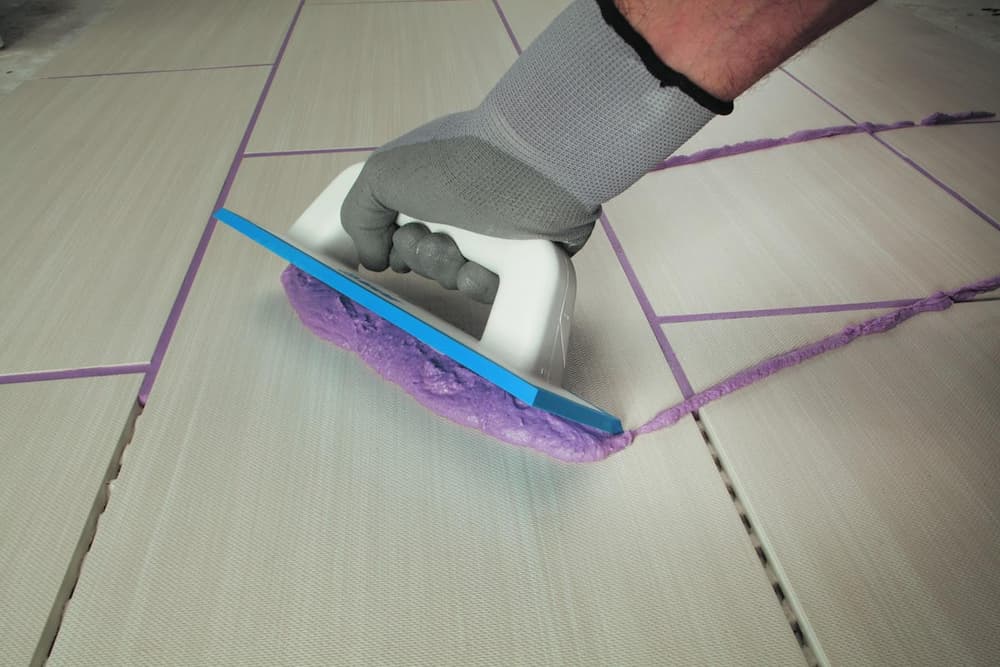 Wall floats are preferable to other types of trowels for novice tilers due to how much easier they are to operate and how well they fit into narrow places. It is likely that store-bought tools will not identify whether they are intended for use on floors or walls. A universal float is a word applicable to a subset of individuals. Examining the softness of the pads will allow you to establish their type. If you have a large tiling project or want to tile other rooms, it may be good to spend a little extra on a high-quality float. This is particularly true when the tiles will be utilized in various rooms. As a general rule, the grout float should be moved diagonally across the grout joints. As a result, the edge of the float will not sink into the joints and dislodge the grout. On occasion, it is important to work parallel to joints, such as when grouting along the edge of a wall or floor; nevertheless, this maneuver must be executed with considerable caution. If that is not practicable, the float should be moved diagonally. To finish filling the grout joints, distribute the grout across the tiles while holding the float at a 45-degree angle to the tiles' surface. This is the minimum appearance for floor tile.
 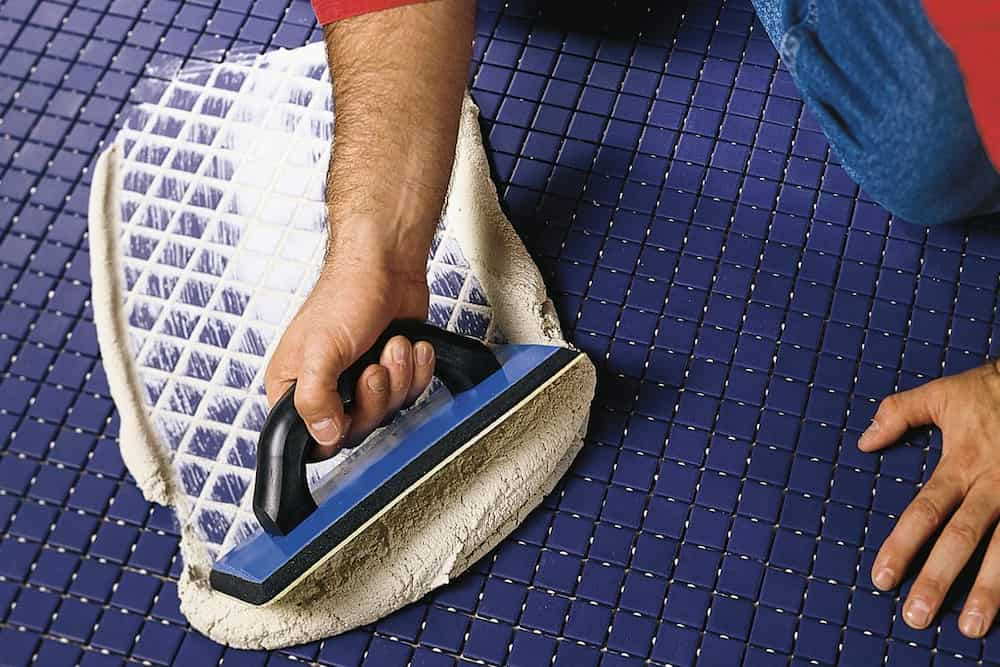 A lower angle will cause the grout to be distributed evenly throughout the tiles, but a greater angle will likely pull an excessive quantity of grout from the seams. When tiling walls, a lower angle (approximately 30 degrees) may work better than a greater angle for filling the seams. If you find a section of tile that does not appear to receive the grout properly, you can also try reducing the angle. After filling all of the grout joints in a work area, a second pass with the float should be made to remove excess grout from the tile faces. This time, hold the float at an acute angle of around 80 to 85 degrees, which is nearly a vertical position. If care is used throughout the cleaning procedure, tiles can be washed on an incline without the grout being pushed out of the joints. Defer the grout haze cleaning till a later date. The excess grout can be scraped off the tile faces with the aid of a rubber grout float, which does an excellent job of doing so but cannot clean the tiles alone. After the grout has dried, it often leaves behind a layer of chalky residue that must be removed with a specific sponge intended for the task. You should have removed any clumps and chunks of grout with the float, but you can deal with the haze afterward. Using a clean sponge, remove the foggy appearance of the grout by applying a haze cleaner, a specialist cleaning solution. If you have any questions regarding the tile grout contact us and receive more information.
💰 Tenfold your income 💎