Happy Monday and good morning! Today is a great day because I get to demonstrate the beadboard's miraculous abilities to you. Yes, I get to share today the precise steps we took to install an unpainted beadboard backsplash in our kitchen. As you surely already know, we just finished remodeling our kitchen, which I talked about in this post last week. Well, one of the major challenges we faced during that makeover was our quirky backsplash. It has a multicolored block pattern with plenty of dark brown and orange colors. It had to go since I was by no means enjoying it. We discussed a TON of cost-effective replacement options (we even considered painting it!), but in the end, we felt that beadboard over the tile was the best option. I wasn't sure how it would work because I haven't come across any tutorials for this sort of stuff. But I'm glad to report that everything went as planned and that the outcomes are fairly fantastic. I believe you'll be astonished to learn that it was a straightforward process. Okay, let's get going now. When we started, the kitchen appeared as follows: Obviously, this tile backsplash didn't fit with my style. For two years, I made a lot of effort to love it, but it just wasn't working. I had originally hoped that I would alter my mind after we had the new quartz counters, but the new tops made me loathe it even more. I was definitely required to remove that tile! 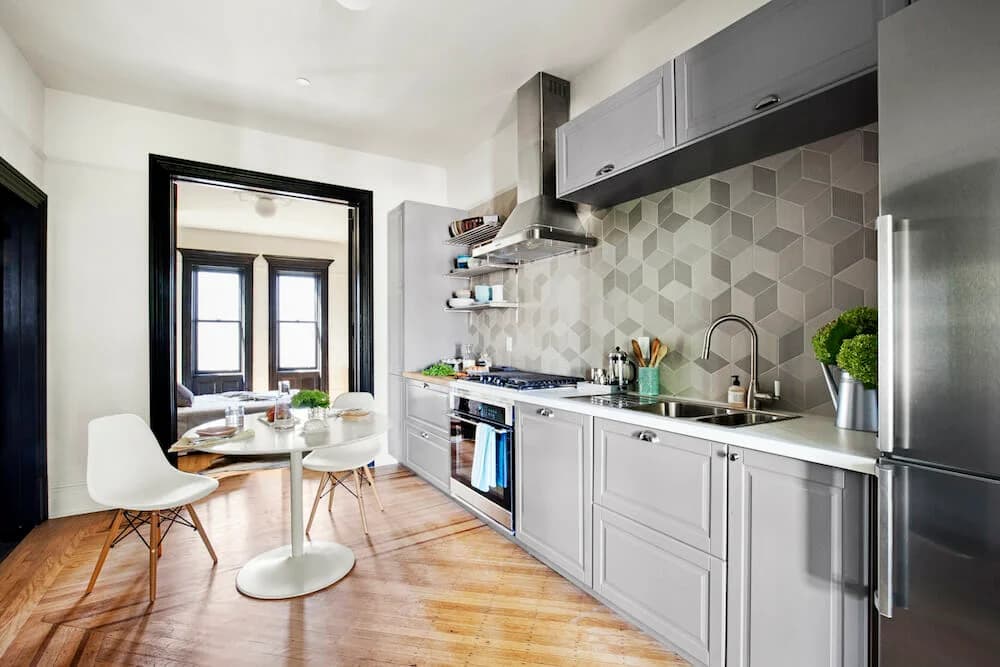
- Cleaning the tile came first, before anything else. To complete the task, I merely used hot, soapy water. We then removed the outlet covers.
- To determine the exact area we needed to cover, we began by measuring the backsplash. Next, we purchased a number of 4-foot sheets of beadboard from Home Depot. They cost about $10 per sheet, making the entire endeavor very economical.
- Using a table saw, we then sized all of the beadboards. Starting in the far corner of the kitchen, we measured each piece as we went and made sure to make cutouts for all the outlets and any other areas we wanted to avoid, like the window over the sink, before moving further.
- Before attaching the pieces to the tile, we trimmed each piece to the appropriate size. After cutting one piece, we would set it up against the tile and then go to the next.
- After cutting all of the boards, we determined that painting them first and attaching them to the tile would be the easiest. We really saved a ton of time by doing it this way, so I'm overjoyed that we did. It was also MUCH simpler to paint them in our dining room than it was to paint them crammed beneath the cupboards. We used satin-finished Behr Ultra-Pure White.
- The beadboard needed to be attached to the tile next. For this component, we used strong construction adhesive. We chose this material since it works well with tile and brick and dries quickly; it also performed admirably.
- We liberally applied it to the back of each piece before firmly setting it on the tile!
 Here, pressing each piece firmly against the tile and holding it there for around 30 seconds proved crucial. This is really a two-person job because each component needs to be lined up and securely in place before you move on to the next one. We made our way around the kitchen piece by piece. This portion took a maximum of 20 minutes. Easy as pie.
- Once we had everything in place, we reinstalled the outlet covers (you can use these extenders if you need a little more length), and the last step was to caulk and silicone the top and bottom of the beadboard to complete the job. Since the caulk will be in contact with water, make sure it contains silicone.
I'm truly astonished by how effectively this worked and how our kitchen was improved. I adore it utterly. By the time we purchased everything and completed the task, the overall cost to us was around $200. And to be honest, I'm relieved that we chose this route rather than pulling out the old tile and replacing it. I like the warmth and texture that the beadboard adds, in addition to the fact that it saved us a ton of time and money. It complements the modern quartz countertops nicely and gives the entire kitchen a really cottage-like feel. Since we've been using it, which has been for about two weeks, cleaning has been simple, and there have been no problems at all. And I honestly don't think there will be any issues. There shouldn't be any problems with water getting under the wood because we caulked it with a sturdy silicone sealant. I considered further sealing it with a clear polyacrylic, but I am hesitant to do so because I am aware that occasionally this might cause white paint to become yellow over time. I firmly believe that this will endure, and I do want to publish updates on its progress every six months. 
Unpainted Kitchen Backsplash
Do You Need a Backsplash in the Kitchen? No, it is the quick response to the inquiry "Do I need a kitchen backsplash?" it is not necessary. At least strictly speaking. A backsplash in your kitchen is not necessary for the same way as a sink or countertop, whether unpainted or painted. The fact is that while they are handy, backsplashes are not a need for kitchen renovations. The majority of designers would advise you to install a backsplash since it protects the wall behind it from damage caused by grease, water, and other liquids. You don't need a backsplash, but Ashley Fong, a designer, points out that doing without leaves your wall exposed and necessitates more upkeep. From a durability perspective, it is suggested but not necessary. Consequently, you are not into backsplashes. That's alright! After all, it's your kitchen. You get to choose what goes inside and what doesn't. There is no love lost in this kitchen, despite the absence of a backsplash, as it has a lovely conventional layout. Despite this, you still need to take all reasonable safety measures to prolong the life of your kitchen. To that end, if you decide against installing a kitchen backsplash, there are a few tasks you'll want to complete. Think of these as preventative measures you may take to maintain the greatest possible condition for your walls. 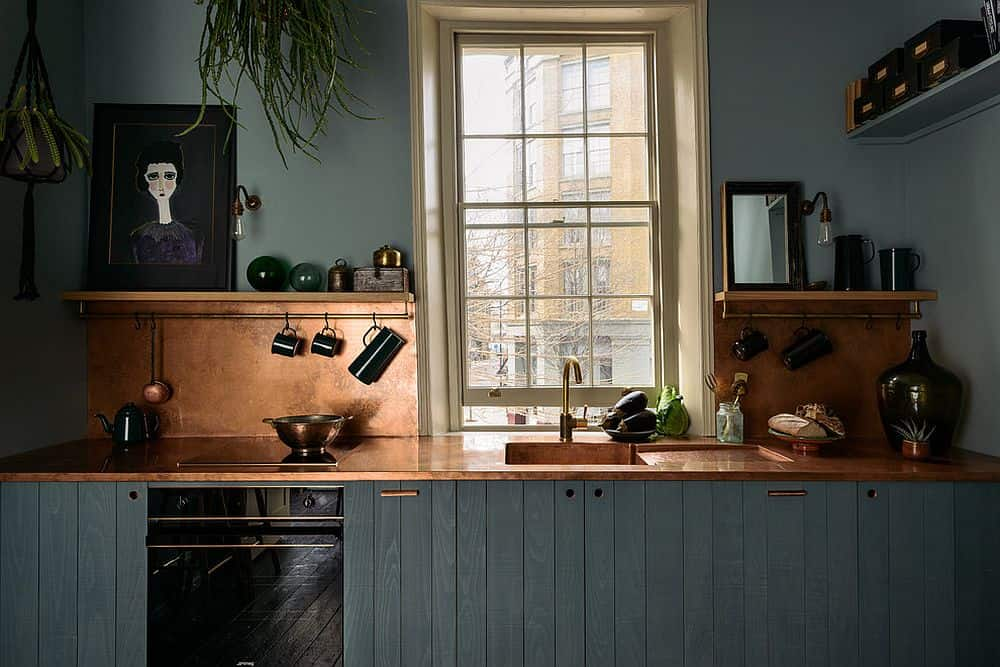 Your kitchen is more prone to damage from spills and messes if it lacks a backsplash. You want to do it if you're certain that adding a backsplash to your design is not something. First, you should do some research on the wall paint you intend to use. Food splatter will inevitably stick to your kitchen walls if there isn't a splashback barrier in place. Finding a primer that resists moisture and washable paint that can endure vigorous scrubbing is ideal. You can wipe over a high-quality paint several times without it fading. Glossier paints typically hold up better to routine cleaning than matte paints. High-quality or semi-gloss paint is generally the best option for a painted kitchen backsplash. Sealing the edge of your countertop where it meets the wall should be the next item on your list after choosing a paint color. If not, spills will inevitably occur below your base cabinets, where cleaning would be impossible. And last but not least, watch out for spills! Make every effort to keep the area around the potential backsplash dry. As a homeowner, it's a smart habit to develop because moisture is the deadliest enemy of kitchen cabinets. You could not like the backsplash's appearance, but you are also unlikely to agree to perform more cleaning. You are heard! Perhaps you should think about adding a backsplash to the wall only behind the stove. Without a doubt, the most splatters occur behind the range. Still not a fan of the concept? Why not rearrange your kitchen so that the island contains your stove or range? You won't need to be concerned about a wall behind the stove this way!
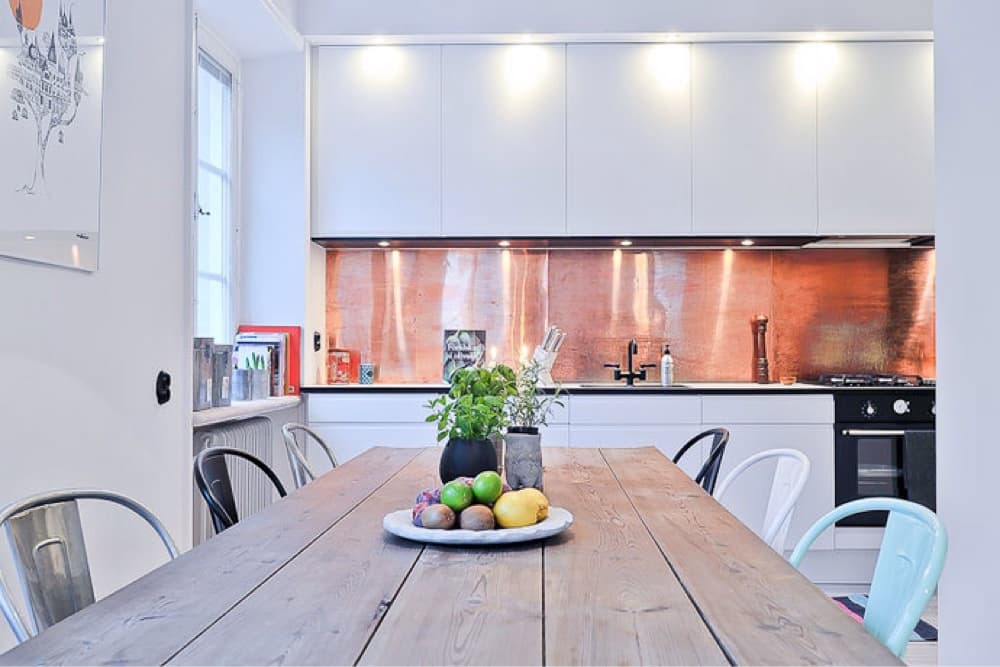
  To use as a backsplash, you can get heat-resistant and waterproof wallpaper if you're prepared to look about and perhaps place an online purchase. These wallpaper products appear less and less like paper as industry technology improves. They are also frequently DIY-friendly. Of all, even wallpaper created specifically for use as a backsplash is still paper. Eventually, it will bubble, peel, and tear. Although a wallpaper kitchen backsplash won't be as long-lasting as one made of tiles or stone, if you're a homeowner who doesn't want a typical backsplash, it might just meet the aesthetic mark. A backsplash may be in the cards if you want to provide your kitchen walls the best defense against future splatters and splotches. Even if you aren't a fan of the backsplash craze, there is almost certainly at least one product out there that satisfies your aesthetic and durability requirements. To begin with, you can make a backsplash out of so many inventive materials. Several of the most preferred materials for kitchen backsplashes are: backsplashes made of stainless steel marble backsplashes Quartz countertops glossy backsplashes Take a look at the backsplash made of stainless steel in the kitchen below, for instance. Using stainless steel as a backsplash in your kitchen is a delightfully out-of-the-box choice. It's special. It's stylish. You'll be grinning from ear to ear. You can differentiate your kitchen backsplash from those in the suburbs in a number of ways, not just by experimenting with various materials. You can choose how far to extend your backsplash. In the business, a base-level backsplash should be 4 inches high. A 4-inch backsplash is less popular now than it once was since homeowners usually upgrade to taller backsplashes and use them as design focal pieces.
 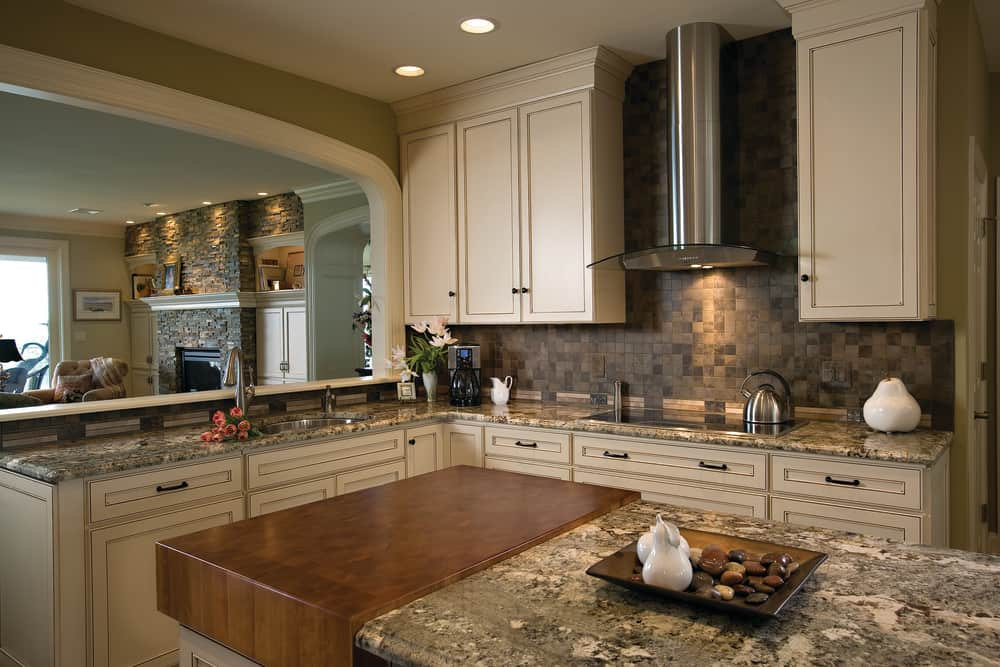 To protect your priceless drywall, though, a 4-inch or 6-inch lip can be sufficient if you don't want anything too eye-catching. Your backsplash can then ascend the kitchen wall as far as you desire from there. Frequently, homeowners' backsplashes end at the base of their upper cabinets (usually 18 inches). Sometimes, homeowners go for a full-ceiling look.
0
0