A tile wall is stunning. Tiled walls are common in bathroom and kitchen cabinet splashbacks, but they may be utilized everywhere. You may build up a tile wall by measuring and cleaning the wall, deciding the pattern, and hanging the tiles. grout 1) Tilework Now we can tile. Layout now. This is vital because he wants the tile to fit as thoroughly as possible without minor cuts. Depending on the room, you may need to make minor cuts, but you may limit this probability by making them before you start tiling.  Find the wall's middle. Divide the wall's width in half to determine its center. Mark the wall, level it and draw a line down the center. This is the tiled centerline. You may now optimally position tiles. Grasp the tile in one hand and set it on the centerline. With the other hand, hold another tile and build a grout next to the first with a slight spacing. This shows how many tiles fit. Since we started at the middle line, any sliced piece is identical on both ends. 2) Baton-tile repair If you don't start with the skirting board, tile from wall-mounted batons. Hang the baton. Use as many screws as necessary to secure the tile. Spirit level it and now tile. 3) Tile adhesive You've hung the baton and set the stage. Apply wall tile glue and start tiling. Wear gloves to avoid irritating adhesive. Use safety glasses to avoid getting glue in your eyes. The wall will cover the adhesive and the beginning line will disappear. Mix glue with a bucket trowel. Loosen for simpler wall-mounting. Put a tiny amount on the grooved tile trowel. Drag it to the wall. Put some on the wall, no matter how thick or hard it is. Repeat, but don't paint too many places at once. A square meter of adhesive should be enough to work in 20 minutes. Spread wall glue. It doesn't have to be smooth yet. Gently tap the wall.
 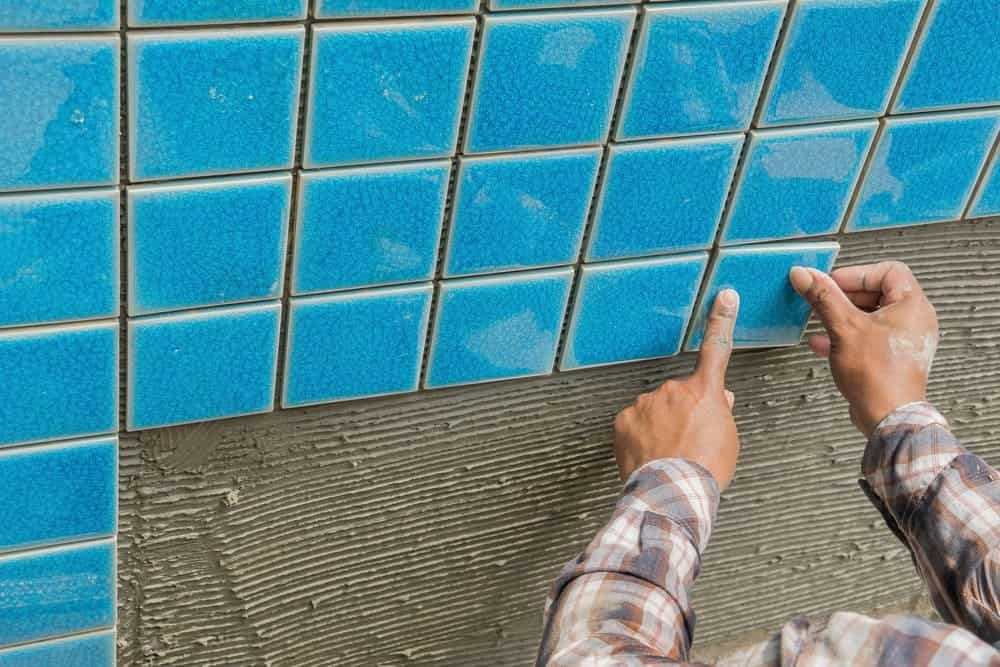 4) Make glue flats Now make the ribs, smooth out the glue, and adhere the tiles. Hold the trowel at 45 degrees and smooth the surface using the cut edge. Push the designated prong against the wall. This forms "ribs." Take charge. If the ribs travel in the same direction, their orientation doesn't important. Don't worry about baton buildup. Carefully scoop it up with a bucket shovel, avoiding the ribs. Put the trowel's adhesive in the bucket. When tiling, you want the tiles to be clean and without extra adhesive. Hardens after drying. When installing tiles, have water and a sponge nearby.
- Add tile.
Set aside the cleaned trowel and pick up the first tile. Align and press baton marks into the glue. Apply firm pressure and use side-to-side motions to grab tightly. Put the next tile next to the last one without gaps. Apply strong pressure and a small rolling motion before gently prying with your fingertips. Sandwich a tile divider between the two she'd already laid. Continue tiling with spacers as nails.  6) Tiling the focus Before tiling, choose a focal point. Or a bathroom with windows. Use clean tiles around a window to make it look square. To make a window appear square requires talent. Mark the window's center on the top wall. Mark the row of tiles above the window's midline. Vertically cutting tiles shrinks them. The columns are lower because the window is wider at the top. It's terrible. The tiler then cuts a row of tiles to match the width at the top. Even if the window behind the tile slides inward as the column falls, the tiles stay in straight, same-width columns. Reverse, top, and bottom repeat. 7) Tile windows and alcoves Next, finish tile edges. The tileset's flat border is visible. Inside the window recess, facing tiles must transition well. Tile trim is needed. Choose a color that matches the bathroom. They're white and colored. Install trim before tiling the recess. Cut tile to length. I'll put tile trim around the window. For seamless assembly, trim the length with 45-degree corners (think the corners of a picture frame). Cut corners using a junior chainsaw and miter block. Elevate the trim. Line match the marks on the trim with the miter block's grooves. After that, complete the trim.
  Before continuing, measure the 45-degree-mitered piece on a window ledge. In damp areas, leave 2mm between miter joints and tile edges. This let's grout fill the spaces. This is more waterproof than pressing metal against another surface. After trimming, the recess must be tiled. Apply adhesive to the back of the tile before placing it over the tile trim, leaving a 2mm gap between the tile's edge and the trim's smooth edge. 8) Grout mixing for wall tile grouting Like the adhesive, the type of tile grout used depends on the type of tile and the setting in which the tile is installed wet areas such as wet rooms and walk-in showers. Now that the wall is tiled, the glue has had enough time to cure in accordance with the manufacturer's drying instructions. You may now begin mixing the grout. Make sure the grout joints are clean and devoid of any stray adhesive that might contaminate the grout before you begin to grout the tiles. is prepared to begin. 9) Grouting tiles on a wall Grout should be poured onto the grout float using a bucket trowel. When your float has the appropriate quantity of grout on it, push it against the tile's surface and begin working your way outward. Push the grout in while holding the float at a 45-degree angle. There is no need to be concerned about staining the tile. Later, tidy up. As you move it around the tile, press it into the grout. Collect a lot of grout from the float tile surface, then use it elsewhere. Reapply grout frequently, especially where it links to other surfaces. Use a sponge to quickly clean the tiles, then rinse them with cool water.
  10) Finishing and cleaning To eliminate dullness from the tile surface, scrub the tile with a sponge and cold water at a 45-degree angle after waiting 5 to 15 minutes for the grout to dry in the joint a little more. Remember to clean the sponge so that it isn't too dirty and doesn't disturb the grout. Finally, use a clean, soft cloth to polish the tile surface once the grout has cured.