Fried meatballs cooked at home without using any dairy products or eggs are a quick and easy meal alternative that is also quite nutritious to make Tasty Pasta Balls with No Allergen Seasonings. You will never again be required to buy ready-made meatballs for the sake of your children or your husband. These baked meatballs are hypoallergenic, so they may be enjoyed by everyone at the dinner table. Dinners that are served throughout the week should not be slow, tough, or dull in any way. If you make a batch of these meatballs that are safe for those with allergies, your family will go crazy for them. A number of years ago, I learned the hard way that the majority of pre-made meatballs include allergenic ingredients such as dairy and eggs. I could have skipped dinner, but I decided to make meatballs from scratch instead. I left off the egg and cheese, however. I was taken aback by how nicely they held together, how long they stayed juicy, and how fantastic they tasted. All three of these aspects pleasantly pleased me. This eggless meatball recipe has established itself in our home as a go-to alternative for a fast and uncomplicated supper during the middle of the week. They are delicious when paired with regular spaghetti or noodles made from zucchini. In addition to the classic spaghetti and meatball meal, you may use them to make meatball sandwiches, slice them and put them on pizza or calzones, or use them in soup. 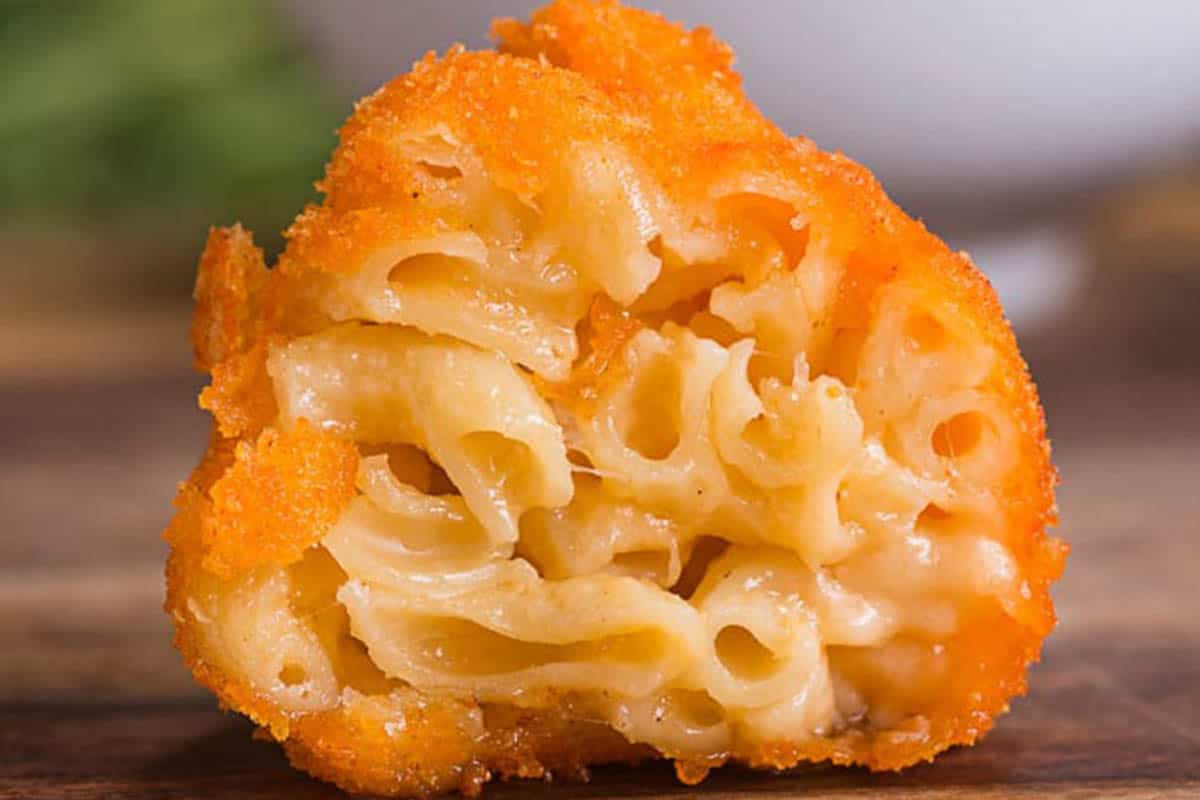 In order to prepare these meatballs, you will need to mix ground beef, chopped onion, chopped garlic, and Italian seasoning in a large bowl. After the ingredients have been well mixed together, portion them out into equal balls and place them in a single layer on the baking sheet. When it has finished cooking for 15 minutes in the oven, you have the option of serving it as an appetizer, spooning it over pasta, or allowing it to cool and storing it in the refrigerator for a later time. Could I cook them in a pan that does not cling to the food instead of baking them? Without a shadow of a doubt! Instead of placing the raw meatballs on a baking sheet, heat the olive oil in a large skillet on the stove over medium heat. This will ensure that the meatballs are evenly cooked. While the meatballs are cooking, you should turn them at least once so that they brown evenly and cook through completely. If your dish is very big, you could find that you need to do the process in stages. The following is an instruction manual on how to store meatballs in the freezer correctly. The best way to keep leftovers for up to a week is in a container that keeps air out and puts them in the fridge. Are meatballs OK for freezing? After they have been allowed to completely cool, meatballs may be kept in the freezer for up to three months if they are first put in a bag that is acceptable for freezing. It would be an honor for me if you would regularly include my recipe for meatballs that are gluten-free, paleo, dairy-free, and egg-free in your dinner rotation. They are simple to make, and once they are done, they may be kept in the freezer for later use. Check that your oven is preheated to at least 400 degrees Fahrenheit before you start cooking. Put all of the ingredients into a big bowl and mix them together. Roll the meat into small balls and lay them on a baking sheet. The meatballs should be seasoned with the necessary amounts of salt and pepper. Baking anything for at least 20 minutes guarantees that it will be cooked all the way through, which will provide the best results. It is now time to remove it from the oven and start eating it!
Tasty Fried Pasta Balls
These arancini (croquettes) are called tagliolini crochette or tagliolini ordura in Italian. Since the early 1800s, these Tasty Fried Pasta Balls have been a mainstay of Naples's food and street food scene. You won't be able to stop at just one of these pasta balls, which are made by stuffing pasta nests with eggs and then frying them in breadcrumbs. The street fare of Naples is well-known, and it contains some quite unique delicacies. Obviously, pizza is the greatest street food in Naples. Some of the fried treats available include simple pastries (zepole), battered seaweed (fried pizza), fried polenta triangles (scagliuzz), fried polenta, potato, and onion croquettes (panzarotti), and fried meatballs (pasta creciotta). Quite like these arancini tagliolini, the wildly popular frittatine di pasta. I've eaten a lot of arancini since my husband is from Sicily. However, I've never tried cooking them with pasta before, rather than rice. Arancini comes from the Italian word "arancia," which means orange. Evidently, because they may be mistaken for oranges. Palermo, at least, has rounder ones. The rice arancini in Catania tend to take on a conical shape. You can trace the origins of many of the delicious street dishes seen in Southern Italy back to the need to dispose of scraps of food. Naturally, leftover pasta works just as well for this arancini tagliolini dish. The ability to build them from scratch is, of course, assumed. The ingredients are easy to get and don't cost much money or time to prepare. When I make these again, I'm going to try baking them. I've made arancini before and they turned out well, so I think this method will also work. Scarmosa or provolone cheese is often used in Naples for making tagliolini arancini. Authentic mozzarella was used in my preparation. Use spaghetti in place of tagliolini (or taglierini) if you can't locate it.  I'm certain that spaghetti arancini or croquettes would also be great since there are several recipes for them here in Italy. As I indicated previously, I wasn't sure how my Sicilian husband would react to arancini pasta. My concerns were unwarranted. He loved them so much that he ate three of them in a row. You probably are, too. Considering how much money most people want, you should plan accordingly. Begin heating the pasta water. As soon as it boils, stir in the salt. Tagliolini or spaghetti should be cooked until al dente, as directed on the box. Cooking time for fresh tagliolini is dramatically reduced to 3 minutes. Immediately after draining the pasta, toss it with butter and Parmesan. It has to be cooled, so pour it into a container. Add 2 beaten eggs to the cooled spaghetti and stir well. Taste and adjust the salt, then stir it in. The cheese and ham should be cubed into bite-sized pieces. Add a pinch of salt to the remaining two eggs and beat them. The spaghetti or tagliolini should be cut into eight pieces and rolled into balls on a floured surface. Slightly compressing the ball of dough will help the ingredients adhere. Use your thumb to create a small hole in the center of each ball. Fill the center hole with the cheese and ham, then seal the ball. Flour a surface, then roll the ball in the egg, and finally coat it with breadcrumbs. And although it wasn't specified in the instructions I followed, I completed this final step twice. Keep the balls cold, preferably in the fridge for 20 to 30 minutes. Then, they are deep-fried in heated oil, such as olive or peanut. It's not necessary to use a deep fryer. The trick to getting the arancini pasta to brown evenly on both sides while using a standard skillet is to keep flipping it. Kitchen paper is perfect for draining the arancini pasta before serving them hot as an appetizer or as a side dish to a salad.
Fried Pasta Balls with No Allergen Seasonings
Quick and easy to make from frozen, these chickpea dumplings are a family favorite. These Fried Balls with No Allergen Seasonings may be served with spaghetti, on pita bread, or just by dipping them in your favorite sauce. Creating meatballs without using actual meat may seem like a stretch. These bean balls, however, are every bit as tasty, adaptable, and delightful. While chickpeas may be an untraditional major component, the binding agents and spices are typical of traditional Kofte. This dish is perfect for you if you're trying to eat more plant-based meals. In any case, you've come to the perfect spot if you're hoping to broaden your horizons in the kitchen. These kid-friendly veggie meatballs have even won over meat eaters and can be thrown together in just 20 minutes. You may eat them with spaghetti, on sandwiches, or just by themselves with your preferred sauce. (Honey mustard and kebabs are a particular favorite of mine.) Vegetarian meatballs may be made with a broad variety of ingredients, although they do need quite a few: Those Chickpeas in a Can: The chickpea, a lowly legume that packs a lot of nutritional punch, takes center stage in this dish. Before incorporating chickpeas into other components, they must be well washed, drained, and dried. After 20 minutes, you can either wipe them off with a cloth or let them air dry. Breadcrumbs are a must-have since they are traditionally used as a binding and bulking factor in meatball preparations. For those who cannot tolerate gluten, almond flour is a suitable substitute. Eggs are another common ingredient in meatloaf and meatball recipes. 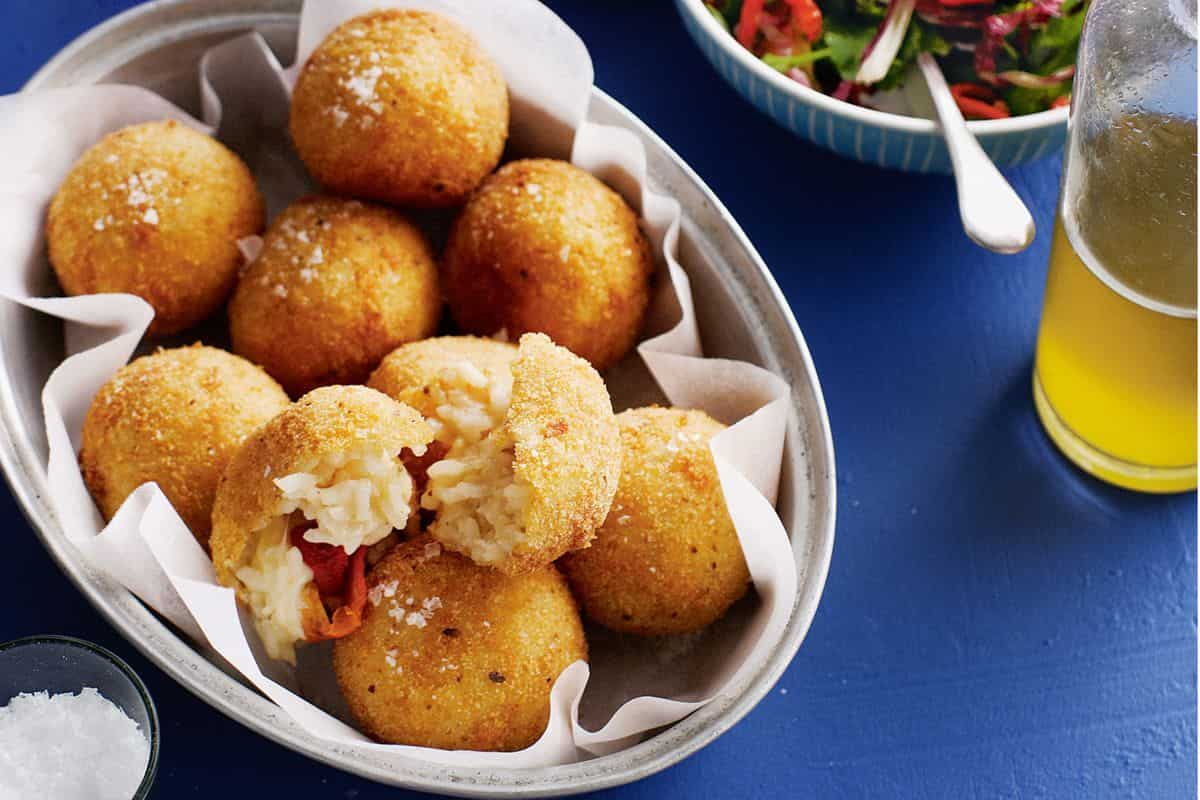 Two flax eggs may be used as a replacement for the eggs if you're veganizing the recipe. Flavor and "cheese" without the dairy: nutritional yeast is a key flavoring ingredient. You may use grated Parmesan cheese if you don't have a vegan cheese grater on hand (or if you don't need to prepare a dairy-free meal). Most recipes for Italian meatballs call for fresh parsley. Spices: It's common knowledge that chickpeas by themselves don't have much flavor. This is why spices play such an important role in this dish's taste. To make these meatballs, you will need smoked paprika, Italian spice, garlic powder, black pepper, and salt. In just 20 minutes, you can have these chickpea meatballs ready to eat. The only special tools required are a food processor and a deep skillet. Then the magic may commence without the need for flesh. First, throw everything into a blender or food processor and mix it up. Chickpeas, breadcrumbs, eggs, parsley, nutritional yeast (or Parmesan cheese), and spices make up the rest of the ingredients. Second, liquefy the ingredients by blending them together. It's okay if the mixture is on the thick side. The mixture has to be uniform enough to be rolled into a ball. Next, we'll stuff the meatballs. Make 14–16 meatballs, each with 1 tablespoon of filling or 1 tablespoon of cookie dough. The fourth step is to fry the chickpea balls. Bring 2 tablespoons of olive oil to heat in a large pan over moderate heat. Add the chickpea meatballs to a hot pan and cook for 6 to 8 minutes, turning them every so often to make sure they brown evenly. Step 5: Dive In! This meatball is made from chickpeas and may be served in a variety of tasty ways. Here are some of my recommendations.
  In the following, I've outlined a few of my preferred preparations for these chickpea meatballs, but you may use them in place of any other kind of meatball. For instance, Red sauce and pasta are a classic combination. Spaghetti and meatballs are a traditional comfort food, and these chickpea meatballs, with their Italian flair, are a close second. Wrap in a hoagie roll. The truth is that a meatball sub was always my go-to when I was a youngster. Can you imagine a more satisfying sandwich? Pita-related accessories these chickpea meatballs are a delicious substitute for falafel, especially when served with hummus and a few chopped fresh herbs. I hope you take it for what it is and enjoy it! Keep things basic and pair these chickpea meatballs with your go-to condiments and/or a dipping sauce. They provide nutrition and flavor to salads and are a great addition on their own. Toddlers will like these since they are easy to eat with their fingers. To answer your question, these vegetable meatballs may be frozen and then reheated without any problems. If you want to store them in the freezer for later use, it's best to let them cool to room temperature first. Before closing the bag, make sure to remove as much air as possible. Then you may freeze it for up to three months after labeling and dating the bag. In order to reheat them, my go-to method involves 20 minutes in a preheated oven (or toaster oven) set to 325 degrees Fahrenheit. This is better than microwaving since the outside stays crispier.