The wettest place is the swimming pool so the right products like tiles grout and adhesive must be selected for repairing tiles with proper goods. It is difficult to perform extensive repairs after they are filled without pulling them out of service for an extended length of time. Depending on the size of the pool and the kind of tile being used, swimming pools are the best-wet locations for tiling. When selecting the waterproof product, tile adhesive, and grout for the pool, several elements, including water pressure, temperature variations, and chemicals added to the water, must be taken into account. The area where you apply tile again can need some attention. In the top picture, we can see a damaged area that was fixed with hydraulic grout to level it with the adjacent tile bed. Large fractures should be widened, any loose material should be removed using a disk grinder or chisel, and then filled with hydraulic grout (if deeper than 1 inch) or EZ Patch. (Less than 1 inch). To provide a smooth, uniform surface for the new tile, fill up any gaps. Before proceeding, let any patches for 24-48 hours to dry. 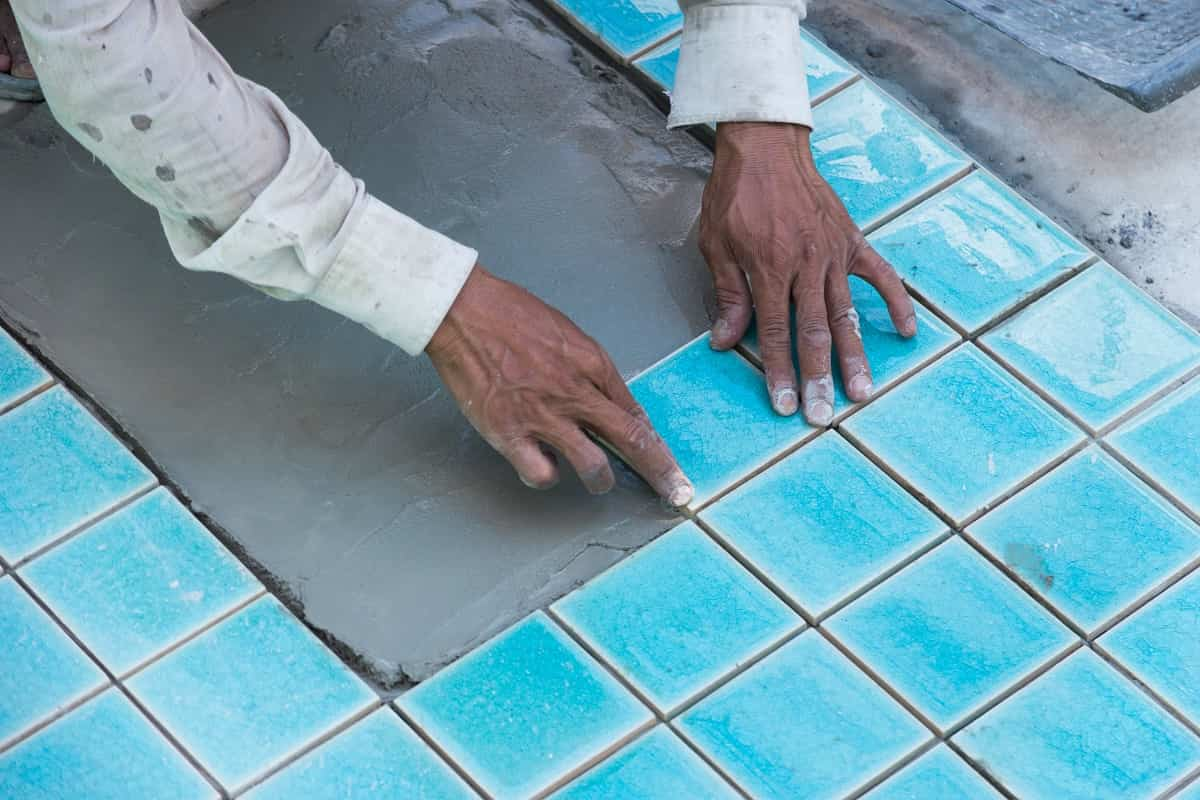 Create a solid ledge by using the chisel or a tiny, pointed flathead to remove any grout fragments that are still clinging to the surface. When mounting fresh tile, this bottom edge, or even the notch in the pool plaster, is helpful. It would be wise to wipe the surface if it has been exposed for a while before retiring. Cracks in the pool tile, please? Stop if the beam (the portion of the pool wall beneath the tile) has noticeable fractures. To lessen the likelihood that your tile will come off too soon, you should fill the crack with hydraulic cement and press it as deep into the crack as you can. This is known as beam damage. Large fractures in the beam should be observed since they are probably to blame for the tile sliding off. A defective expansion joint that allows the pool and pool deck to contact during expanding and contracting often results in such fissures. The deck prevails as they both grow and pushes up against the pool wall. A tile repair for active beam damage can only be expected to last a year or two unless the bigger problems are addressed. In the worst-case scenario, this entails removing the coping stones, rebuilding the wall's top section, and repairing the expansion connection that connects the pool wall to the pool deck. changing pool tiles; Use pool water or a hose to thoroughly saturate the area that needs repair during a cool time of the day. The moisture in the mortar bed will be sucked out if the surface is hot and dry. EZ-patch1. Although it may be used underwater, EZ Patch 1 F.S. (Fast-Set) pool tile restoration works best when the water level below the tile can be decreased. Mix 1 cup of EZ Patch #1 at a time in tiny batches with water and the provided bonding agent.
 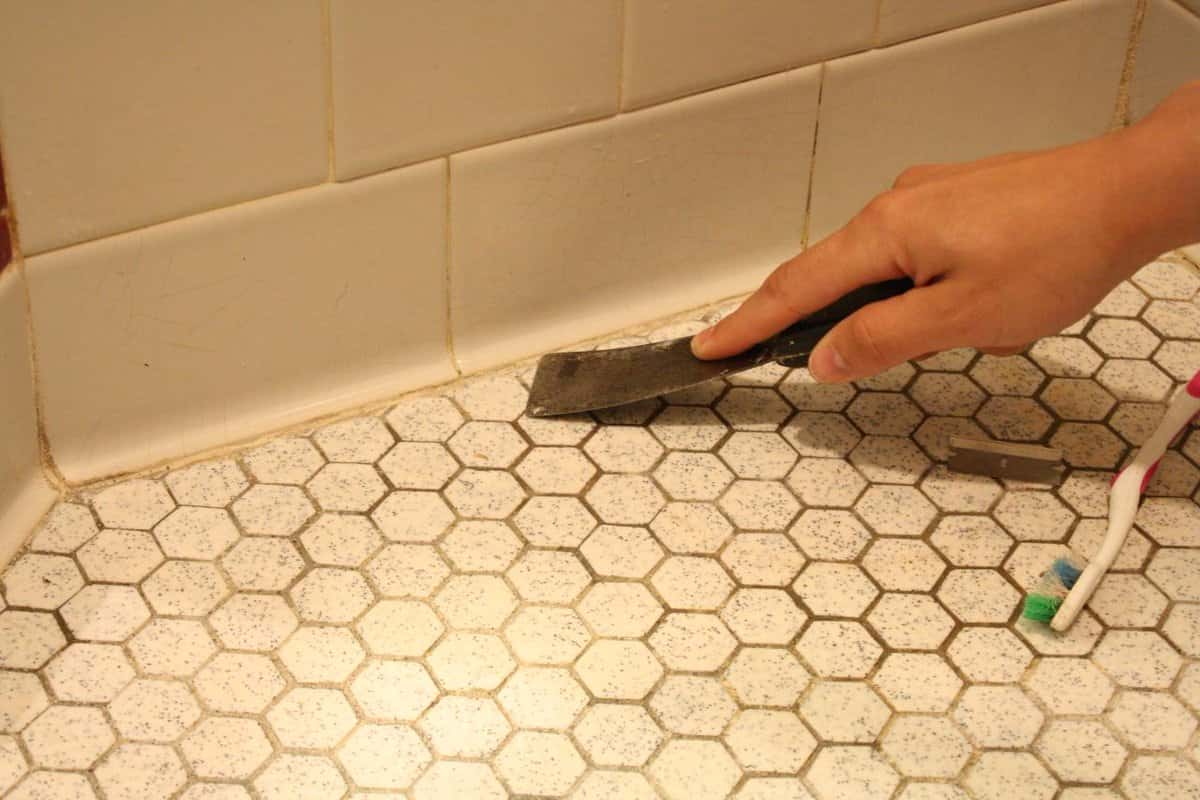 Mix until the mixture resembles peanut butter. With a 1/4-inch V-notched trowel, spread it over the wet tile bed, raking the bed to make 1/4-inch rows or furrows of the EZ Patch tile restoration mix. Position the sheet tile quickly, then press it evenly and firmly into the pool mortar bed. Some will manage to push out the sides and through the tiles. Make sure you push firmly on all of the tile's components and that it continues to be level and plumb. To position and place the pieces properly in a mosaic, more skill is required. The tile may gradually slip off if the mixture is too moist, too dry, or the bed is too thin. After setting the tile, watch it carefully for a few minutes to make sure it is not slipping or sagging, and then go on to the next tile area while keeping an eye on it. Work quickly! You only have 5–10 minutes to work with the mix while using EZ Patch Fast Set. It is most effective to mix in tiny quantities while moving forward step by step. If you are not using sheet tile and are laying tiny, individual pieces of tile, "butter" the back of each piece with EZ Patch before pressing it into the damp, prepared surface. Hold it there for five to ten seconds. After your tile has been set, carefully remove any big chunks of leftover tile mix, but wait 24 hours before washing or touching the tile too much.
swimming pool tiles adhesive
Using a high-quality swimming pool adhesive while installing swimming pool tiles is just as crucial as using adhesive, if not more so. Detergents, in addition to chlorine, may adversely influence the durability of your grout. Because of this, all of our pool tile grouts are designed to have high chemical resistance, assisting you in creating a sturdy, long-lasting swimming pool. The clever options in our selection of swimming pool grouts also act to stop high humidity, water movement erosion (to which grout at the waterline is especially susceptible), chemical deterioration brought on by strong, thorough cleaning techniques, and high humidity. Your pool will be waterproof and retain the highest levels of adhesion and flexibility when Bostik pool tile adhesive and grout are utilized. In most swimming pools and the regions around them, the tile grout is an essential component of the mosaic and tile work. The standard cement-based grout is not at all the proper solution for such underwater tile installation. Grout made of cement is particularly porous, prone to breaking, and sensitive to stains. Your grout made of cement might suffer from the apparent dampness of a swimming pool. Detergents and chlorine used to clean your pool's inside and exterior may potentially have a negative impact.  When it comes to withstanding the heavy chemical usage and the moisture connected with swimming pools, it's essential for you to choose a grout on which you can rely. Epoxy Grout: A grout that is waterproof and able to endure the humid conditions present around swimming pools is the natural option for the swimming pool adhesive. Epoxy grout is resilient, watertight, and doesn't need to be sealed. T hese factors make epoxy grout a great option for all your pool adhesive requirements. Due to its resistance to cracking, staining, and crumbling, this kind of grout is a great option for areas where heavy activity is anticipated. Epoxy grout is ideal for wet and sometimes humid environments since it is moisture- and weather-resistant. Epoxy grout materials are somewhat more costly than any other typical grout product, however, this difference is only temporary. You may save a ton of time and money in the coming days by spending a little additional money on an appropriate and durable epoxy grout for your pool. Epoxy grout has advantages that exceed and explain its higher price. If you choose the incorrect path for your swimming pool and the surroundings around it, it will cost you more in the long run due to frequent maintenance and maybe tile system failure. To make sure that the swimming pool tiles maintain their pattern for a lifetime, use premium waterproof grout. Anything else than epoxy grout will be a waste of time and result in a later job to redo the grouting which will cost money. Ideas for epoxy grout for your pool.
  There is no need for you to forgo the creative approach that may make your swimming pool something that others will enjoy, even if its useful qualities for your swimming pool or deck are highly suggested. All swimming pool owners have an insatiable need for beauty, thus there is pressure on all project components to meet expectations. Even the grout used to build the pool's tiles is supposed to be a work of art. Due to this, trendy boutique grout treatments and colors are becoming quite popular among pool owners. Even while grout is a necessary component of all tile installations, this does not preclude it from serving two purposes: as an adhesive that keeps tiles in place and as a tool for decorating your swimming pool. Due to the grout industry's notoriety and the vast aesthetic potential of grout, a number of exceptional boutique grout products have started to appear on the market. Epoxy grout may be used in a variety of ways on mosaic and tile projects to beautify your swimming pool. Some of the greatest methods to display flairs are via mosaic patterns and designs on the bottom of the swimming pool. Intricate abstract or even solid artwork may be created using mosaics, giving your pool a magnificent look. Your mosaics will be best protected and secured underwater by waterproof epoxy grout, so the pattern you pick may cover more of the swimming pool's surface than simply the region surrounding it.
  This offers up a world of possibilities for mosaic or tile installations that may transform your pool into something quite spectacular. Instead of tiling the whole area, one approach to make your tile work around your pool stand out is to develop numerous little patterns close to the pool area. You may add visual interest and keep the area from seeming uninteresting by using various patterns or artwork placed equally around your swimming pool. You might decide to add artwork to the pool's borders or a complex abstract design that produces striking displays of brightness and color. For a far more distinctive appearance, you may also attempt a cracked or uneven tile pattern with a brightly colored grout. The patterns and design concepts you may come up with for the area surrounding your pool are only limited by your creativity.
repairing tiles with grout
Tile grout ages over time and develops stains, fissures, and looseness. It's probably time for repairing your tiles with grout if you've noticed that it's beyond their prime. The good news is that grout restoration is a simple and affordable solution for updating the appearance of kitchen or bathroom tiles. In addition to making your tile seem old and worn, damaged grout may serve as a haven for mold and bacteria development. In addition to some frequently possessed gear like eye protection, a shop vacuum, gloves, towels, as well as a scrub pad, grout repair calls for a few specialized ones like a grout saw and a grout float. Prior to beginning grout cleaning. Before removing the broken or loose fragments, cleaning the grout is a crucial first step. This will enable you to match the new grout's color to that of the old grout. Tip for Repairing Grout: For consistency, get grout that is the same color as the current grout. Considerations for safety; When repairing grout, eye protection is essential since grout removal causes it to crumble into little fragments.  You should strongly consider using a dust mask to prevent inhaling grout particles and maybe even mold. additional factors; When replacing grout, the tile must be dampened. Epoxy grout, on the other hand, requires that the surface be entirely dry before application. Use a nonstick gum-rubber float to lay epoxy grout if using that kind of grout. Use a mix of white vinegar and water to fix the cracked grout. In a dish or bucket, combine one part water and one-part white vinegar. Once all the filth and grime have been removed, scrape the damaged grout with a clean toothbrush and scrub brush dipped in the solution. With a towel, remove any extra mixture. Use sample grout chunks, which are accessible mostly from home renovation shops, to determine the closest color match. Add additional water while mixing the new grout if the color of the previous grout is lighter than the color you selected from the chips. Use less water if the initial grout color is darker. There are two types of grouts: sanded and unhanded. Based on the tile type, the location of the repair, and the breadth of the tile joints, choose the appropriate kind of grout.