Although it's easy to assemble, an outdoor table with a tile top is built to withstand any weather. You may create it yourself for significant financial savings and you won't need any special equipment or supplies; they are all readily accessible in-home centers. Additionally, these tables are a stunning complement to any patio or deck. First, Overview of the Tile Top Outdoor Table. This table may be constructed using basic tools and abilities. Shop for your steel and wood at a home improvement store, then visit a nearby tile supplier to choose a unique tile. Ask to examine a tile made of stone, porcelain, or a mix that can tolerate inclement weather. the table, made out of stone tiles in two sizes, costs are low. This tabletop's construction consists of a plywood core coated with cement board, sealed with a paint-on membrane, and then tiled with grout. With the use of a template and handmade jig, you bend durable steel bars from your local home center or hardware shop into attractive curves to form the leg foundation. 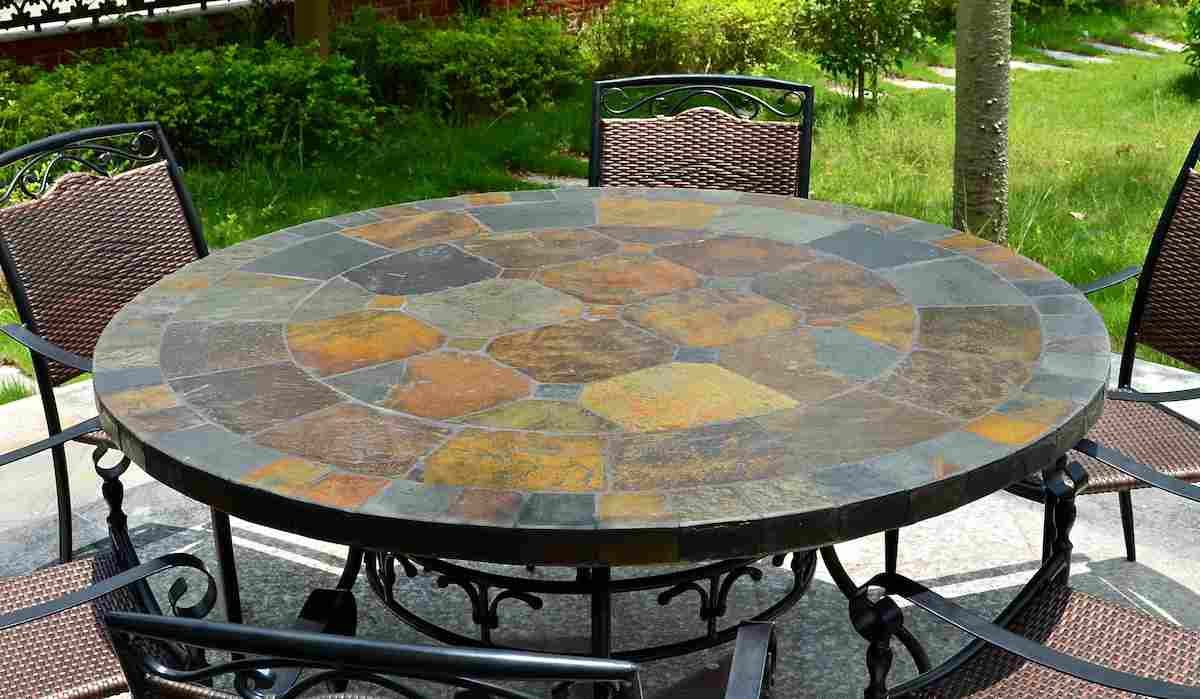 You drill, put them together, and then attach them to the tabletop. To finish the project, budget 10 to 12 hours over the course of a week. We divided the work into daily phases to aid with the process. It takes into consideration the time needed to let glue, mortar, and sealer cure so you may complete the job quickly. This project will require roughly 6 days to complete. Why many screws? Later, when you bend the steel bars, these pieces of 24 will be put under a considerable degree of strain. Since you'll be covering both sides of it, there's no need to purchase expensive plywood for this project. If the plywood is somewhat bowing, place the bows across from one another to prevent warping once you screw them together. Create a full-size template using a 12 × 20-inch piece of 1/4-inch plywood and hardboard as illustrated in Figure A while you have your construction equipment available. Draw marking across all four sides after placing markings at 1-inch intervals along each side. Plot the corresponding locations as shown in Figures A, and then sketch a straight line linking them.
  Mark the 36-inch steel bar with a permanent marker for each inch, as shown in Photo 4. The remaining 8 in. will be chopped off later, but for now, you'll need it to bend with. The bending procedure might be tough, so get an additional piece just in case. In order to drag the bar toward you, slide it between the blocks such that the first mark is in the middle. Due to the significant mechanical advantage, you have, this initial little bend is simple. Avoid the temptation to overbend; a little prod at each mark results in a lovely, even curvature. You could want to push the bar from the bent side as you approach the last few bend marks to get a little extra leverage. Every sixth bend or so, check the weld to see how it compares to your template. To get the curvature to match your template, you may need to re-insert the leg piece into the frame to unbend some of the pieces. Avoid getting too worked up about attempting to follow the blueprint perfectly. Close enough suffices. The smaller 1/8-in thick bars should next be cut and bent to create the struts as indicated in Figure A. You guarantee that the struts support the legs evenly, be certain to drill them precisely.
  A cement board may now be used to cover the disc assembly that you cemented together the day before. Make careful you use a belt sander with a rough belt to smooth the plywood's the outside curve. You will have a lovely even border to tile afterward if this curve is smooth and even. Then, place the disc on a piece of cement board, draw the form there with a carpenter's pencil, and use your jigsaw to cut off the shapes. With a typical jigsaw blade, you can cut this material, but it will take roughly three blades to complete the circle. Instead, visit your local hardware or home shop to get a specialized abrasive knife blade for your jigsaw. If you're a cook, visualize a dish of mashed potatoes while you combine the thin-set mortar in a bucket to the consistency of toothpaste. The chemical reaction will then begin after around 10 minutes of standing. Apply mortar to the wood disc using a trowel that has a 1/4-inch notch, and then comb it. The trowel makes it easier to properly apply the correct volume of mortar. Place a piece of cement board into the mortar, then fasten it to the plywood disc with screws.
  Now that the metal stucco lath has been cut and installed, mortar may be added to it. Till the next day, let the mortar set. The disc must then be waterproofed, and your design must be completed. Roughen the discs' edges with a rasp, then hand-sand them with coarse sandpaper. Remove any dust, then roll or brush a waterproofing membrane over top. The membrane will prevent moisture from entering the disc, which would otherwise cause the core to expand and eventually shatter. Let each coat dry after applying at least two. I couldn't believe that after it dried, the mortar would adhere to this material when first saw it. Well, it truly does seal the surface and does work. Lay down your tile pattern and verify that it works where the membrane is curing. To assist with your tile placement, create a cardboard disc the very same size as the coated disc and draw a series of concentric guidelines on it. The moment has come to test out design possibilities. However, feel free to test anything. I discovered that a circle shape that spreads equally outward works best.
  If you do decide to cut tile, make careful to use a smoothing stone to reduce the sharp edge. Test the tile's coverage after placing your tabletop on your workstation. You may need to use small cardboard pieces to shim each tile or raise the whole top somewhat above the workbench. The tile may be slightly lower than that of the bottom border or even slightly higher than the bottom depending on the size; neither departure from flush will be seen on a completed table. Butter the back of the tiles, then push them into the mortar after mixing them. By altering the width of the junction, you may fill the edge using just whole tiles with a little forward preparation. After completing the edge, allow the mortar to dry for 24 hours until tiling the top.
💰 Tenfold your income 💎