Large format type of tiles need special craft in installing, removing and grouting. The adhesive that is used needs to be selected in accordance with the kind of substrate material, the kind of tiles, their size, and where they will be used. We recommend using the double-buttering method to apply the adhesive when installing big format tiles. This method involves applying the adhesive not only to the back of the tile but also to the substrate that the tile will be mounted on. It is much simpler to apply adhesive to the back of a tile if the tile is first placed on a trolley, which is a convenient way to stand a tile. Before you apply the glue, you need to make sure that the back of the tile is clean and that there is no dust made of ceramic or magnesium present. If necessary clean the back of the tile with a damp sponge dipped in a mixture of water and acid detergent.  When applying the adhesive, the spreader that is used must be selected specifically for the type of substrate material that will be used. It is recommended to use a notched spreader with sloping notches to apply the adhesive on the substrate in order to get better distribution of the adhesive. On the other hand, the spreader that is used to apply the adhesive on the back of the tile should have smaller notches in order to ensure that almost all of the surface is wetted with adhesive. Utilizing a spreader that has 3 mm pitch square notches is the method that should be utilized when applying and spreading the glue on the back of the tile. In order to shorten the distance that the air has to travel in order to be pushed out, the glue has to be put in straight lines that run parallel to the short side of the tile. When applying glue to the substrate, on the other hand, it is advised to make use of a spreader that has sloping notches that have a pitch of at least 10 millimeters; the exact value will vary depending on the levelness of the substrate. The use of a spreader with sloping notches causes the trails of glue between the notches to fold over one other, creating a domino effect that helps fill all the gaps and minimizes the possibility of entrapping air bubbles within the bed of adhesive. The glue must be put on the substrate in a straight line in the same direction as the adhesive that was applied to the back of the tile after first applying a preliminary thin coating of adhesive to the substrate in order to remove any dust that may be present on the substrate. After applying the glue utilizing the double-buttering method, it is advisable to utilize runners and cross-members or a frame with suction-cups to make handling the tiles easier and safer after the adhesive has been applied.
  In order to help push the air out, the tiles are installed by placing the ribs of adhesive on the substrate and on the back of the slab in a parallel fashion. It is imperative that the ribs of adhesive never cross over each other throughout the installation process. To guarantee that the tile is thoroughly bonded and that all of the air has been removed, either run a vibro-plate over the surface of the tile or manually tap the surface with a special anti-bounce float made from rubber. Both of these methods can be used. We propose tapping the tile from the centre working towards the edges in the same direction as the ribs of adhesive, that is, parallel to the short side, to ensure all the air under the tile is driven out. Any air bubbles that form could represent a weak point for the installed tiles, particularly when installing internal floor tiles where gaps could lead to the tiles being broken if they were subjected to concentrated loads. Air bubbles could also represent a weak point for the installed tiles if they were installed improperly. When it comes to tiles that have been installed outside, holes in the installation could lead to the accumulation of water. This could result in the tile becoming dislodged as a result of the stresses induced by the freeze-thaw cycles of water that penetrates under the tile in the winter or the pressure generated by water vapour in the summer. Because of this, doing the steps of double-buttering and tapping the tile down while going through the operation with care are extremely critical measures to take. The installation of tiles on the floor and on the walls can be done using the same method. The design engineer is responsible for determining whether or not additional mechanical safety fasteners are required to be used while laying tiles on facades.
 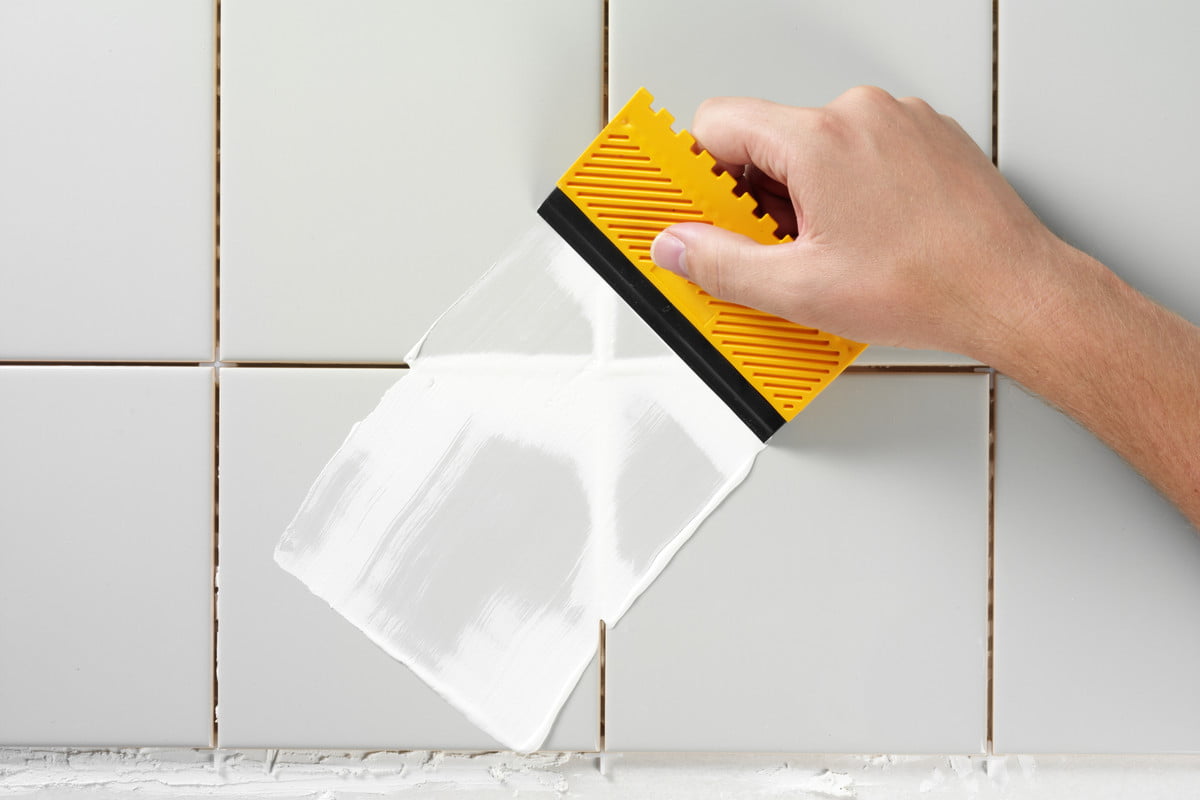 During the design process, you will need to decide on the width of the grout lines. This decision will mostly be influenced by the type of substrate material, the size and type of the tiles, as well as the area of use (wall or floor, internal or external). In every scenario, the minimum width that is recommended between each tile is 2 millimeters, and this width should rise depending on the area of usage and the forces that are anticipated when the tiles are put into service. It is advisable to make use of levelling spacers in order to keep the appropriate distance between each tile and cut down on the amount of out-of-flatness between tiles (around one spacer every 50 cm). It is important to position the spacers before installing adjacent tiles, and it is also important to embed the spacers in the adhesive. This will prevent voids or gaps from forming under the tiles in correspondence with the spacers, which could result in the tile breaking. If the spacers are not embedded in the adhesive, voids or gaps will form under the tiles. It is possible to utilize a specialized positioning tool to place the tiles in order to make this step of the process more straightforward. It is made up of two separate groups of suction cups, one for each tile, as well as a central threaded mechanism that is used to adjust the width of the grout line that is located between the tiles and pull the tiles into the desired position. Before you begin grouting, you should always make sure that the grout lines are clean. After tapping the tiles into place, if there are any traces of adhesive in the grout lines and the amount of adhesive in the grout lines does not allow for at least two-thirds of the depth to be grouted, the adhesive will need to be removed mechanically using a cutter, scraper, or something else of a similar nature.
  You need to wait approximately the following amount of time before you may fill in the grout lines between the tiles: – Two to Three Hours in the Case That Rapid-Setting Adhesive Was Used; – Twenty-Four Hours In The Case That Normal-Setting Or Reactive Adhesive Was Used For the purpose of cleaning the grouting, a minimal quantity of water, an abrasive pad (such as Scotch-Brite), and then a firm cellulose sponge are utilized, with the caution that the grouting not be removed in the process. In contrast to cementitious grouts, epoxy mortar grout on floor and wall tiles must be cleaned while the grout is still "wet," and if necessary, additional water must be used to clean the tiles in order to remove all traces of the epoxy grout completely. Cementitious grouts can be cleaned after the grout has dried completely. According to the new range of Mapei Coloured Grouts, which has been specifically created to create a perfect match between the color of the grout and tiles so that the grout lines are less noticeable, Mapei grouts are available in a wide range of colors. These colors have been designed to create a perfect match between the color of the grout and tiles. If you use these items, the grout lines that are between the tiles will still be there; however, they will be less noticeable, and they will not detract from the look that is generated by floor and wall tiles, for instance those with a marble or wood effect finish. Our professional exporting team would be glad to cooperate with all traders and importers from anywhere on earth.
💰 Tenfold your income 💎