you can install ceramic tiles in the kitchen that are made up of mosaic tile and it can be a fantastic approach how to enhance the beauty of the kitchen backsplash. Whether used on floors, walls, countertops, or backsplashes, mosaics crafted from ceramic tiles, porcelain tiles, or glass tiles create intricate patterns that provide a sense of elegance to any space. In the past, mosaics were meticulously placed as tiny tiles to create a smooth, expansive surface with intricate motifs. Modern mosaics, on the other hand, come in sheets with the tiles already linked, making them exceedingly simple to install.  Mosaic sheets offer advantages over working with individual ceramic or porcelain tiles when working with very tiny or geometric tiles. Modern mosaic tile is created by adhering tiny ceramic tile pieces, generally 2 inches square or less, to sheets of fiberglass mesh. The tiles are arranged on the sheets so that the spaces between them are precisely the proper size for grout joints. Putting mosaic tiles is, therefore, more efficient than installing individual tiles. Depending on the desired design effects, mosaic sheets may have tiles of a single hue or a range of hues and shapes. The bulk of mosaic sheets are comprised of traditional ceramic tiles, however alternative materials like as glass, porcelain, natural stone, and even unglazed terra cotta tiles can also be utilized. Consequently, the price of mosaic tiles might vary greatly based on the kind of material. Mosaic sheets are primarily comprised of small square tiles, however some mosaics also use small rectangular tiles or other geometric patterns. Even within the same sheet, they are able to combine different shapes. In addition, thin sheets of mosaic tile are utilized for borders and other aesthetic embellishments. The installation procedures for mosaic tile sheets are largely identical to those for ceramic tile, with the exception that partial sheets can be fitted by simply snipping the fiberglass backing to produce sheets with certain shapes, making cutting sometimes simpler. As with any other type of tile installation, mosaic tile installation requires a perfectly flat and smooth surface. Modern tiling often employs cement board as the subfloor, either directly against wall studs or over a plywood subfloor. Mosaic tile may be laid directly on plywood or wallboard in non-wet regions, although experts advise cement board as the best underlayment. Install the cement board in whole sheets before trimming pieces to cover any gaps.
 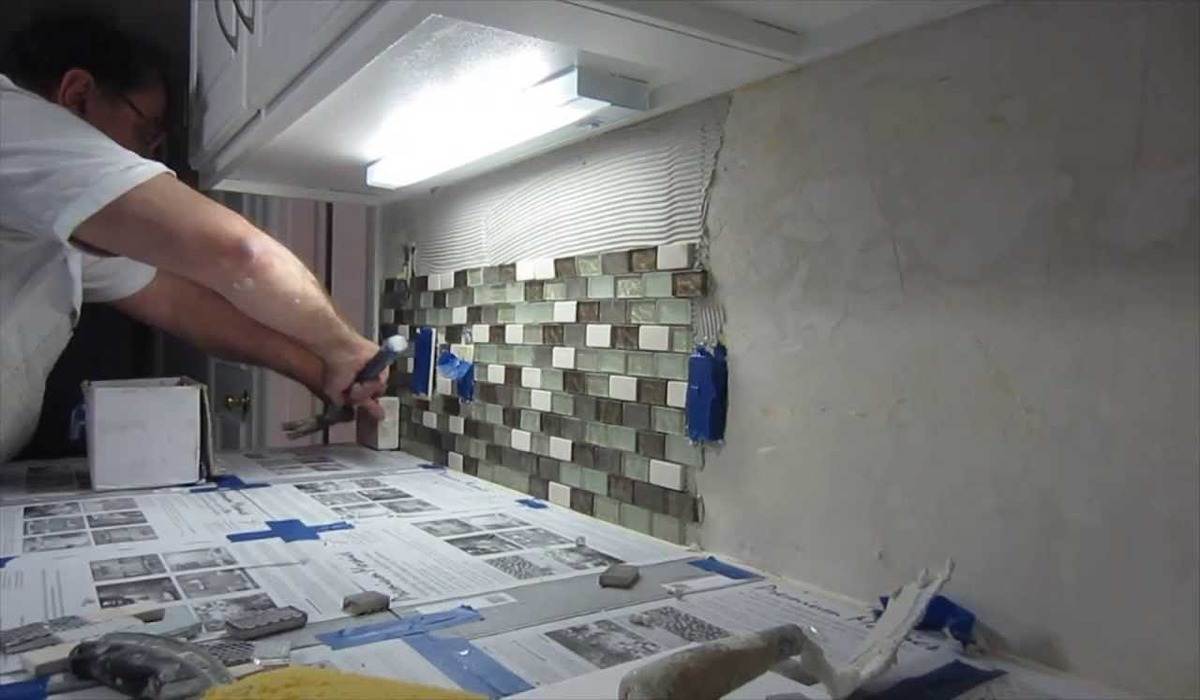 The quickest technique to cut cement board is to score it with a utility knife and a steel carpenter's framing square, and then snap it along the score lines. When using cement board screws to attach panels to studs, the rough side of the panels must face outward. Allow around 1/8 inch of space between the panels. To seal the connections between cement board panels, two-inch-wide fiberglass cement board tape should be utilized. To cover the tape, a thin layer of thin-set glue should be applied with a taping knife. A well-planned design is required for a successful mosaic tile installation in order to ensure that grout joints are square. Draw layout lines that cross perpendicular lines and split the surface in half from top to bottom and left to right. The majority of specialists begin the installation procedure in the precise center of the surface, placing each tile sheet in its entirety prior to making any necessary cuts along the sides and around obstacles. Beginning at the junction of the layout lines, apply a layer of thin-set glue to one of the layout quadrants, working in 2 to 3 foot square sections. Avoid applying excessive amounts of adhesive; the cement board should be visible in the grooves. Apply the first tile sheet to the corner of the first quadrant, adjusting it with your hands to ensure that it is perfectly square with the layout lines. Press down to securely embed the tile in the thin-set. As you gradually release your palm from the tile, keep an eye out for any slipping that may occur during the holding phase. Install adjacent mosaic sheets in the first quadrant using tile spacers, ensuring that the gaps between the sheets precisely match the spaces between the individual tiles on the sheets. In order for mosaic sheets to interlock, little tiles are spaced apart on each sheet. Ensure that the grout joints are evenly spaced over the tile surface.
 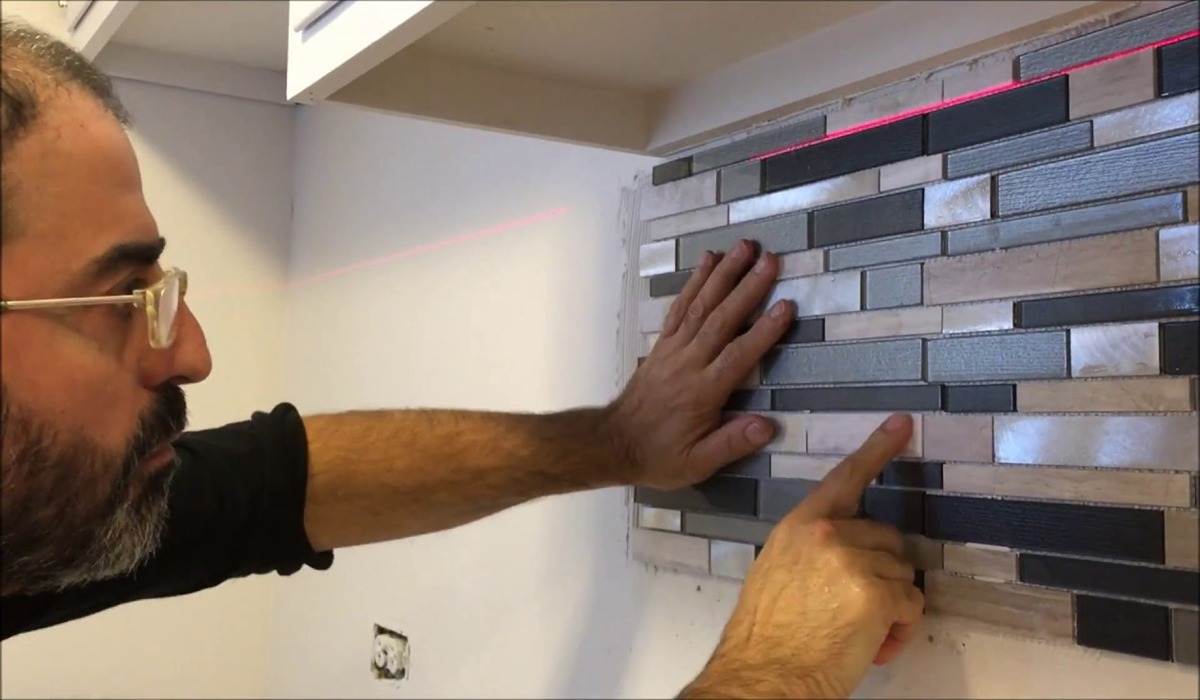 Mosaic sheets can form ripples or waves on the surface, which differs from the behavior of a single large tile. To avoid this, tap the mosaic sheet into the thin-set with a rubber mallet and a small piece of plywood (about 8 inches by 8 inches) after every few sheets have been placed. By leveling the tile area, a beautiful smooth surface is produced. Pay particular attention to the seams between the sheets to guarantee that there is no lippage (when one row of tiles is higher than the surrounding row) or slippage (where gaps between sheets are wider than the grout gaps within the sheets). As you approach the perimeter of the tiled area, it is likely that you will need to trim tile sheets to size. In certain instances, you may make a partial sheet that is the exact size you need by simply cutting fiberglass mesh, but in other instances, you may need to trim each edge tile individually. Avoid doing so whenever feasible; you may be able to cover the gaps around the plan's perimeter with baseboard moldings, cove tiles, or other decorative elements. To minimize the size of the sheets, just use a sharp utility knife to remove the mesh backing at the grout seams. The cut tile sheets should be installed similarly to the whole sheets. There are several options available for separating individual tiles from the sheet. Similar to how full-size ceramic tiles are put through wet saws, tile sheets may also be fed through them. This is by far the simplest approach for cutting tiles when undertaking really large tiling jobs that require a great deal of cutting. Wet saws may be rented from hardware stores and tool-leasing companies. Simple wet saws are fairly priced and a good investment if you work with tiles regularly. Another option is the tile nipper, which resembles a pair of modified pliers and may be used to "nibble" each individual tile square inside the sheet. Alternately, you may use a rail cutter to score a whole row of tiles (also known as a snap tile cutter).
 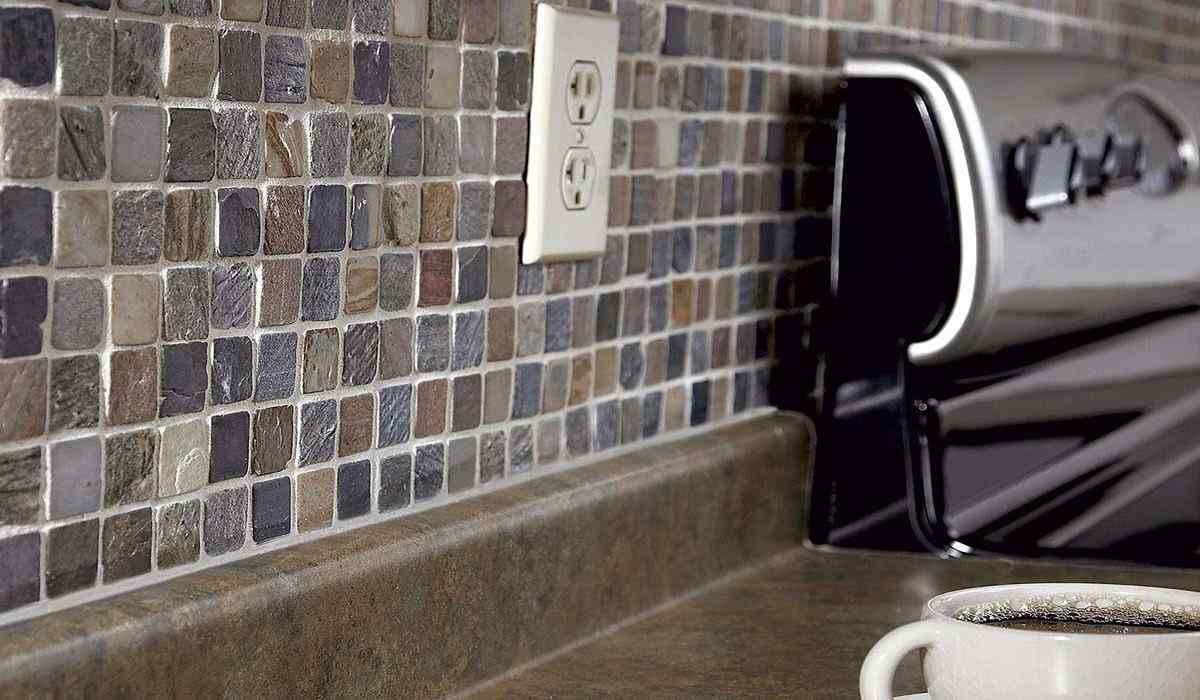 Then, using the tool's pivot lever, each tile in the sheet may be snapped individually. Once one quadrant has been completed, repeat the preceding steps to finish the remaining three quadrants of the tile project, one at a time. From the center of the plan, go outward to the quadrant boundaries. Install the trim or accent tiles used to complete the project. This might include baseboard or cove tiles or bullnose edging. Additionally, a thin-set glue is utilized to adhere to them. After all the tiles have been installed, let the installation set for a short period before grouting. Mix a batch of grout from dry powder once the mosaic tiles are securely adhered to the thin-set and cannot move (or you can use pre-mixed grout for small jobs). Utilize sanded grout when the grout seams are wider and unsanded grout when the grout seams are 1/8 inch or less. 1 Follow the manufacturer's directions for combining. By loading the edge of a rubber grout float with grout, you may apply it to the tile's surface. Using many passes of the grout float while holding it at a 45-degree angle to the surface, push the grout into the joints. The grout is driven deep into the joints by the edge of the float. To ensure that the grout thoroughly fills all joints, you must reverse the position of the grout float. Continue until all joints are filled with grout. As there are numerous grout joints when dealing with mosaic tiles, this may take some time. Use the grout float's edge to remove a large amount of excess grout from the tile surface. Since tile grout is permeable, it must be sealed to protect both the grout's quality and the underlayment. This is particularly important in wet conditions, such as showers. Before applying a sealer according to the manufacturer's instructions, the grout must be completely dry and cured. If you've chosen to install mosaic ceramic tiles for your kitchen backsplash you can contact our sales managers to receive the relevant catalogs and price list.
Thank you very much for explaining in detail how to stick stylish mosaics for kitchen backsplash
Installing mosaics in the kitchen is not a difficult task, but you must know it
0
0
Usually, the kitchen splash is attached to the kitchen with the help of quality adhesives
0
0
It was a very useful article. Thank you for posting this useful information on the good site of Arad
0
0
Read this article to learn how to install this product It is a very good article
0
0
Hello, installing a mosaic kitchen backsplash that is made of colored mosaics and ceramics and makes the kitchen very beautiful and modern
0
0
These bananas, while they are comfortably placed, give off the appearance of the kitchen
0
0
Nowadays, backsplash tiles can be easily installed with tools
0
0
Thank you for the information and experience you have provided us with installing splash in kitchens because it is very practical and needed by us.
0
0
You can use tiles, mosaic, marble, etc. to beautify the walls of the kitchen
0
0
This product is suitable for construction and has high efficiency for builders
0
0
0
0