اتصال به اینترنت شما ضعیف یا قطع است.

The Price of stair ceramic tiles products + Wholesale Production Distribution of The Factory

This article will guide you on how to install ceramic tiles on your building’s stairs. Stairs tiling is an innovative and uncommon approach to enhancing a hallway or outdoor space. Determine the length and width of each step to be tiled using a measuring tape. In addition, measure the vertical length of the risers, which are the facing-your-feet back surfaces that make the steps ascend. Multiplying the two dimensions together will get the needed square meters for the project. When working with regions of irregular shape, it is advantageous to divide the area into a number of smaller segments that may be computed independently and then joined together. Always reserve an additional 10 percent to accommodate for breakages, cuts, and waste. It is suggested that 10-15% room be left between each tile when employing a brick bond pattern. If you are unsure, you may simply take the dimensions (height and width) of each step you will be tiling to your local hardware store, where the staff will be able to provide you with guidance. When selecting a floor tile for any purpose, the tile's adaptability and slip resistance should be given careful attention; this is especially crucial when tiling outdoor stairs. Slip-resistant stair nosings may be installed as an extra safety measure. Concrete must be at least six weeks old for the movement caused by drying shrinkage to have occurred. The concrete must be level, clean, dry, and free of dust, laitance, and any other contaminants that might act as release agents and prevent the adhesive from sticking to the concrete. If the concrete has a dusty look, the loose particles can be removed by dry brushing it with a wire brush. Reduce the absorbency of the concrete and limit the dust by using a BAL APD primer that has been diluted with water 1 to 1. Before commencing the tiling process, it is essential to ensure that the subfloor is dry. If there is any doubt, a moisture level reading should be acquired to confirm. Using a spirit level, ensure that the step is level, and if it is not, add an appropriate leveling compound; this will provide a professional finish. 
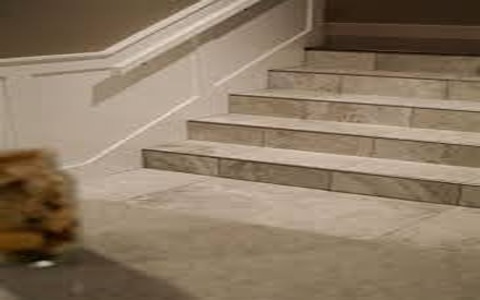
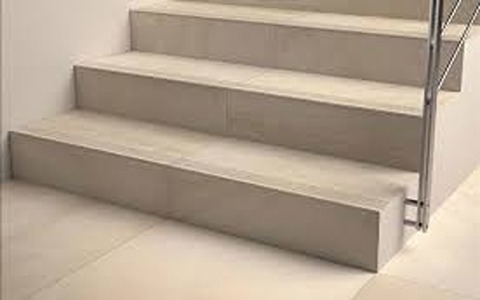
If you like a neat finish on the edge of an outdoor step, you may wish to place bullnose tiles along the edge. As long as the subfloor is properly prepared, tiles may be glued to almost any flooring substrate. The ground must be precisely smooth, clean, and devoid of dust, oil, and other foreign particles. Every surface must be completely stable, with no discernible movement (known as deflection). In order for the stairs to be able to hold the additional weight of the tiles, it may be necessary to strengthen them in addition to removing their deflection. Consult a professional for advice on how to increase the stability of your staircase. To prepare the wooden stairs and surrounding area for the installation of the tile, remove any trims, carpets, rugs, and other objects from the vicinity of the stairway. Remove any nails, tacks, or staples from the wooden stairs. Remove the front nose board from each stage. The nose board is the portion of each step's tread that extends beyond the vertical backboard (also known as the riser). Cut the nose board so that it is flush with the riser using a jig saw, a multi-tool, or a circular saw. The cut area is sanded in order to create a level and smooth surface. Sand the surface using an electric sander before finishing by hand with sandpaper. Remove any mud and other debris from the stairs. The area should next be swept, and each step should be cleaned with a damp sponge or cloth. After creating the step, you may discover that you need to go above and beyond; in this instance, you may consider using WBP-grade plywood that is at least 15 mm thick. The most difficult aspect of tiling a wooden stair is that each step will move up and down. This effect is called deflection, and it appears as a sensation like a minor spring or bounces while walking on such a surface. If this movement is not corrected prior to tiling, there is a great likelihood that the grout will crack or fall out of the joints and that the tiles will lift and shatter. Depending on how free from deflection the structure is believed to be, the floor will be analyzed to determine whether or not a tiled finish may be placed. A water-filled glass tumbler should be positioned in the center of each step and kept there for a few minutes to establish the stability of the steps. Warming up involves bouncing up and down on the step while standing on each side of the tumbler. If water were to spill from the glass, the floor would require reinforcement. It is crucial to note, however, that in some installations, a staircase may not be able to withstand the added weight of tile without significant bending, even after being reinforced with an overlay. Even though the staircase can hold the weight of the underlying overlay, this is the case. After completing the necessary preliminary work, you will finally be allowed to begin tiling. Place the initial tile on the apex, and then work your way down. Since the general guideline is to progress outwards from the center, your primary goal should be to ensure that the center of each step is in the correct spot. Mark the precise center of each riser using a marker. This should be the spot where the initial tile is laid. The others will be placed alongside it, one on each end. Beginning with the risers, tile the stairs working your way down. Apply the tiles to the face of a vertical step riser so that the top edge is flush with the edge of the horizontal stair tread, and then apply adhesive to the back of the tiles using a trowel. The tiles should be aligned such that the upper edge is flush with the edge of the tread. Throughout the installation procedure, an L-square must be used to guarantee that the stair raisers are put at the right angle. It is crucial to pay close attention to this aspect in order to guarantee that the stairs are tiled properly. For the purpose of evaluating this aspect, the L-square must be utilized on both sides of the step. Install the tiles on the surface of the stair tread, aligning each tile's edge so that it is flush with the edge of the tile that was previously installed on the vertical stair riser. To ensure that the tile will stick well to the adhesive, place it on the adhesive bed, press down on it, twist it, and then slide it into place (for larger tiles, it may require a thin layer of adhesive on the back of the tile as well as the step). Using a spirit level or straightedge, the tile should be examined for evenness and flatness in both directions, and then a tile spacer should be set between each tile. Do not press the tile down so that it fits flush on top of the stair riser tile; instead, leave a grout-filled space between the two. If the tile is placed immediately on top of the tile, it will be subjected to severe tension and strain, which may cause cracks, chips, or even detachment from the stairs. Use spacers of at least 3 millimeters on interior stairs and at least 2 millimeters on outdoor steps to provide uniform spacing between tiles. If necessary, tiles can be cut to size with a tile cutter. The following day, the face of the tiles will require a final cleaning with Fila First Wash and the use of cleanup pads in order to remove the polymers left behind by the grout. In the case that the polymers are not eliminated, a haze may remain on the tiles' surface. After the tiles have dried, polish them with a clean cleaning cloth until they are pristine. Now that you’ve learned how to do a tiling job on your stairs, contact our sales managers and choose your desired stair tiles.

How useful is this article to you?

Average Score 5 / Number of votes: 1

Comments (15 Comments)

Chernobil

Thank you for the complete explanation about installing ceramic tiles on the stairs. It was very useful and informative

Salma

Using ceramic tiles for stairs makes them more beautiful and stylish

Mari

Ceramic stairs are very stylish and beautiful and easy to clean

Zahra movahedifar

Hello, good time. As you know, ceramic tiles are used in the design of stairs in buildings, which is very elegant and stylish.

Asli

Those who like to install ceramic tiles on the stairs by themselves can learn the best method from this article

Sohila

The stairs are measured and the ceramic tiles are cut to the size of the stairs with a cutting machine

Elmira

Hello, good day. Thank you very much for your good content. You really told me the small points that we should follow while working.

P.b

These tiles and ceramics that are used for stairs, one must be strong and two must not slip and fall, which will make people buy it with confidence.

Tara

Those who like to install ceramic tiles on the stairs by themselves can learn the best method from this article.

Reza

We must be very careful in choosing tiles or stepping stones, because if we use slippery tiles, we will have problems later

rahmani

Ceramic tiles are known as the most important building covering, especially on the floor of the building. Choosing a high-quality ceramic for the floor of the building on one side and installing it on the other side. No matter how good material you have chosen, you cannot get the desired result until you have a correct and standard installation.

Sakina

Hello and dear friends, these paving stones are very suitable and high quality for the entrance of the building, the floors of the rooms and especially the corridors, and they have a good price.

Pari

To install ceramic tiles on the stairs, you must get the help of experienced people because installing them requires special materials that not everyone can do alone.

Noshin

One of the best spaces where you can use patterned tiles is the swimming pool. Many people use indoor and outdoor swimming pools in their gardens and homes.

Anjel

Stair tiling requires a lot of precision and concentration and this article will guide you in this field

💰 Tenfold your income 💎