There are going to discuss implementing a metal gable roof and types of installation Metal gable roofs are one of the most popular types of roofs in the country, thanks to their beauty. Of course, it is not recommended to implement such roofs in all areas of the country, especially in high-wind areas. To learn more about this type of roof, types of metal gable roofs, and how to implement it, read the rest of this article. What does a metal gable roof mean? A metal gaبble roof is a sloping roof made using colored galvanized sheets. Sinusoidal galvanized sheet is most used in the construction of metal gable roofs. A metal gable roof is basically a false roof that is triangular when viewed from the front. The main purpose of a metal gable roof is to add to the aesthetics of the building and to collect water from snow and rain to protect the roof from moisture and seepage. This type of roof is widely used in the northern regions of the country, where metal gable roofs with different slopes are seen. The minimum inclination of such roofs is 15° and the highest is 70°. How many types of metal gable roofs are there? The most important difference between metal gable roof types is the way the panels are placed and their angle relative to each other, creating the overall shape of the roof.  This type of roof is named according to the number, and the more roofs there are, the higher the cost of the roof. There are several types of metal pitched roofs, each with its advantages and disadvantages: single metal gable roofs the cheapest type of metal gable roof is the single girder type. Also, this type of gable roof is easy to implement, and you don't need many experts to implement it. The water collected on these roofs is also drained very quickly, therefore, it has a higher lifespan than other types of metal pitched roofs. One of the other advantages of a single girder metal gable roof is the low amount of material required for its construction. Four-bay metal gable roofs Using four metal gable roofs allows you to design the empty space of a building and increase its dimension. The use of this type of gable roof is mainly used for buildings where all parts are discontinuous. One of the advantages of a four-bar metal gable roof is its aesthetics. Multilayer Metal Gable Roof Metal gable roofs are several times stronger than other types of metal gable roofs, and the rain and snow that collects on them dry faster due to the wind. How to implement a metal gable roof? The most important and main stage of implementing a metal gable roof is its foundation. A proper foundation increases the durability and strength of a gable roof. In the following, you will become familiar with the step-by-step steps to implement a metal gable roof: infrastructure Liners for gable roofs are usually done with wooden or metal profiles.
  tep. Choosing the right ironwork material and how to implement it depends on the slope of the roof, and according to experts, a 32-degree slope is the best type of slope for metal gable roofs. In the construction of gable roofs, metal tanks are installed parallel to the beams at 70 to 80 cm. Sheet cutting and preparation After pot roofing, it's time to cut the galvanized sheet. The galvanized sheet shall be cut longitudinally, and the length of each sheet shall not be less than 10 meters. Scissors, grindstones, and circular saws can also be used to cut boards. Although cutting boards with a grindstone is faster, it is safer and more accurate to size with scissors for the job. After cutting the sheet, you should use a drill-to-drill hole in its edges to prepare enough space to close the screws. These holes should be at least 15.3 cm from the edge of the board. Temporary installation of panels at this stage, the gable panels should be placed horizontally over the roof beams and placement should be complete. To prevent the sheets from falling off, they can be temporarily closed with plastic. Make sure each sheet overlaps its side sheets by about 5.5 cm. final level After the panels are placed on the main beams and substructure, the outer edges of the panels should be tightened with screws and polycarbonate washers. Once the work on one side of the roof is complete, the boards on the other side should be installed with a cover between the sides of the roof. It is also necessary to install gable gutters on the edges of the metal gable roof because, without them, the water collected on the roof cannot easily transfer to the ground.
 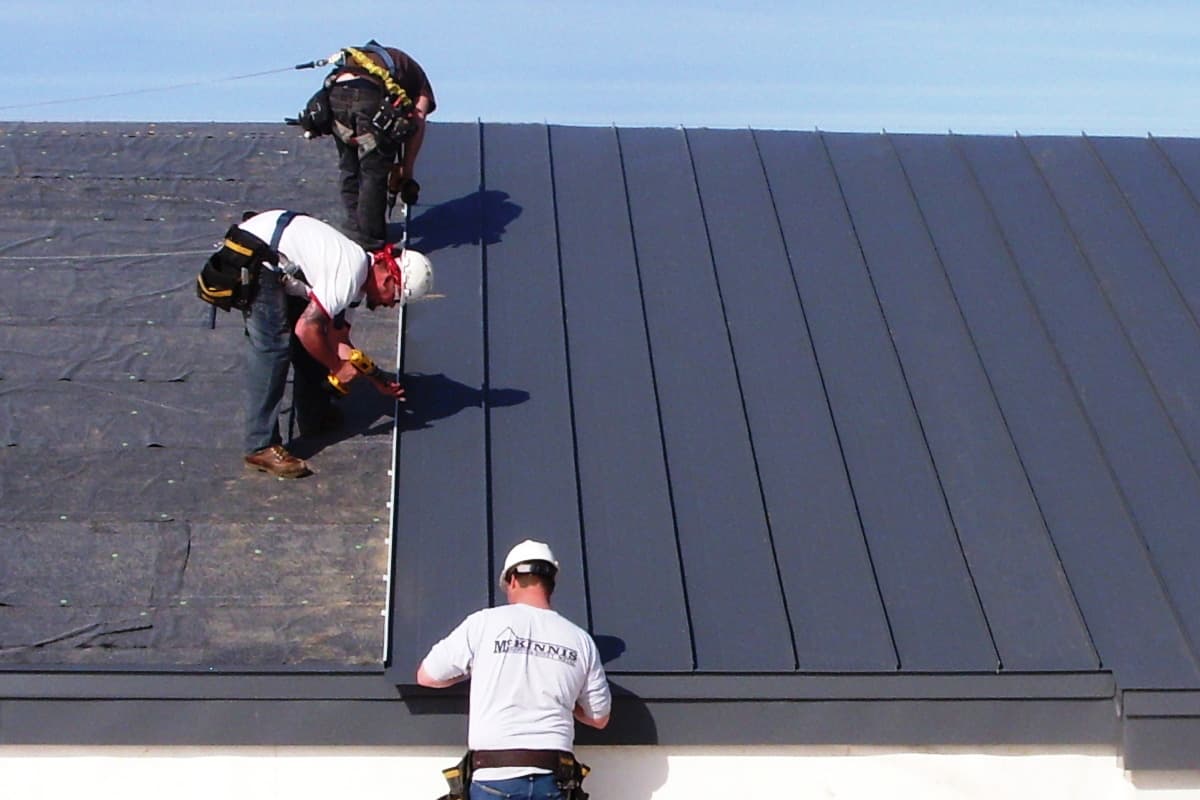 What factors does the cost of a metal gable roof depend on? If you plan to roof your building in gable form, in addition to asking about the price of the main building material (such as the price of rebar), you need to understand the factors that affect the cost of a metal gable roof. After the price of iron, profile tanks, and galvanized sheet, the most important factor affecting the cost of a gable roof is its slope and quantity. The lower the slope of the roof and the higher the number on it, the greater the number of gable panels required for its implementation, and again, the cost of implementing the roof increases. Of course, determining the slope of the roof depends on the purpose of the building. The brand of the galvanized sheet used in roof construction also has an impact on the cost of its implementation, some factories have a larger weight or width of galvanized sheet, so their sheet price will be higher than others. In addition, the method of galvanizing the sheet has an impact on its price.
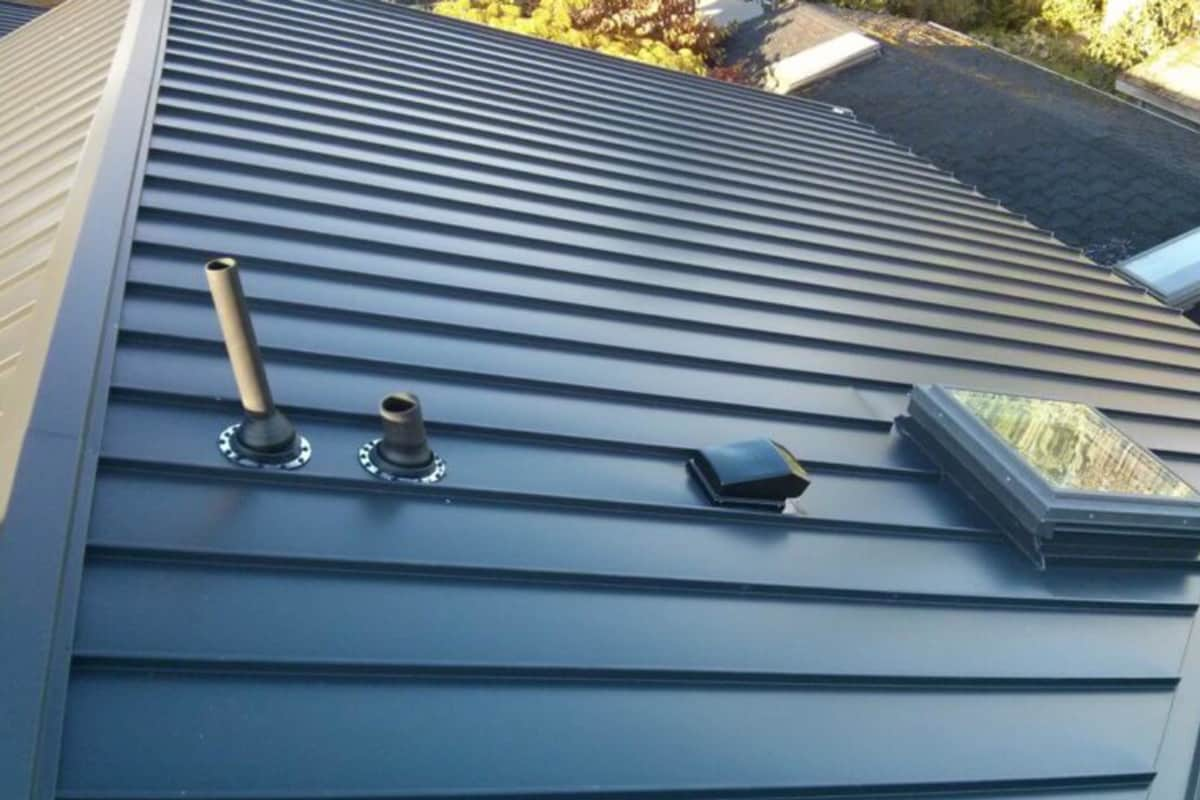
Types of Installation Metal Gable Roof
There we explain the step-by-step installation of metal roofing and 1- Apply the following the first layer on top of the plywood or OSB roof is the liner. For this, we chose a self-healing ice water membrane to protect the shallow roof deck. The tricky part is keeping the pads smooth and wrinkle-free. Open the bottom layer of the roof while removing the adhesive from the lower half. Layers should be placed six to eight inches apart. After opening the bottom layer, cut it flat and pull the rest of the adhesive from underneath. 2- Order panels according to scale, if possible, avoid creating seams on the roof. They don't look good and may cause water to get under the panels. I cut the metal ceiling to the length of the ceiling. They are nearly 32 feet long and must be transported on a flatbed trailer. Of course, you'll need a large elevator to lift the panels above the roof. If you don't have one, you'll need to order a more manageable length. 3- Bend the end of the trim off Cut and bend the front end to wrap it in the corners before installing the trim. A series of one-inch cuts and aero cuts are made at each bend to create labels. Hand caulk folded tabs to meet walls or corners, or to close gaps created by trimming. Each trim has a different shape and requires unique cuts and bends.  4- Close the edge of the edge Mount the flash securely to the panel and secure it to the roof deck on the base plate with 1" roofing pegs. In warm climates, the leader attaches before the undercoat. Ice dams are common in northern Wisconsin, and we install them over pads to protect the entire roof from the dam. 5- Connected and overlapping cuts Where the ends of the trim meet, you join them together. First, cut the hem of the underwear trim at an angle. After installing the gasket trim, apply a sealant to the top. Open the hem of the overlapping trim and slide it over the beveled hem of the underlay trim. 6- Paste the square guides square guides are important for an even installation on the ceiling. Use the 3-4-5 method to create guides at 90 degrees to the edge. First, make a mark along the edge three feet (or any multiple of three) from the corner. At that mark, measure four feet (or multiples of four) toward the ridge. Then, measure five feet (or multiples of five feet) from the original corner and mark where it intersects the second mark. Draw a line from the first three-foot mark to the intersection of the second and third marks. Since the Getaway roof is larger, I measured 21 feet, 28 feet, and 35 feet (seven times three, four, and five) to create my square guides. 7- Adjustment panel Places each metal panel on the inner foam wrap strip. The strips are designed to match the corrugated surface beneath the panels and keep insects and water out below. Place the closure strip about an inch along the edge and secure to the panel with butyl tape. Apply caulk to the closing tape, then adjust the panel so it overhangs an inch from the edge of the edge. Adjust the panel so that the measurements from it to the guide are the same at the top and bottom.
  8- Turn the screw correctly and securing the panels is the key to waterproofing the roof. Here's what you need to know: On the edge of the rim, place the screws on either side of each rib in a row to thread through the bubble wrap tape. The spacing between each row should not exceed 24 inches, with one screw for each rib on the overlapping side. Starting at the bottom, glue the panels in rows, working towards the ridge. The screws lay flat on the roof. Bent screws do not seal. Do not over-tighten or over-tighten. Tighten just enough to squeeze the rubber washer to the edge of the screw head, not over it. Clean any metal chips or holes immediately. They will call. 9- on the panel the two edges of the metal panel are different. The overlapping edges have a short, ribbed bottom that does not touch the ceiling surface when laid flat. The bottom of the rib has a drainage or anti-siphon channel to keep water flowing to the edge. Overlap the last rib on each panel. They should be perfectly nested together. 10- Cover the edges of the rake After all the panels are closed, it's time to install the gable trim. This cleans the edges of the panels and prevents rain and snow from getting under the roof panels and siding. After bending the end of the trim to meet the corner of the lip, apply butyl tape to the underside of the trim, which is on the flat surface of the roof panel. Press it into place and tighten the screws every 12 inches on the butyl tape.
  11- Tighten the stack cover for the roof cover, use butyl tape to stick a row of closing tape four inches from the peak. This is where you screw the stacking cover to the roof. Apply a coat of sealant to the foam cover, then place the stacking cover on top and attach it to the roof deck with two-inch screws through each rib. By completing the roof cover, all the water that falls on the roof is drained from the roof without touching the bottom layer. All information mentioned above providing to the buyers who want to know and buy metal steel products with professional and innovative thoughts, and passionate and enthusiastic attitudes. We are eager to do what we do and strive to further the needs of our customers by providing quality products and services. And do not hesitate to any questions our support teams are available. For more information kindly visit our site.