how to cut slab tiles vs concrete slab tiles
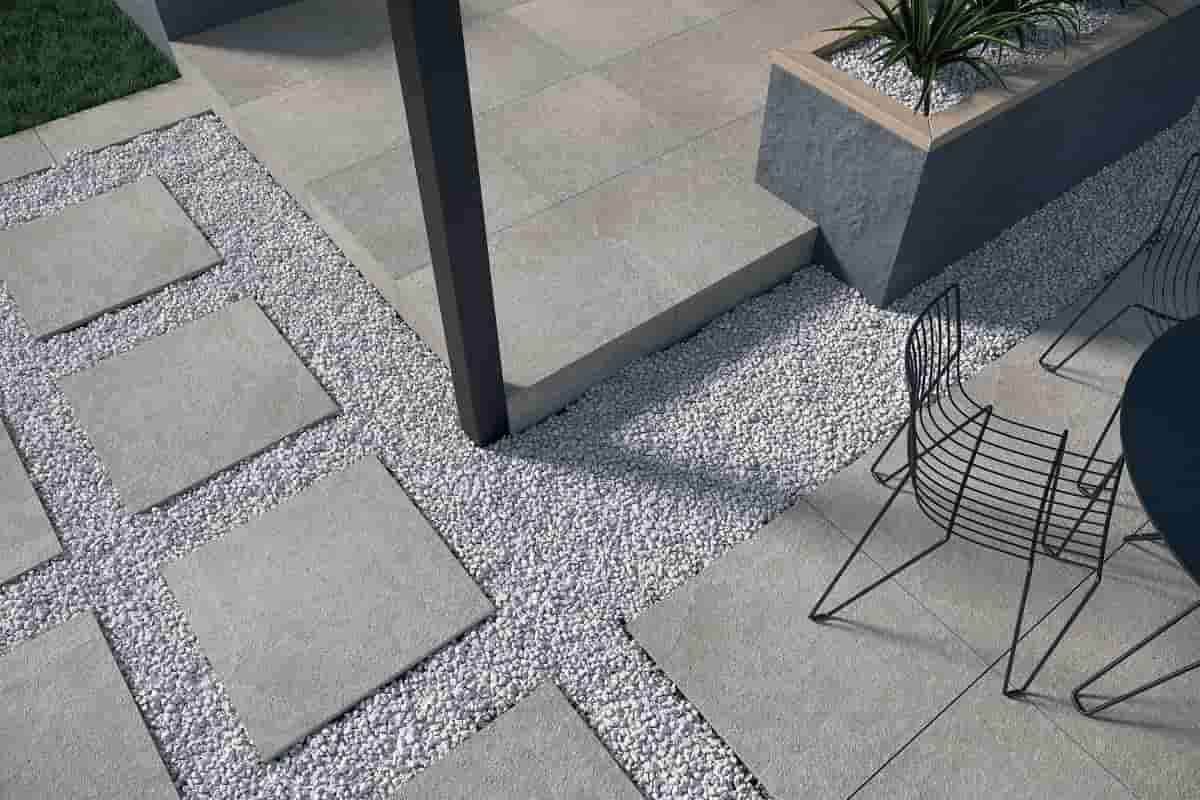
When comparing slab tiles vs concrete slab tiles, the question of how to cut them is always common. Large format or slab tiles are larger tiles that now have a huge influence on the market.
slab tiles PRICE
It has taken manufacturers a few years of research and development with prototypes to produce high-quality ceramic and porcelain tiles in big sizes, with thicknesses starting at 3 mm.
This kind of tile is exceedingly tough to handle and incredibly difficult to drill and cut in a way that results in sharp edges and no chipping. The proper porcelain slab cutting tools are required for it.
The main issue with tiles nowadays is not their component materials, which are typically far better than they were in the past, but rather their overall brittleness.
One of the most important considerations when cutting huge tiles is the length.
For instance, when discussing big format porcelain tile cutters, the challenge is creating an incision that won't contribute to the crack spreading along the tile's full length when pressure is applied for splitting.
This is very challenging when using Kerlite "Cotto D'Este" or other tiles made of Granite Fiandre that are 1.5 m long or longer.
Another issue related to the excessive length of these kinds of tiles sometimes surfaces while drilling holes for facilities.
What is the best method for cutting large-sized tiles, then?
The tile may shatter or split entirely during handling if the hole is not made in the proper professional way, which entails generating a "clean" circular hole that is continuous and complete.
Making square holes before the tile is set is very risky in this situation as well because cracks may begin to show from the square corners of the hole as a result of the tile layer accidentally twisting the tile while moving it or installing it.
Now we must underline that since there is a considerable danger of shattering tiles that are expensive and may cost several hundred euros, the issues we have discussed are incredibly noticeable for big format tiles and call for extra care.
Due to the qualities of these large tiles, only a select few skilled teams can successfully install this kind of product to provide a "state of the art" finish.
Please be aware that architects, surveyors, and interior designers are driving the industry in this direction by increasingly requesting this product.
You may also find it interesting to read and consider the piece that follows, which discusses the use of tiling equipment intended particularly for drilling and cutting big-size tiles.
The Montolit Masterpiuma 125P2 Tile Cutter was shown at the 2010 Cersaie Fair as a tile cutter 155P2 for 155 cm tiles.
Please watch our brand-new, high-definition video, which demonstrates a step-by-step tutorial on how to use the new manual tile cutter 155P2 with its comfortable companion stand, the "Vertigo."
slab tiles FOR KITCHEN
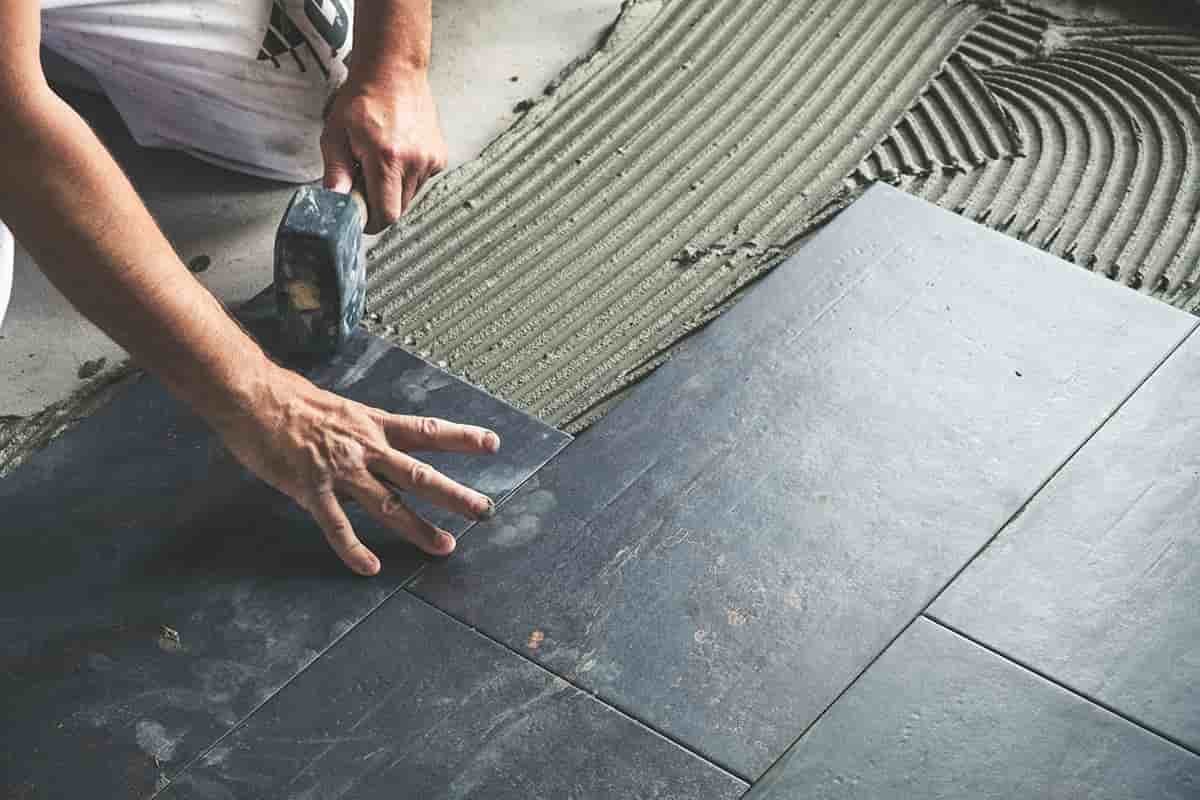
The first portion of the movie demonstrates how to use a tile cutter to cut large-sized porcelain tiles while working on the floor. Although this method of cutting is the most common, it may also be the most harmful and taxing on the operator.
In fact, because of the challenging and unnatural position required for this kind of employment, it may eventually result in bodily issues. The most strained areas are the back and knees.
In addition, there is a technical issue with the incision when cutting big format porcelain tiles (90, 100, or 120 cm).
The extreme length of the tile forces the fitter to begin the incision, which is problematic for the individual for obvious reasons related to the length of the arm because they are unable to complete the incision all the way to the end of the tile. This problem can occur when working on the ground or on a raised work table. As a result, the incision process must be stopped to adjust the body and resume writing.
In essence, the incision is not continuous, which causes the exercise to be stopped, greatly varying the etching pressure in various areas of the tile.
A brief, "jerky" incision action on tiles results in an uneven incision line that is not of consistent pressure or depth, leaving blank spaces on the tile. When pressure is applied to a split tile after incision, this will cause the tile to swerve off course.
Our tech group researched possible solutions and created the "Vertigo" stand as an attachment to put the cutter atop in order to prevent this issue on really lengthy and pricey tiles.
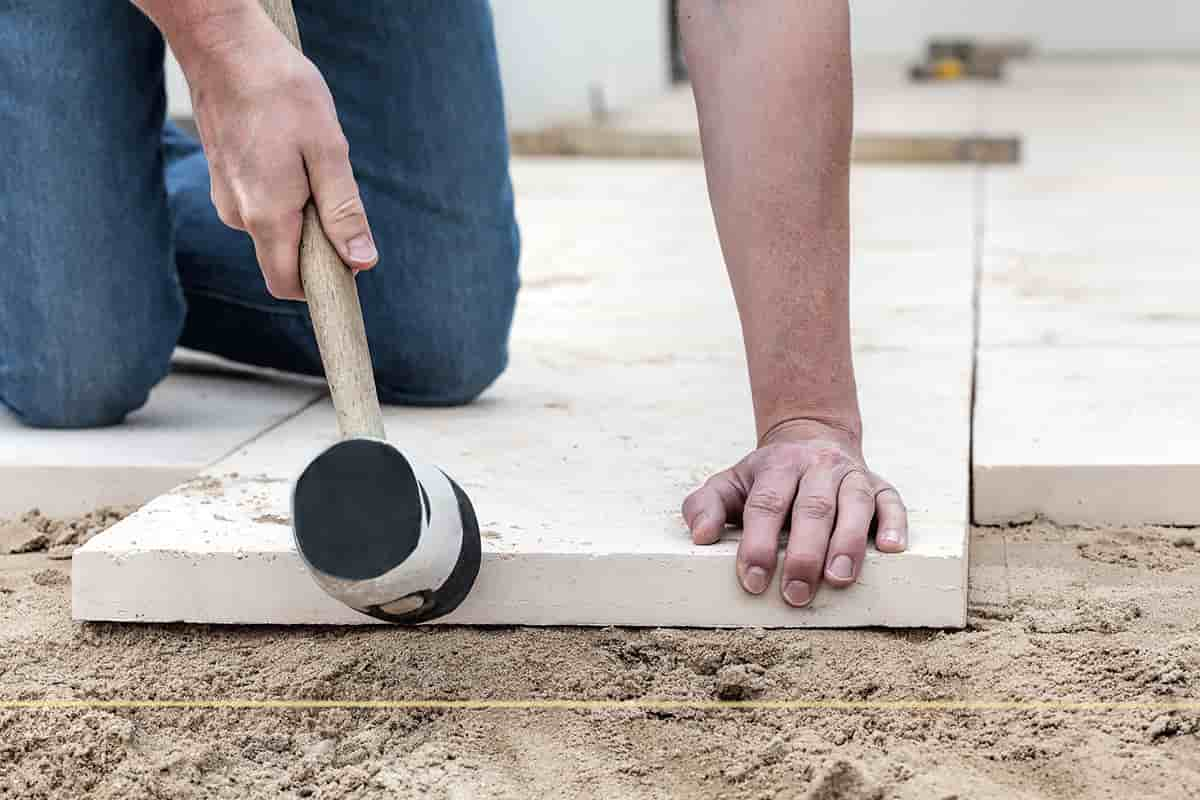
With the help of this accessory, the tiler may cut the tile easily and interruption-free while maintaining continuous pressure from start to finish, considerably lowering the danger of breakage. The Vertigo keeps the tile cutter in a nearly vertical position.
Also: Two more significant benefits of using the cutter in a nearly vertical position are:
It drastically lowers back and knee pain and frees up space in the workspace to safely handle other tools and materials. It also significantly minimizes the cutter's footprint in the workspace.
The vertical cutting of a particularly thick tile is specifically shown in the video.
In this instance, following the incision, another tool named "Big Foot" is utilized to make it simpler to break this tile. This unique tool is intended to be used with thick tiles. The broad, thick, and very durable steel pressure pad of this item enables more pressure to be exerted to break the large, heavy tile.
Additionally, the bigger Masterpiuma Tile Cutters may be utilized in the traditional horizontal position.
This product aims to enhance the tile layer's working environment while simultaneously developing a tool that may reduce the chance of breaking big format tiles, which are becoming more and more well-liked and suggested by designers and architects.
 concrete slab tiles
Slabs of plain concrete tiles were used as the flooring material for utility rooms, garages, patios, and basements for many years.
However, concrete is now a suitable option for house interiors as well, since it may be polished, etched, or stained to create a finished flooring surface.
The numerous benefits of concrete as a flooring material may come as a surprise if you are accustomed to thinking of it as a utilitarian surface appropriate solely for utilitarian surfaces.
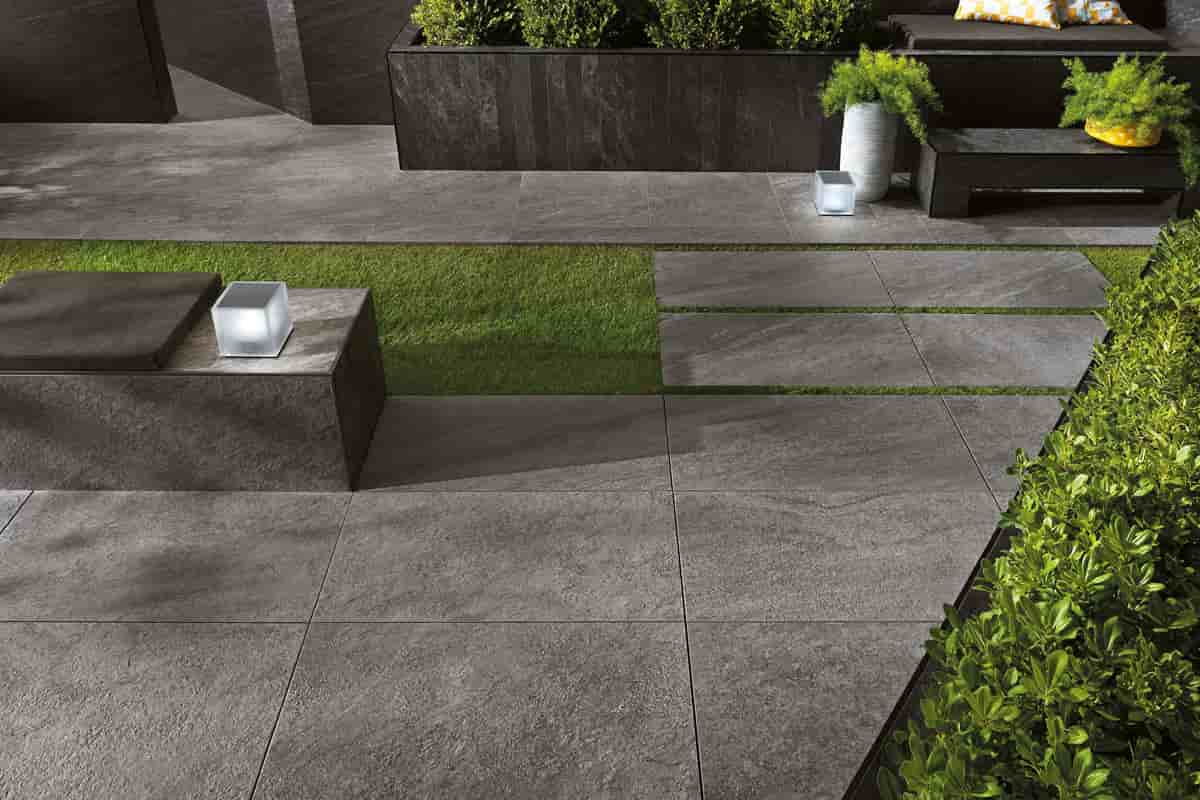
Although they are not a suitable aesthetic match for every house, concrete may create some of the most beautiful and exquisite floors you have ever seen.
If laid and maintained correctly, a concrete floor is robust and resilient and may endure the whole time you own the home. Additionally, the design choices are surprisingly varied.
However, concrete is also exceedingly cold and hard to walk on, making it only suitable for basements of houses constructed over basement foundations or residences with slab-on-grade foundations, where there is already a concrete slab in place. These flooring may be vulnerable to moisture evaporating into the living area because they are "on-grade"—directly in touch with the soil.
Cost of concrete floors
There are numerous different finish choices for concrete floors, which makes the installation cost fairly variable. The price of a simple floor may be as little as $2 per square foot or as much as $30 for luxurious, beautifully rendered flooring.
$2 to $6 per square foot for basic design. Pouring the slab or overlay, followed by a straightforward polishing and single colorizing treatment, are the steps in a simple concrete floor design (staining or dyeing).
Design in the middle range: $7 to $14 per square foot. The slab or overlay is poured together with polishing and multicolored staining in this pricing category.
Luxury architecture costs $15 to $30 per square foot. The most advanced (and costly) concrete floors may have various colors, a range of texturing or stamping methods, and the creation of geometric patterns in the slab or overlay. These floors are extremely creative.
Concrete floors may last a lifetime if they are sealed and maintained correctly. Concrete may last for many years in high-traffic areas, even in commercial applications.
When compared to upgrading your flooring every few years, this may save you a significant amount of money and time in the long term.
concrete slab tiles
Slabs of plain concrete tiles were used as the flooring material for utility rooms, garages, patios, and basements for many years.
However, concrete is now a suitable option for house interiors as well, since it may be polished, etched, or stained to create a finished flooring surface.
The numerous benefits of concrete as a flooring material may come as a surprise if you are accustomed to thinking of it as a utilitarian surface appropriate solely for utilitarian surfaces.
Although they are not a suitable aesthetic match for every house, concrete may create some of the most beautiful and exquisite floors you have ever seen.
If laid and maintained correctly, a concrete floor is robust and resilient and may endure the whole time you own the home. Additionally, the design choices are surprisingly varied.
However, concrete is also exceedingly cold and hard to walk on, making it only suitable for basements of houses constructed over basement foundations or residences with slab-on-grade foundations, where there is already a concrete slab in place. These flooring may be vulnerable to moisture evaporating into the living area because they are "on-grade"—directly in touch with the soil.
Cost of concrete floors
There are numerous different finish choices for concrete floors, which makes the installation cost fairly variable. The price of a simple floor may be as little as $2 per square foot or as much as $30 for luxurious, beautifully rendered flooring.
$2 to $6 per square foot for basic design. Pouring the slab or overlay, followed by a straightforward polishing and single colorizing treatment, are the steps in a simple concrete floor design (staining or dyeing).
Design in the middle range: $7 to $14 per square foot. The slab or overlay is poured together with polishing and multicolored staining in this pricing category.
Luxury architecture costs $15 to $30 per square foot. The most advanced (and costly) concrete floors may have various colors, a range of texturing or stamping methods, and the creation of geometric patterns in the slab or overlay. These floors are extremely creative.
Concrete floors may last a lifetime if they are sealed and maintained correctly. Concrete may last for many years in high-traffic areas, even in commercial applications.
When compared to upgrading your flooring every few years, this may save you a significant amount of money and time in the long term.
 slab tiles SIZE
upkeep and repairs.
Concrete flooring starts with a structural concrete pad that is incredibly robust and long-lasting by nature, which is why it is so well-liked in busy commercial spaces like garages and warehouses.
Similar advantages apply when using concrete as a flooring material for homes. High heels, furniture legs, and pet claws won't scratch the surface, making it tough to ruin.
Additionally, you shouldn't be concerned about most fallen goods damaging you. Although it is conceivable, it takes a lot of effort to chip or damage a concrete surface.
A concrete floor is quite simple to keep looking its best. Depending on the traffic volume, it must be sealed or waxed every one to three years to preserve the protective coating.
In addition, you may sometimes sweep the floor clean with a neutral cleaning product. Try a blue utility pad for stains that are very difficult to remove.
Concrete floors are prone to settling and cracking with time, and this is an issue that occurs more often when an old structural slab has been converted to a completed residential flooring surface, such as when a basement or loft condo has been turned into a home. If the floor develops significant cracks, it may be patched, ground, and refinished to regain its gloss.
Design
Concrete flooring complements contemporary or industrial-style houses well, but they don't combine well with traditional, antique home designs.
For instance, a polished and acid-stained concrete floor might suit rather well into a contemporary-style home but would certainly seem out of place in a traditional colonial-style house.
Long gone are the days when a concrete floor simply meant a slab that had been laid and polished. While a simple polished slab is sometimes all that is required, homeowners also have access to a number of texturizing and coloring methods:
In order to revitalize an old slab, a thin coating of fresh concrete is applied over it. After that, the overlay is polished and colored, much like a fresh slab.
Polish: To achieve a glass-smooth surface, a basic poured slab or overlay may be polished with increasingly finer abrasive pads. After applying a sealer, the floor becomes really beautiful and shiny.
Acid-stained: Concrete reacts with moderate acids to produce a mottled, multicolored surface that resembles marble. Every level is really different.
slab tiles SIZE
upkeep and repairs.
Concrete flooring starts with a structural concrete pad that is incredibly robust and long-lasting by nature, which is why it is so well-liked in busy commercial spaces like garages and warehouses.
Similar advantages apply when using concrete as a flooring material for homes. High heels, furniture legs, and pet claws won't scratch the surface, making it tough to ruin.
Additionally, you shouldn't be concerned about most fallen goods damaging you. Although it is conceivable, it takes a lot of effort to chip or damage a concrete surface.
A concrete floor is quite simple to keep looking its best. Depending on the traffic volume, it must be sealed or waxed every one to three years to preserve the protective coating.
In addition, you may sometimes sweep the floor clean with a neutral cleaning product. Try a blue utility pad for stains that are very difficult to remove.
Concrete floors are prone to settling and cracking with time, and this is an issue that occurs more often when an old structural slab has been converted to a completed residential flooring surface, such as when a basement or loft condo has been turned into a home. If the floor develops significant cracks, it may be patched, ground, and refinished to regain its gloss.
Design
Concrete flooring complements contemporary or industrial-style houses well, but they don't combine well with traditional, antique home designs.
For instance, a polished and acid-stained concrete floor might suit rather well into a contemporary-style home but would certainly seem out of place in a traditional colonial-style house.
Long gone are the days when a concrete floor simply meant a slab that had been laid and polished. While a simple polished slab is sometimes all that is required, homeowners also have access to a number of texturizing and coloring methods:
In order to revitalize an old slab, a thin coating of fresh concrete is applied over it. After that, the overlay is polished and colored, much like a fresh slab.
Polish: To achieve a glass-smooth surface, a basic poured slab or overlay may be polished with increasingly finer abrasive pads. After applying a sealer, the floor becomes really beautiful and shiny.
Acid-stained: Concrete reacts with moderate acids to produce a mottled, multicolored surface that resembles marble. Every level is really different.
 Another technique for coloring concrete is dyeing, which involves spreading a solid coloring substance over the completed surface. Dyeing, as opposed to acid-staining, produces a solid color effect.
Textured or stamped concrete may be given a three-dimensional texture by brushing, stamping, embedding glass beads, or both, while the concrete is still wet.
Dimensional divisions: For aesthetic impact, high-end concrete floors are sometimes laid out in geometric patterns, with each piece colored or textured in a unique fashion.
Concrete floors may be stenciled or airbrushed to create vast canvases for a variety of creative painting methods.
Construction of a concrete floor
A structural concrete slab that already exists is often ground down and then polished, colored, or texturized to produce a residential concrete floor.
To reveal the existing concrete slab, it may be necessary to first remove any flooring that is already in place, such as carpeting or vinyl.
Where the slab is damaged, a thin layer of new concrete may be poured over it; this layer serves as the foundation for polishing, coloring, or texturing.
Colorizing chemicals may be put into the concrete before it is poured in situations when a new slab or overlay is being installed.
On the other hand, the staining or dyeing often happens after the concrete has been polished by grinding with abrasive pads of increasingly finer grits.
Applying a concrete sealer as the last step will protect the surface. Regular reapplications of this therapy will be required; some experts suggest doing so once a year.
It is also feasible to lay concrete flooring over a wood-framed subfloor, albeit this is fairly uncommon. Here, the procedure entails applying the selected colorizing and polishing processes after pouring a thin layer of overlay concrete over a meticulously prepared subfloor.
But even a very thin concrete overlay weighs quite a bit; thus the technique often calls for strengthening the timber structure structurally.
Concrete floors are often constructed and completed by experts since the task is fairly difficult and requires specialized equipment, whether it entails pouring a brand-new slab, modifying an existing slab, or pouring an overlay. Although it is not advised, daring DIYers may hire grinders to polish a concrete slab themselves.
You have the option to subsequently cover the concrete with any floor surface covering of your choosing, provided that it is smooth and free of holes, lumps, and faults. Future design flexibility is greatly increased with concrete flooring.
Another technique for coloring concrete is dyeing, which involves spreading a solid coloring substance over the completed surface. Dyeing, as opposed to acid-staining, produces a solid color effect.
Textured or stamped concrete may be given a three-dimensional texture by brushing, stamping, embedding glass beads, or both, while the concrete is still wet.
Dimensional divisions: For aesthetic impact, high-end concrete floors are sometimes laid out in geometric patterns, with each piece colored or textured in a unique fashion.
Concrete floors may be stenciled or airbrushed to create vast canvases for a variety of creative painting methods.
Construction of a concrete floor
A structural concrete slab that already exists is often ground down and then polished, colored, or texturized to produce a residential concrete floor.
To reveal the existing concrete slab, it may be necessary to first remove any flooring that is already in place, such as carpeting or vinyl.
Where the slab is damaged, a thin layer of new concrete may be poured over it; this layer serves as the foundation for polishing, coloring, or texturing.
Colorizing chemicals may be put into the concrete before it is poured in situations when a new slab or overlay is being installed.
On the other hand, the staining or dyeing often happens after the concrete has been polished by grinding with abrasive pads of increasingly finer grits.
Applying a concrete sealer as the last step will protect the surface. Regular reapplications of this therapy will be required; some experts suggest doing so once a year.
It is also feasible to lay concrete flooring over a wood-framed subfloor, albeit this is fairly uncommon. Here, the procedure entails applying the selected colorizing and polishing processes after pouring a thin layer of overlay concrete over a meticulously prepared subfloor.
But even a very thin concrete overlay weighs quite a bit; thus the technique often calls for strengthening the timber structure structurally.
Concrete floors are often constructed and completed by experts since the task is fairly difficult and requires specialized equipment, whether it entails pouring a brand-new slab, modifying an existing slab, or pouring an overlay. Although it is not advised, daring DIYers may hire grinders to polish a concrete slab themselves.
You have the option to subsequently cover the concrete with any floor surface covering of your choosing, provided that it is smooth and free of holes, lumps, and faults. Future design flexibility is greatly increased with concrete flooring.
How useful is this article to you?
Average Score
5
/
Number of votes:
1