The ceramic tiles on the floor may get cracked sometimes, but it is not an impossible mission to repair them by yourself. The Instruction to do so is completely explained in this article. You're not trapped with the crack indefinitely if one of your floor or countertop tiles has cracked due to normal wear and tear or an unlucky event. It's very simple to fix a cracked tile, and if you'd rather to replace it entirely, you can do that as well. This article will explain how to patch a cracked tile in three different ways: professionally using 2-part epoxy, quickly using nail polish, and completely replacing the tile if you'd choose.  Epoxy for Chips and Hairline Cracks Purchase a 2-part epoxy repair kit online or at a hardware shop. You can use epoxy, a hardening substance, to glue two pieces of your damaged tile together. While 1-part epoxy kits are available, 2-part kits are usually of higher quality and will hold your damaged tile together for a longer period of time. 2-part epoxy kits of excellent quality often cost $5 to $20. Just so you know, most hairline cracks and chips can be repaired using just 2 small tubes. Avoid purchasing a commercial quantity. Use an acrylic putty repair kit if you'd like. Given that these kits contain dyes you can mix to fit intricate tile patterns, this is a fantastic alternative if your tile is multicolored. With paper towels and a cleaning solution, wipe down the cracked tile. Put a few drops of Oxiclean or rubbing alcohol on one or two paper towel sheets. The paper towel should be wetted. Next, use the damp paper towel to thoroughly clean the cracked tile's surface. When you're finished, scrub the tile with a soft-bristled brush and wash the area with water. Cleaning the fractured tile will get rid of any dirt and grime and make sure the epoxy adheres to the tile's surface. Use an old toothbrush if you don't have a special soft-bristled brush. On a spare piece of cardboard, combine the two epoxy compounds. Put on a pair of latex gloves. Scrape the epoxy mixture from each of the two bottles onto a piece of cardboard using a popsicle stick. The two components of the epoxy should be thoroughly mixed together. As a result, the epoxy will begin to harden chemically.
  If extra cardboard is not readily available, you can also mix the epoxy on top of a piece of wax paper, a paper plate, or some scrap wood. Quicken your pace here. After combining the epoxies, you have 15 to 30 minutes to complete the task before the epoxy begins to harden. Numerous 2-part epoxies are packaged with a particular applicator tool. Use that in place of a popsicle stick if you choose. Along the tile's hairline crack, smear the mixed epoxy. Scoop some of the mixed epoxy up with your popsicle stick. Transfer the epoxy to the tile, then use a fine paintbrush to evenly apply epoxy throughout the crack's whole length. The epoxy will penetrate the fissure from below. Make sure to apply epoxy to a distance of around 0.20 centimeters (12 in) on either side of the crack. Try not to get the epoxy over the rest of the un-cracked surface of the tile. Use a paper towel or gloved finger to remove any extra epoxy. Wait about 7 days for the epoxy to fully cure. In as little as 15 to 30 minutes, the epoxy should begin to set and dry. But it takes a bit for it to fully cure and solidify. To find out how long it will take for the epoxy to fully cure, read the directions that came with it, or give it a week to be on the safe side. Don't touch the tile or place anything on top of it for the first 15 to 30 minutes while it dries. Additionally, keep all household pets and kids away from the tile. To hide the patch and make it blend nicely with your tile, paint the epoxy. Although it can be challenging to completely blend the repair, painting the epoxy with a color that is even remotely similar will greatly aid in its concealment.
 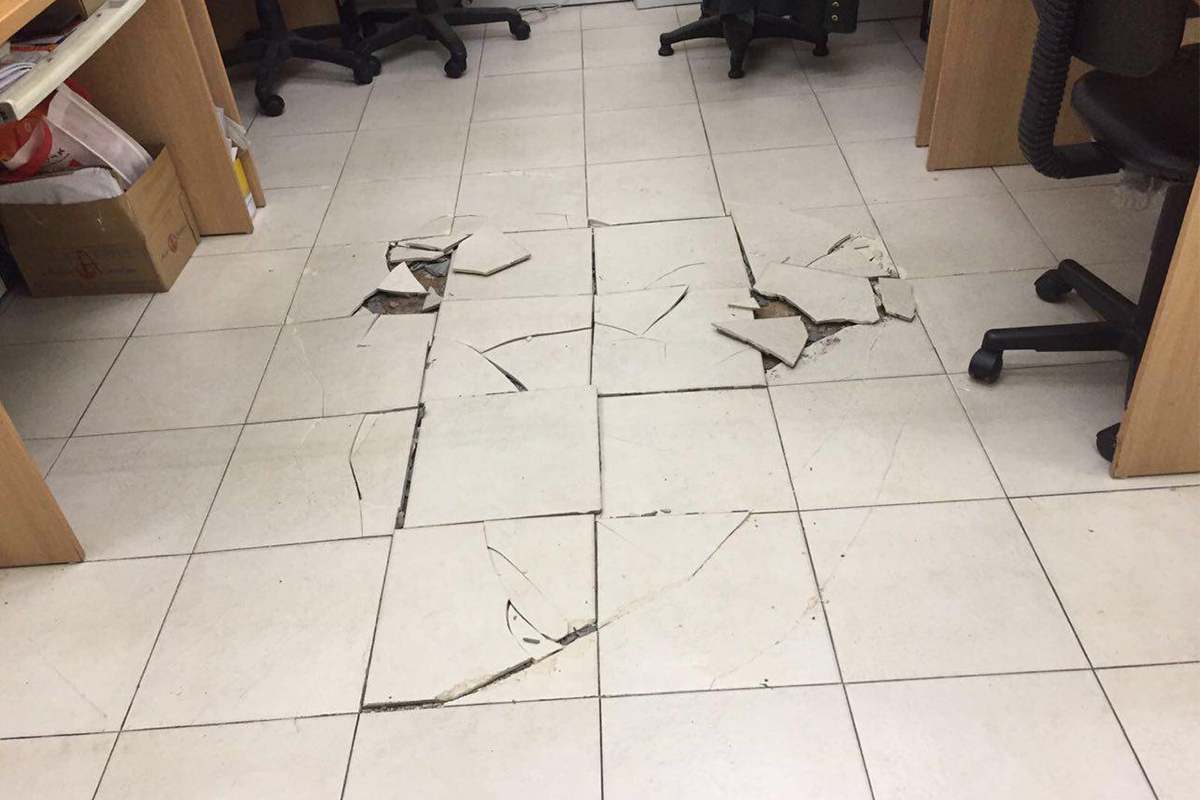 Look for an oil-based paint that closely resembles the tile's hue. Apply the paint with a tiny brush after roughening up the epoxy and surrounding tile with sandpaper. Use oil-based automotive paint if your tile has a glossier appearance. This step is not required. You may decide to leave the epoxy undyed if you discover that it is already quite similar to the color of your tiles. Nail Polish for Small Cracks Look for a nail polish that complements the hue of your tiles. There's no need to play around with complex epoxies if you just need to rapidly patch a small fracture. Simply locate a nail polish container that closely resembles the shade of your tile. Although it won't be flawless, this repair can be done in only five minutes if you have a little crack that has been bothering you. With soap and water, scrub the tile next to the crack. Put warm water on a sponge or rag. Lather up the sponge or rag after adding a few sprays of dish soap to it. To completely clean the tile, scrub it down. To help the moisture evaporate, wipe the tile dry and allow it some time to air out. Fingernail polish should be applied sparingly along the crack. Draw the nail polish's liquid out of the metal jar and onto the tile's surface using the little brush that comes with it. Spread the polish along the tile crack until it is completely sealed. To ensure that the crack seals, add another 1-2 millimeters (0.039-0.079 in) on either side of the crack. Allow the fingernail polish to dry for 15 minutes. You must wait for the nail polish to completely dry before completing the cracked tile restoration. After 15 minutes, lightly touch the nail polish with your finger to check if it is dried. The nail paint is dry if your finger comes away from it dry and there isn't a trace of your fingerprint.
  Wait another 15 minutes or so if the nail paint is still damp after that. Apply polish in successive coats until you are satisfied with how the tile appears. After applying one layer of polish, if the crack looks good, you can declare it to be fixed. If it leaves something to be desired though, go ahead and add another layer of polish. Apply further layers as necessary after allowing it to dry. Continue doing it until the tile appears repaired, uniform, and cohesive. To get the tile to look just right, 3–4 layers of nail polish may be necessary. Just keep in mind that it probably won't be flawless. After 5–6 layers, or more, you will likely be in "as good as it gets" zone. Replacement of extremely damaged tiles To replace the broken tile, locate or buy a new one. It is advisable to just replace it if a repair doesn't seem good enough in your opinion or if the crack is too severe to be saved. Ideally, the tile floor or counter installation left you with one or two extra tiles. If that isn't the case, snap a photo of the tile you want to replace and visit a hardware or tile store to purchase a replacement. The sales staff can also assist you in locating a tile that matches your décor. If your tile isn't available at the hardware or tile shop, just buy a substitute. Using a hammer and a center punch, carefully break and remove the tile. Place the center punch's point in the center of the cracked tile, then gently hit the back of the tile with your hammer until it breaks apart. Work your way out of the tile's center by repeating this method. Any pieces of grout that are too small to be broken with a hammer can be pryed out with a chisel. Hammer with sufficient force to break the tile but not enough to harm the walls or wood supporting it. Be careful not to break any of the tiles that are nearby as well!
  You can use a small chisel or file in the absence of a center punch. If you don't have any of those, tap the tile lightly with the back of your hammer while covering the nearby tiles in painter's tape. Remove any remaining mortar and grout from below the tile by scraping. Most likely, the drywall or wood beneath the tile has grout and mortar adhering to it. Slide the chisel along the area where the tile was removed while holding the blade at a 20-degree angle (relative to the floor). Scrape until all of the mortar and grout has been eliminated. It doesn't have to be flawless. You're set to go as long as the surface is flat enough for you to insert the replacement tile into the aperture and maintain it largely flush with the wall. Put pre-mixed mortar on the replacement tile's base. Gloves made of latex should be worn. With your putty knife, scoop up some thin-set mortar. Spread it thinly and evenly across the tile's bottom using the edge of the putty knife. Make sure none of the other tiles receive mortar on them. It’s hard to remove! Use thin-set mortar. The thick-bed material is extremely difficult to deal with and is not intended for replacing individual tiles. If you'd like, you can also use any type of waterproof adhesive. Place the replacement tile in position and press firmly. Hold the tile in place over the hole from where the original tile was removed while wearing gloves. To install the tile, lay it in the hole and lightly press down. Too much pressure will cause extra mortar to be forced out from underneath the tile and rise up its sides.
  Utilizing a grout float, apply grout all around the new tile. On the bottom of a grout float, apply a little amount of grout. The newly installed tile's surface should be brushed with the grout float. Apply grout to the tile and the area surrounding it repeatedly until all of the tiny gaps on its four sides are filled. To distribute grout, you can use a grout float, which is a sizable, flat tool with a handle. One is available from a hardware or home-improvement store. Use grout that is the same color as the grout that currently surrounds the other tiles. Wipe the tiles clean with a moist rag. Use a moist rag or old washcloth to scrub the new tile (and any other tiles with grout on them) clean before the grout dries. Maintain the integrity of the grout in the spaces around the new tile. Your tile surface will be ready for usage when the grout has had time to dry over night. It will be considerably tougher to remove the grout if you neglect to clean the tiles for a few hours. There is a reliable, professional team behind this website which is ready to share its tiles knowledge with you and cooperate with wholesalers and importers around the world.
💰 Tenfold your income 💎