For people whose job involves the installation of ceramic tile the best suggestion is to get tools that serve them for a long time no to say for ever. If you just use the tools for occasional repair you are not advised to spend too much on tools The following are some of the various functions and purposes that can be served by ceramic tile installation tools: - Attaching Tiles Together with Screws Using a Screwdriver You can use nails, glue, screws, and other fasteners to attach tiles together. After laying down mortar along the seams that separate each tile, proceed to the next step of installing the grout by mixing it and filling in any spaces that remain between the tiles. After the grout has had sufficient time to dry, use the tips of your fingers to apply pressure to the area in order to ensure that the grout will not shift. - Grouting Tiles: Using a sponge brush, evenly distribute grout over the entirety of the tile's surface. Remove any extra grout from the spaces between the tiles with a damp sponge. Before polishing off any extra grout, you should wait until the grout has completely dried. - Cutting Tile Edges Square Make sure the tile edges are precisely square by using a straightedge tool, such as a ruler. After that, trim away any excess grout by using a knife. If the tile is not laid down completely flat, you might need to redo the grouting in that region.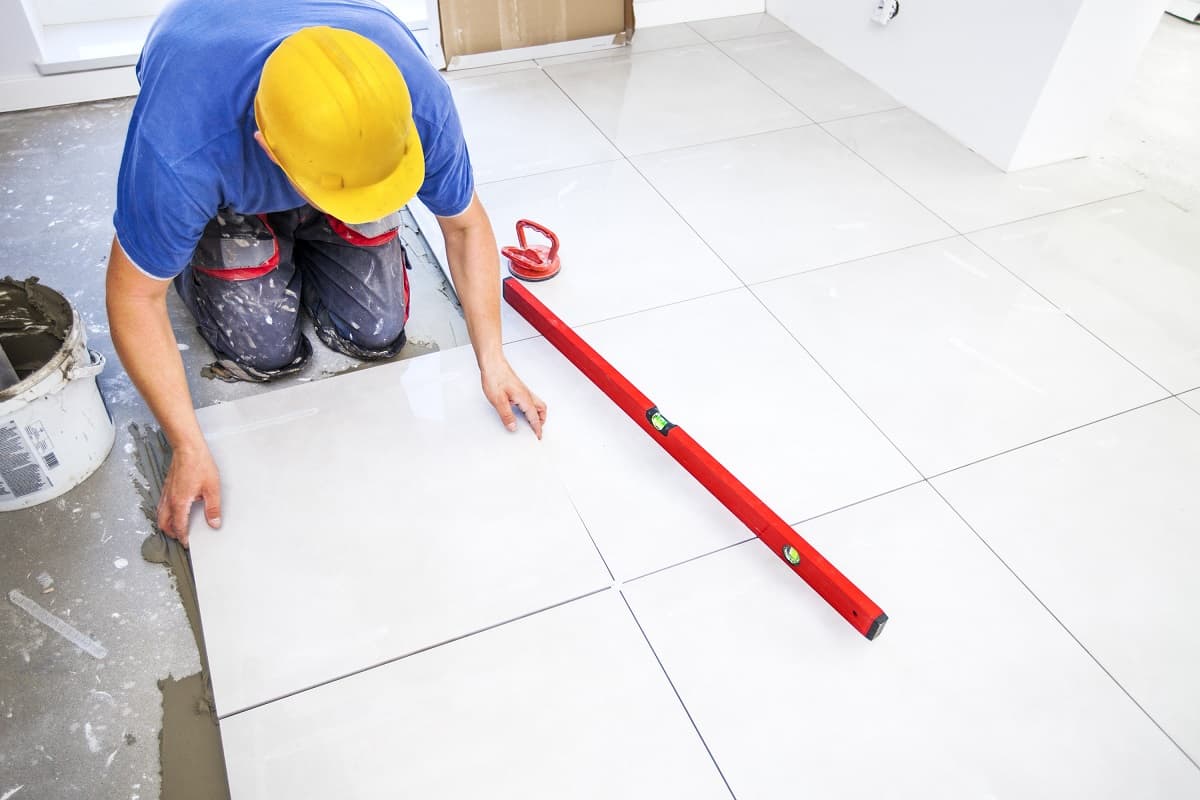 -When Pouring Concrete Tile Floors: Mix concrete in accordance with the instructions provided by the manufacturer. Pour the concrete onto the reverse side of the sub floor, making sure to leave a gap of about two inches along the edge where the tile will be laid. Wait until it sets for a few hours or overnight, whichever comes first. First, the forms should be removed, and then the subfloor should be taken out from underneath the concrete. After the subfloor has been removed, cut out the concrete tiles to fit within the openings that have been left behind. Install the tiles that have been grouted. - Creating Slips Creating slips is an excellent method for preventing tiles from sliding off of a wall once they have been installed on the wall. Make slits in the mortar right beneath the tile by using a utility knife to make the cuts. Caulk should be used to fill in the gaps between the tiles. Use a moist cloth to buff the surface of the tile until it is smooth. Creating Unique Designs on Walls Quickly by Cutting Tile Into Shapes Creating interesting designs on walls can be accomplished by cutting tiles into shapes. You can make your own tiles if you don't want to spend money on ones that are already made. To get started, use a jigsaw to cut the tiles into long strips. Place the tiles on a surface that has been thoroughly cleaned, and then arrange them into the design you like. Anchors screwed into the wall are used to keep the tiles in place. At first look, installing ceramic tiles could appear to be a difficult task, but in reality, it's not that difficult at all. If you only follow these pointers, you won't need any specialized gear or training at all. Tile Dimensions and Form Factors The size and shape of the tile that you choose to use will be determined by the amount of space that is available. Always keep safety in mind; if the tile is too large, it could topple over or hit someone if they walk below it, and you should avoid doing either.
 In the event that the tile is too small, it will not cover a sufficient area to successfully repel moisture. The majority of tile manufacturers recommend putting tiles with a thickness of 1/8" to 1/4" in bathrooms, whereas tiles with a thickness of 1/2" to 3/4" are recommended for kitchens and laundry rooms. It is recommended that there be a space of roughly four inches between each tile. Preparing the Area Being Worked On Make certain that the surface you intend to tile is clean and clear of any debris before you start. Check that the flooring that runs along the room's perimeter is even and smooth before you enter (preferably level). To prevent tiles from cracking or breaking off in the future, sharp corners and fissures should be removed from the surface of the tile using a tool knife. Arranging the Ceramic Pavers To identify the correct positioning of the tiles, your manufacturer should have provided you with a layout diagram to consult. Keep in mind that once the tile is put, the less likely it is to shift around because of its size. You should begin by arranging the long edges of the room, and then work your way inward toward the center of the space. After you have the entire pattern laid out, you should check to see if the tiles are aligned in an even manner. Keep in mind that you'll need to leave a couple of additional square feet of space towards the back of the wall. Prepare the Surface for Tiling After you have decided on the final arrangement, you should then lay out the tiles on the floor to make sure that everything will fit correctly. Mark the locations on the floor where you intend to place the tiles with chalk before you begin laying out the tiles and laying them out.
  After that, get a straightedge and measure along each of the chalk lines to determine where on the tiles you need to make cuts. Take the tiles out of their packing and lay them down flat on the chalk marks. This will make it much simpler to cut the tiles. To get rid of the extra parts, you can cut the tiles with a tile cutter. Take care not to go beyond the edge of the chalk outlines, since this could lead to the unintended removal of more tiles than is required. Putting in Grout Apply grout to the empty areas between the tiles once you have finished removing any extra tiles that were in the way. When selecting the color of your grout, you need to be careful because it needs to go well with the colors of the tiles and it needs to go well with the material that is surrounding it. Before moving on to the following stage, make sure the grout has had plenty time to dry. Fastening the Sill Bars to the Frame In the event that your tiles are not fastened directly to the subflooring, you will be required to fasten the sills to the walls. Drill holes through the wall studs at a distance of at least 12 inches and then use screws to secure the sill bars. Make sure the hole isn't too close to the ceiling; doing so will prevent water from leaking through the joints in the structure.
- Ceramic tile installation tools
for effectively installation of ceramic tile, you need the necessary equipment, tools and methods to assure a quality job. Ceramic tiles are gaining popularity in both commercial and residential settings due to their durability, ease of cleaning, low maintenance needs, and low cost. 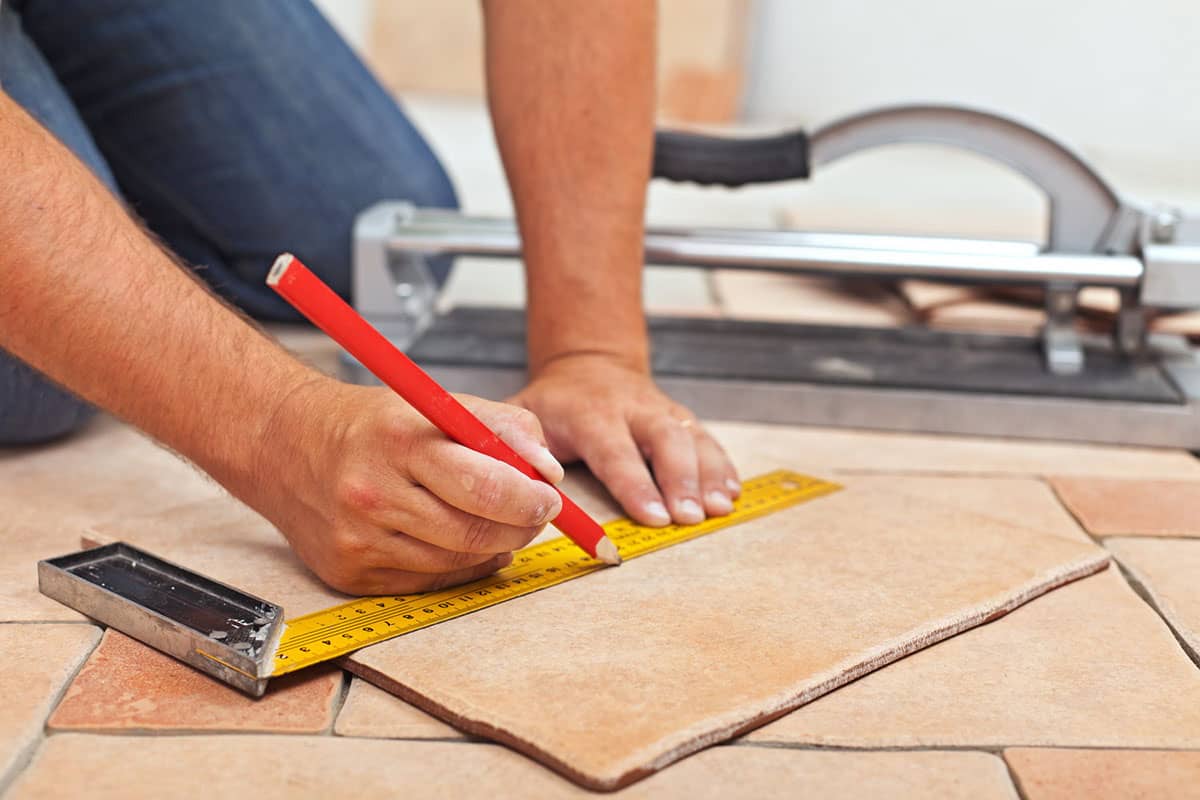 Kitchens, baths, entryways and hallways, fireplaces, countertops, flooring, countertops, mantels, fire pits, and pool surrounds frequently feature ceramic tiles. Here are some recommendations from our staff regarding the ceramic tile installation tools that will help you obtain a quality installation at a reasonable cost. - Tile Grinder - The first stage in any ceramic installation is grinding the tile pieces together to make them suitable for usage with a trowel, grout, etc. The use of hand-held grinders is discouraged since they do not cut tiles evenly and frequently leave behind little fragments. A professional tile grinder would feature a blade with a diamond tip that cuts tiles without causing damage. If you only have access to handheld grinders, you may wish to purchase a tile grinder attachment for your drill press. - Trowel - Most people consider a trowel to be a traditional instrument used for spreading mortar onto brick or stone surfaces; however, ceramic tile trowels are not meant for mortar applications and are primarily used for leveling and smoothing the final surface once the tile has been installed. While a standard trowel may suffice for placing tiles, a ceramic tile trowel is required for applying tile glue. These trowels typically have a handle with a flat edge and a slightly elevated lip at the front end. The lip is utilized to firmly press the tile into position while simultaneously removing any excess adhesive from the tile. When applying tile, the raised border keeps the trowel out of the way. You should opt for a trowel built exclusively for ceramic installations while installing ceramic tiles. - Scraper - When scraping and removing old adhesive residue before applying new glue, a metal scraper is far safer than a plastic or wooden stick.
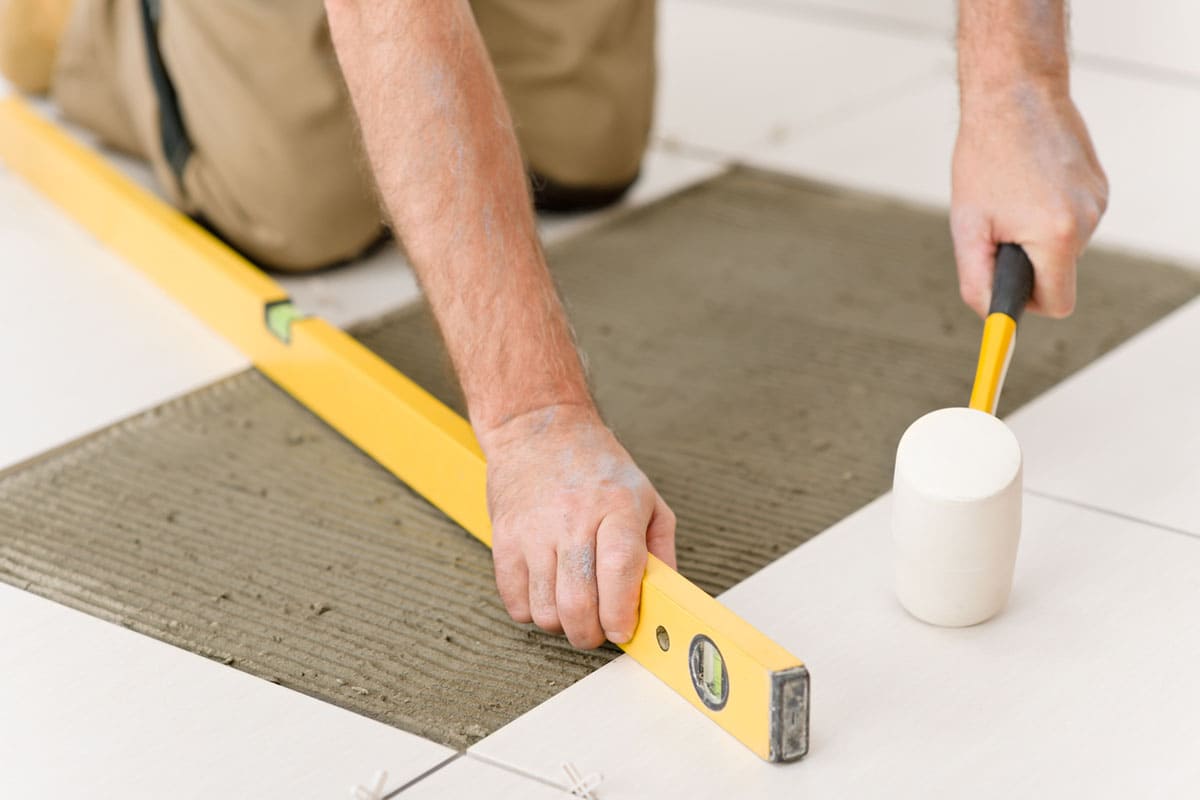 The sharp edge of metal scrapers prevents damage to the tile surface during application. In addition, the steel head on the back of the tool provides leverage, so you will not need to apply additional force to the tile to remove the glue. - Adhesive Dispenser - When putting a new glue layer between two previously bonded tiles, avoid contacting the adhesive with your fingers or a spatula. Glue dispensers enable the application of a thin, homogeneous coating of adhesive while limiting the possibility of adhesive transfer to the hands. Numerous adhesive dispensing devices are handheld instruments used by experts. Others are constructed as larger units. - Tile Cutter - There are a variety of sizes and prices of tile cutters on the market today. A manual tile cutter with a handle and cutting wheel attached to a base is one alternative. To use the tile cutter, just put the tile where you need to remove it from the substrate, insert the base into the space between the tile and the backer board, then crank the handle in a clockwise direction to remove the tile. A powered tile cutter, which is powered by an electric motor and allows you to trim tiles without exerting unnecessary effort, is another choice. Ensure that a tile cutter comes with proper instructions and safety warnings prior to purchase. - Tile Trimmer - After the tile adhesive has dried, it is time to make the final layout modifications and remove any adhesive residue. A tile trimmer is useful for swiftly trimming tiles so they are flush with one another. A tile trimmer typically consists of a spinning spindle with a cutting wheel at its tip. Place the trimmer over the tile joints and revolve the wheel carefully to remove excess adhesive. After each pass, the tray should be lifted slightly to allow excess adhesive to drip back into the joint.
 How Can Ceramic Tile Installation Equipment Benefit Us? Ceramic tile installation equipment is used to put tiles on the floor or walls of a home or business. Before installing any kind of tile, it is essential to measure twice and cut once. Ceramic tiles must be laid between 1/8 and 1/4 of an inch thick. To effectively install the tiles, you will require ceramic tile installation tools. Before installing the tiles, you can level the surface of the floor with these tools. The tiles can then be installed without worrying about uneven surfaces. If you have chosen vinyl flooring, you may wish to use ceramic tile installation tools prior to beginning the installation process. Vinyl floors require significantly thicker layers of tiles than ceramic floors, and if you don't use the proper equipment, you risk damaging the flooring material. What Types of Ceramic Tile Installation Tools Are Currently Available? There are a variety of ceramic tile installation tools on the market nowadays. The initial item is wooden sticks. Sticks made of wood are excellent for leveling the tiled surface. Some individuals still prefer to accomplish the task with their hands, thus they are not absolutely necessary. The tile roller is another typical tool used by experts. This device is used to balance out the tile thickness. It is advisable to use this instrument once the surface has been leveled. A grout spreader is a third type of tool that experienced tile setters frequently employ. This device is meant to evenly apply grout across the tiles. The components of grout are cement and sand. When grout is utilized, it helps to hold tiles together and forms a strong link between the two materials.
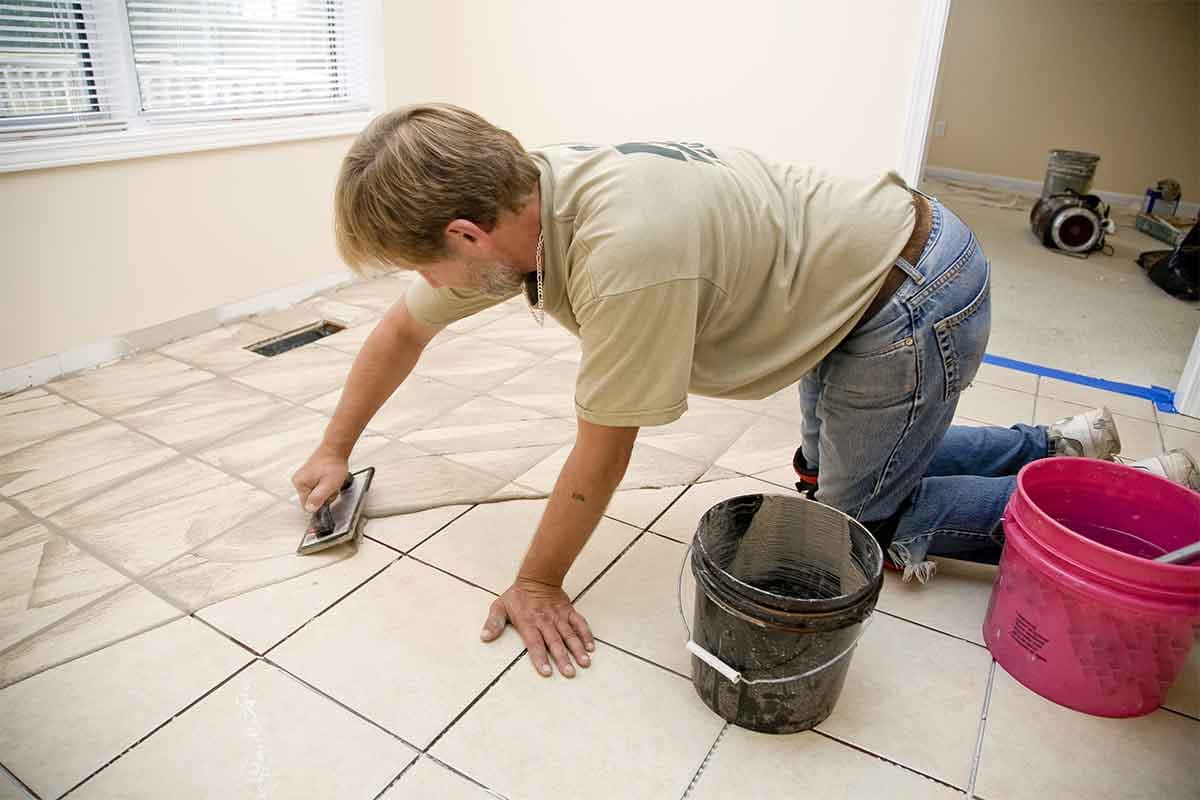 How do ceramic tile installation instruments operate? A ceramic tile installation tool has dual functionality. First, it makes the tiles flat on the floor by leveling them. Second, it evenly distributes the grout across the tile's surface. After the tiles have been leveled and the grout has been distributed, tile installation can begin. Be cautious to maintain the area around the tile's edge clear of grout so that it does not become destroyed during installation. Assemble the tiles according to your aesthetic preferences. Then, press the grout into the inter-tile areas. Apply pressure, but only as much as is necessary to drive the grout into the spaces. Finally, lift and press the tiles back into place. Allow them to dry for 24 hours prior to sealing. Sealant is utilized to safeguard newly laid tiles. It prevents dirt and debris from penetrating beneath the tiles and destroying the aesthetics of the entire room. After the installation has been completed, scrub and wipe the floor clean.