Corn cooked is the best method for the grill canned corn in an air fryer (whenever you are not on time and you don’t have enough time to cook something). Corn that has been air-fried is cooked in a matter of minutes and results in kernels that are soft, juicy, and packed with the taste of just-charred corn. Corn cooked in an air fryer has recently risen to the position of the second-favorite method. The grill or barbecue in the backyard is where you should give the corn justice. Corn that has been air-fried is not only cooked in a very short amount of time and is very simple to prepare, but it is also tender, juicy, and has a wonderful charred flavor. Scroll down to see the recipe card for this simple corn dish that can be prepared in an air fryer, or continue reading for more information. The components that you require are summarized below for your convenience. The ear of corn on the cob: You may use either fresh corn or corn that has been frozen to complete this dish. Olive oil is the best. Remove the husk from the corn before using it if it is fresh. Before air-frying, cut it into sections measuring between three and four inches in length. Apply oil to the corn by drizzling it on or spraying it. Put the corn kernels in the basket of the air fryer. The precise amount of time needed to cook the corn will vary depending on several variables, such as the size of the corn cobs and the capacity of the air fryer. You may anticipate the cooking time to be on the shorter side when you use an oven-type air fryer like the Power Air Fryer since these fryers, in general, are highly strong.
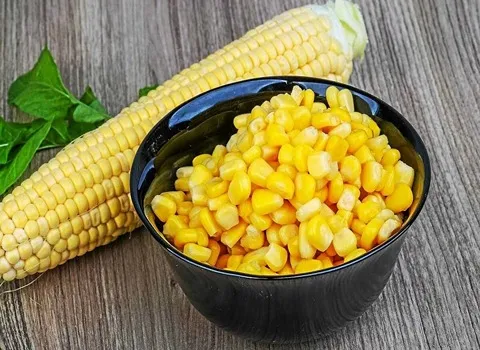
Canned Corn On The Grill
By eating canned corn on the grill enjoy the summertime next to your family. Grilled corn on the cob is unquestionably a food to get excited about. Adding a little smoke and char to corn brings out the inherent sweetness and flavor. Grilled corn is traditionally served with kernels coated in butter and sprinkled with salt. Grilled meats such as hamburgers and steaks, grilled chicken, and barbecued chicken all go well with this condiment. The true taste of the season! To prevent the corn husks from burning, they should be soaked in water before being put on the grill. Thus, the insides of the meat are kept wet when grilling, which keeps them from catching on fire and also helps keep them from drying out. Kernels made this way are luscious and bursting with maize flavor in every bite. However, the husk should be removed, but it should be linked. Cleansing corn silk is a delicate process. A thorough soak in clean water is recommended after the removal of the husks. For a total cooking period of around 15 minutes, grill the corn on the cobs, turning them over every few minutes. If you want to cook your corn in the method outlined above, you will need to soak it. Soak the husks for at least 30 minutes and up to six to eight hours to ensure that they are thoroughly submerged. Another way to cook corn is to remove the husk before putting it on the grill. In comparison to other ways, this one yield somewhat more char, but it's perfect for quick fixes. This method of cooking is most often utilized in dishes such as Grilled Corn Salad or Mexican Elote, which call for a smoky and charred flavor result. Place on the grill and rotate every few minutes until the meal is cooked and boiling without the husks.
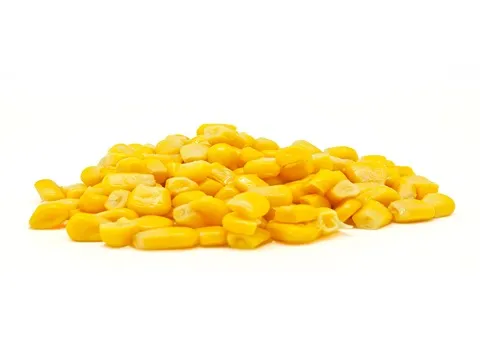
Canned Corn In Air Fryer
For a fast weekday supper or celebratory side dish, try this recipe in an Air Fryer for Buttered canned Corn. Air-fried frozen corn cooked in butter may be on the table in 10 minutes or less as a tasty side dish. This method of cooking with an air fryer is a great way to prepare a tasty dinner quickly. There isn't always enough space in the oven or stove, especially during the holidays. Making a side dish in your air fryer may be the solution to this problem. Frozen corn kernels are preferable to canned corn because they are more flavorful. Frozen corn has a great flavor and a lovely texture. Corn, butter, salt, pepper, and parsley are all that is needed in this easy recipe for corn. If you'd want to spice things up a little, you're more than free to do so. To make air-fried buttery corn, you'll need frozen corn, butter, salt & pepper, and fresh parsley. Remove the frozen corn from the freezer and set it in the air fryer basket's pan. Place the frozen corn in an oven-safe dish (I use a metal cake pan). Before serving, top with butter, salt, and pepper. Fry for five minutes in the oven at 400 degrees Fahrenheit. 5 more minutes of stirring and air-frying. Add some finely chopped parsley to the mix and mix well. Serve immediately after thoroughly mixing the ingredients. canning-derived nutrients in corn. There are 216 calories in each serving, 14 grams of fat, 6 grams of saturated fat, 0 grams of trans fat, 4 grams of unsaturated fat, 30 milligrams of cholesterol, 155 milligrams of sodium, 24 grams of carbs, 2 grams of fiber, and 4 grams of sugar.
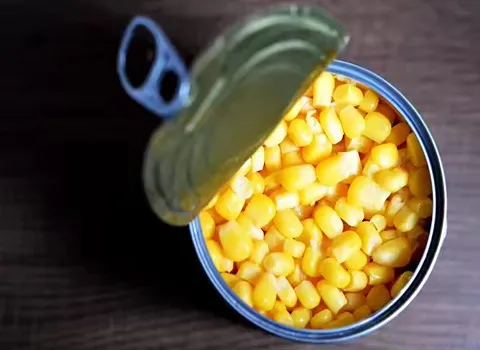
Canned Corn In Fridge
After opening canned corn, it's preferable to place it in a new container and keep it in the fridge. In this case, the real dilemma is whether or not to store it in the refrigerator or the freezer. It all boils down to how long you plan to keep it. Refrigeration is the best option for the short-term storage of canned maize. Canned food has the drawback of requiring a new can every time you eat it. The can inside will rust as soon as it's opened, due to the presence of oxygen in the air. Your tin/can deteriorate faster because of the brine solution in it. As a result, the contents of your can—in this example, corn will be harmed. When kept in an airtight container, opened corn will keep for 3-4 days. Glassware is preferable since it is airtight. Keep the brine solution that comes with it even if you use a plastic container. Brine, sodium chloride, and water solution that serves as a natural preservative without reacting with the maize are used in the production of corn syrup. After opening a can of corn, freezing it is the best option for long-term storage. The strategy will not change. However, the brine that comes with it should be discarded before freezing. Because brine is out of the picture, a high-duty freezer bag may now be used as the container of choice. Ensure that all of the solutions have been removed from the corn before freezing it. It's best to figure out whether you'll be utilizing it in the following few days or not before purchasing it. Because once you've frozen anything, you can't go back to keeping it in the fridge. You should avoid putting canned corn in the freezer because liquids expand when they freeze.
Canned Corn On The Smoker
Grilled butter-seasoned canned corn on the cob may be added to the smoker grates after the pellet grill has reached 225°F and is ready. For 25 minutes, smoke the corn on the cob with the lid closed. You can create smoked cheesy corn by adding cream cheese and shredded cheddar and then smoking it for a long time! You can also add diced jalapeno and chopped chives as well as diced red peppers. You also can bake the corn. It's fantastic, and you'll adore it! In the event that you already have a smoker, this is a wonderful addition. Here are the materials you'll need to make it.
- 48 ounces of corn, either frozen or fresh.
- Olive oil, 3 tablespoons standard measurement.
- Cheddar, Pepper Jack, or any other kind of cheese may be used in place of 8 ounces of cream cheese.
- Clean and dice 2 medium jalapenos. Dice 12 red bell pepper.
- Chopped chives: 2-3 TBS.
After that, it's time to remove the seeds and clean the jalapenos. Discard the dice. Fire roasting the corn isn't required, but it adds a distinct and delightful taste to the kernels. Turn a big iron skillet to high heat and add 2-3 tablespoons of olive or vegetable oil. Allow the corn to rest and brown for 5-7 minutes once it has settled. A half-size foil pan should be used to hold the fried corn. To the pan, add the cheeses, peppers, heavy cream, butter, chives, and seasoning. Place the pan of corn and friends on the grate once the smoke is ready and let it smoke for approximately an hour. After around three hours in the smoker, the smoked cheesy corn should be full of smoke flavor and ready for consumption.
Canned Corn In Instant Pot
Instant Pot Corn on the Cob is the quickest and simplest way to make this canned corn in summertime. It's easy to prepare in a pressure cooker, such as an Instant Pot. Corn on the cob cooked in the pressure cooker is quick and simple! Make Instant Pot Corn on the Cob for a simple veggie side dish! Honestly, it's really simple! Never again will I ever cook corn over an open flame! Corn on the cob cooked in a pressure cooker is the way to go! We visit Snohomish, WA's Bob's Corn Maze & Pumpkin Farm every year. It's become somewhat of a custom! Apple cider doughnuts and a corn maze are two of our favorite things to do during the fall. It is time to stock up on maize for the rest of the year! For salads, soups, and corn on the cob, we utilize the corn. Mexican Street Corn is a favorite of ours, and it is easy to prepare. You can have Instant Pot Corn on the Cob whenever you want. A soup or salad is a great way to utilize cooked kernels off the cobs. The following are a few mouthwatering options for your freshly popped instant pot corn on the cob:
- Butter and salt are all you need.
- Lime juice, butter, and Chile powder
- Butter with garlic
- Garlic, butter, and parmesan cheese
- Chickpea butter
Here are the steps you'll need to take to create one: Trim the corn ear tips. Cut the corn ear tips off. If you want to, you can. Place the trivet in the pot, and add 1 1/2 cups of water to the mixture. The ears of corn should be stacked in the pot. The steam release knob should be in a sealed position when the lid is closed. Doing a Quick Release of pressure is necessary after a cooking cycle is complete. Open the lid and remove the corn with caution after the pin has dropped. Put on some butter and salt, then savor!