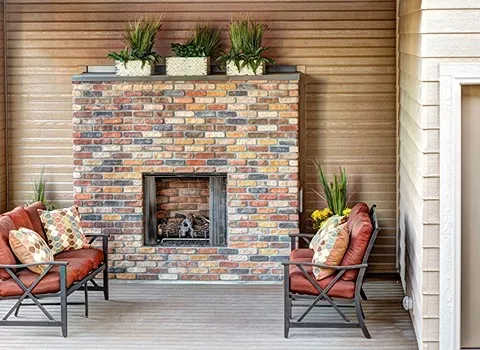
Placing brick veneer on the exterior of a building adds a touch of charm and character while also providing essential protection against the elements.
In this comprehensive guide, we will delve into the world of brick veneer, exploring its history, composition, installation process, maintenance requirements, and the many benefits it offers to homeowners and builders alike.

What is Brick Veneer?
Brick veneer is a thin layer of bricks that is installed over a structural wall as a decorative and protective covering.
Unlike solid brick construction where the bricks are load-bearing and integral to the structure of a building, brick veneer is a non-structural element that is attached to the exterior of a building's frame or substrate.
The term "veneer" indicates that the brick layer is primarily for aesthetic purposes, enhancing the appearance of the building while providing some insulation and protection.
The Composition of Brick Veneer
Brick veneer is typically made from the same materials as traditional bricks, which are fired clay or shale.
These raw materials are mixed with water, formed into shape, and then fired in a kiln at high temperatures to create durable, solid brick units.
The main difference between traditional bricks and veneer bricks lies in their thickness.
Veneer bricks are thinner and lighter than standard bricks, making them more suitable for decorative applications.

Installation Process of Brick Veneer
Installing brick veneer requires precision and skill to ensure proper alignment, stability, and weather resistance.
The process typically involves the following steps:
Preparation of the Substrate: The substrate, which is the existing wall or framework of the building, must be clean, dry, and structurally sound before installing the brick veneer.
Installation of Flashing and Weep Holes: Flashing is used to prevent water infiltration behind the brick veneer, while weep holes allow moisture to escape.
Proper flashing and weep hole installation are crucial for the longevity of the brick veneer system.
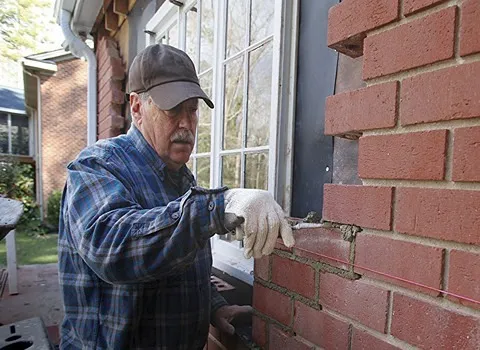
Application of Mortar and Bricks: Mortar is applied to the substrate, and the bricks are then pressed into place, leaving small gaps for mortar joints.
Careful attention to the alignment and spacing of the bricks is essential for a visually appealing finish.
Finishing Touches: Once the bricks are in place, any excess mortar is cleaned off, and the mortar joints are finished to achieve the desired look, whether it be flush, struck, or raked joints.
